
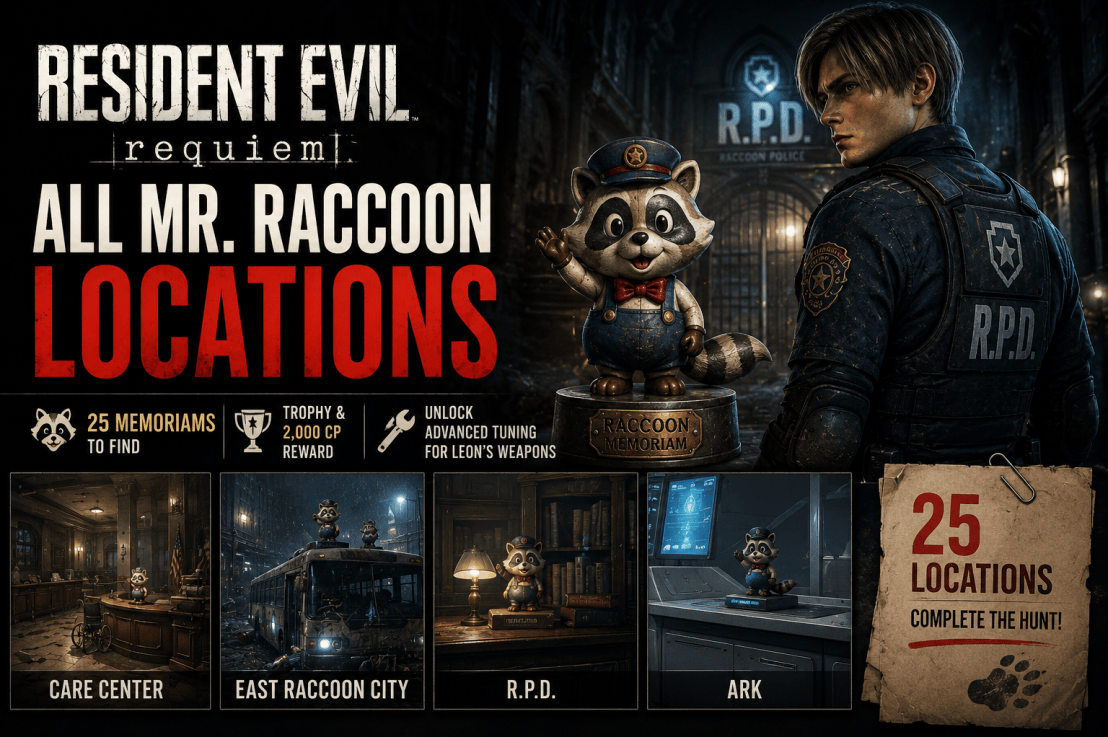
Resident Evil Requiem has 25 Mr. Raccoon Memoriams hidden across the Care Center, East Raccoon City, Raccoon City Center, the R.P.D., and the ARK. Destroying all 25 completes the You Little Rascal! challenge and unlocks a trophy/achievement, along with 2,000 Challenge Points and Advanced Tuning for Leon’s weapons.
The statues are small, and a few are tucked into places you would have little reason to check during a normal playthrough. Some are also tied to a specific character or a particular story sequence, so following them in story order is the safest way to clear the collection.
This guide covers all 25 Mr. Raccoon locations, including the character you need, how to reach each statue, and the collectibles that are easiest to miss.
Spoiler warning: The locations below reveal several story areas and progression details. They’re arranged in roughly the order you’ll encounter them during the campaign.
Resident Evil Requiem Mr. Raccoon Locations: Quick Reference
| # | Area | Character | Location |
|---|---|---|---|
| 1 | Care Center | Leon | Rehabilitation Ward |
| 2 | Care Center | Grace | East Wing Lobby |
| 3 | Care Center | Grace | Corridor east of Waiting Room |
| 4 | Care Center | Grace | Kitchenette |
| 5 | Care Center | Grace | Medication Room |
| 6 | Care Center | Leon | Records Room |
| 7 | Care Center Basement | Grace | Workshop |
| 8 | Care Center Basement | Grace | Bunkroom |
| 9 | Care Center Courtyard | Grace | Private Lab |
| 10 | Care Center Courtyard | Leon | Overwatch/sniper section |
| 11 | East Raccoon City | Leon | Café Oasis |
| 12 | East Raccoon City | Leon | Logistics Warehouse Roof |
| 13 | East Raccoon City | Leon | Underground Parking Garage |
| 14 | East Raccoon City | Leon | Bus near Cedarbrook Apartments |
| 15 | East Raccoon City | Leon | Cedarbrook Apartments |
| 16 | East Raccoon City | Leon | Gas Station |
| 17 | East Raccoon City | Leon | Open sewage pipe |
| 18 | East Raccoon City | Leon | Ridgewood Station |
| 19 | East Raccoon City | Leon | Willis Tower |
| 20 | Raccoon City Center | Leon | Destroyed tanker |
| 21 | R.P.D. | Leon | Operations Room |
| 22 | R.P.D. | Leon | Library |
| 23 | Raccoon City Center | Leon | Gun Shop Kendo alley |
| 24 | ARK | Leon | Corridor near Staff Room |
| 25 | ARK | Grace | Operations Room |
There are 25 total Mr. Raccoon Memoriams, and this ordering follows the game’s progression rather than an arbitrary map order.
How Mr. Raccoon Memoriams Work
Mr. Raccoon Memoriams are small collectible figures that can be destroyed by shooting them or hitting them with a melee weapon. They also produce a distinctive sound when you’re close, which is one of the best clues when a statue is hidden behind scenery or inside an object.
You can check your overall total under Challenges → You Little Rascal!. The game does not provide a detailed area-by-area tracker, so keeping your own checklist is useful.
There is also no traditional chapter-select system for returning to every earlier section. Individual statues can therefore be missable during a run, particularly when a story sequence closes off an area. However, the Mr. Raccoons you’ve already destroyed remain counted across saves and later playthroughs.
After your first playthrough, you can also purchase Raccoon maps from the Bonus Menu, which makes cleanup runs considerably easier.
Care Center — Mr. Raccoons #1–10
The first ten Mr. Raccoons are concentrated around the Rhodes Hill Care Center, its basement, courtyard, and the connected overwatch section. You’ll need both Leon and Grace to collect all ten.
Mr. Raccoon #1 — Rehabilitation Ward
Character: Leon
Location: Rehabilitation Ward
This is the easiest Mr. Raccoon in the game.
After Leon cuts through the early door with the chainsaw, continue through the next doorway. The statue is sitting on a fireplace directly ahead of you.
Shoot it before heading upstairs.
Mr. Raccoon #2 — East Wing Lobby
Character: Grace
Location: East Wing Lobby
Once Grace uses the East Wing Keycard to enter Central Hall, look toward the reception desk.
The Mr. Raccoon is sitting on the desk in front of you.
Mr. Raccoon #3 — East of the Waiting Room
Character: Grace
Location: Corridor east of the Waiting Room
From the Waiting Room, head east along the corridor before going upstairs toward the Lead Researcher’s Office.
The statue is positioned near the end of the corridor. It isn’t hidden behind a puzzle or locked door, but its placement makes it easy to walk past while following the main route.
Mr. Raccoon #4 — Kitchenette
Character: Grace
Location: Kitchenette near the Office
After obtaining the Level 1 Wristband, use it to open the door south of the Kitchen and go upstairs.
In the Kitchenette, look beside the sink for the Mr. Raccoon.
Mr. Raccoon #5 — Medication Room
Character: Grace
Location: Medication Room
This one requires the Level 3 Wristband.
Go through the Guard Office toward the area where the girl is held in a cell. Use the wristband on the empty room on the left, not the girl’s cell.
The Mr. Raccoon is behind the bed.
This is one of the easier Care Center statues to miss because the correct room isn’t the obvious choice.
Mr. Raccoon #6 — Records Room
Character: Leon
Location: Records Room
When Leon returns to the Care Center, head to the Records Room and listen for the familiar rattling sound.
The statue is inside a closet that Leon can break open with his Hatchet. Grace cannot access it in the same way.
Mr. Raccoon #7 — Workshop
Character: Grace
Location: Care Center Basement, Workshop
During Grace’s basement section, reach the Holding Cells corridor and use the Joint Plug to open the Workshop.
The Mr. Raccoon is sitting on the workbench just inside.
Mr. Raccoon #8 — Bunkroom
Character: Grace
Location: Care Center Basement, Bunkroom
Use a Joint Plug at the Boiler Room power distributor to open the connected rooms.
Enter the Bunkroom and look at the television.
The Mr. Raccoon is sitting on top of it.
Mr. Raccoon #9 — Private Lab
Character: Grace
Location: Care Center Courtyard, Private Lab
After solving the puzzle in the VIP Room, take the elevator down into the underground section.
Continue through the area until you reach the Private Lab, where you interact with a computer as part of the story.
The statue is on the desk to the right of the computer.
Mr. Raccoon #10 — Courtyard Overwatch
Character: Leon
Location: Care Center Courtyard, sniper/overwatch section
This is one of the most easily missed Mr. Raccoons in the game.
When Leon regains control, climb through the window and cross the rooftop until you reach the staircase. Do not go through the wooden door at the top.
Instead, turn left and use the sniper rifle to look down into the garden.
The statue is sitting on the base of one of the lit garden lamps. You need to shoot it from your elevated position.
Important: once you leave this position, you cannot simply return to it later in the story. This is one of the statues I’d make sure to collect immediately.
East Raccoon City — Mr. Raccoons #11–19
The next nine Mr. Raccoons are spread around East Raccoon City. This section is where following the correct order saves the most backtracking.
Mr. Raccoon #11 — Café Oasis
Character: Leon
Location: Café Oasis
When Leon regains control in East Raccoon City, follow the road until the first major intersection.
Turn right and enter the first open building on the left: Café Oasis.
The statue is behind the counter.
Mr. Raccoon #12 — Logistics Warehouse Roof
Character: Leon
Location: Logistics Warehouse rooftop
After collecting the Distributor on the rooftop, Leon automatically uses the binoculars to survey the surrounding area.
Before moving on, turn around and face the highway.
Look toward the vehicle wreck on the highway and use the sniper rifle to take out the Mr. Raccoon sitting on top of the van.
This is another collectible where a scoped weapon makes the job much easier.
Mr. Raccoon #13 — Underground Parking Garage
Character: Leon
Location: Underground Parking Garage
After obtaining the Cedarbrook Apartments Key, use it at the Central Camp gate near the elevator.
Go downstairs and enter the door on the right.
When you reach the first enemy where the stealth-kill tutorial appears, enter the room on the left. The Mr. Raccoon is sitting on a box inside.
Mr. Raccoon #14 — Bus Near Cedarbrook Apartments
Character: Leon
Location: Bus on the street outside Cedarbrook Apartments
Continue through the East Raccoon City story until you trigger the cutscene that gives Leon the BSAA Container Keys.
After the scene, you’ll be on the street outside Cedarbrook Apartments.
Walk farther west along the road and check the bus.
The Mr. Raccoon is sitting in the driver’s seat.
Mr. Raccoon #15 — Cedarbrook Apartments
Character: Leon
Location: Cedarbrook Apartments, upper floor
Enter Cedarbrook Apartments and progress until you obtain the Crank.
Return upstairs and use the Crank to open the balcony gate.
Climb the next ladder and turn right onto the upper apartment floor. Continue to the back of the floor and check the open refrigerator.
The Mr. Raccoon is inside.
Do not go downstairs after reaching this upper floor. The refrigerator is near the end of the route toward the rooftop.
Mr. Raccoon #16 — Gas Station
Character: Leon
Location: Gas Station
Return to the road outside Cedarbrook Apartments.
Shoot down the ladder on the opposite side of the street, climb up, and drop into the Gas Station area.
Inside the Gas Station, look for the statue on a metal shelf.
Mr. Raccoon #17 — Open Sewage Pipe
Character: Leon
Location: Western end of the main road
Head toward the western end of the main road, where you’ll find a large crane.
Activate the crane to create a shortcut toward Central Camp.
As you cross the new route, look down and to the left.
The Mr. Raccoon is sitting inside an open sewage pipe.
This is a good example of why it’s worth checking the environment during traversal instead of sprinting directly to the next objective.
Mr. Raccoon #18 — Ridgewood Station
Character: Leon
Location: Underground train section
Use the Fuel Can on the generator near the large crane.
Once the gate opens, continue through the underground route until you automatically reach a train compartment.
The Mr. Raccoon is sitting on a passenger seat inside the train car.
Mr. Raccoon #19 — Willis Tower
Character: Leon
Location: Willis Tower
After obtaining the Fuel Can, return to Central Camp.
Use the elevator to reach the roof and follow the route to the generator. Fill it with fuel and activate it, then use the zipline to reach Willis Tower.
Once inside, head upstairs and follow the seating area into the adjacent room.
The Mr. Raccoon is sitting on a shelf.
Raccoon City Center & R.P.D. — Mr. Raccoons #20–23
Four more Mr. Raccoons remain before the final two in the ARK.
Mr. Raccoon #20 — Destroyed Tanker
Character: Leon
Location: Raccoon City Center
After the motorcycle sequence, when Leon is back on foot, turn slightly left.
The Mr. Raccoon is sitting in the rubble in front of the destroyed tanker.
Mr. Raccoon #21 — R.P.D. Operations Room
Character: Leon
Location: Operations Room
Inside the R.P.D., enter the Operations Room.
Check the left side of the room, where rubble and a wooden barricade conceal the statue.
Mr. Raccoon #22 — R.P.D. Library
Character: Leon
Location: Library
From the Operations Room, follow the route toward the Library and climb up to the second floor.
The Mr. Raccoon is hidden inside the large central bookshelf.
Look at the north-facing side and check the lower shelves. The statue is tucked behind a pile of books.
This is one of the hardest statues to spot without knowing exactly where to aim.
Mr. Raccoon #23 — Gun Shop Kendo Alley
Character: Leon
Location: Alley beside Gun Shop Kendo
After the Gun Shop Kendo cutscene, turn around before continuing.
Enter the open alley and look toward the far end.
The Mr. Raccoon is sitting in an open window, just to the left of the large Umbrella billboard.
Don’t confuse this location with the W870 Police shotgun, which is inside Gun Shop Kendo itself.
ARK — Mr. Raccoons #24–25
The final two Mr. Raccoons are found in the ARK.
Mr. Raccoon #24 — ARK Entrance Corridor
Character: Leon
Location: Corridor near the Staff Room
After entering the ARK and passing through the decontamination tunnel, head right.
Check the corridor near the Staff Room.
The Mr. Raccoon is behind a box.
This is the penultimate statue.
Mr. Raccoon #25 — ARK Operations Room
Character: Grace
Location: Operations Room
The final Mr. Raccoon is collected during Grace’s ARK section.
After passing through the area containing the Lickers and locked containers, you’ll eventually reach the Operations Room as part of the route toward the Noblesse Orb.
The Mr. Raccoon is in the same room, in front of the large monitor on the left side.
Destroying this statue brings your total to 25/25.
All 25 Mr. Raccoons: Quick Checklist
Use this list while playing:
- 1 — Rehabilitation Ward
- 2 — East Wing Lobby
- 3 — Corridor east of Waiting Room
- 4 — Kitchenette
- 5 — Medication Room
- 6 — Records Room
- 7 — Basement Workshop
- 8 — Basement Bunkroom
- 9 — Private Lab
- 10 — Care Center Overwatch
- 11 — Café Oasis
- 12 — Logistics Warehouse Roof
- 13 — Underground Parking Garage
- 14 — Cedarbrook bus
- 15 — Cedarbrook Apartments
- 16 — Gas Station
- 17 — Open sewage pipe
- 18 — Ridgewood Station
- 19 — Willis Tower
- 20 — Destroyed tanker
- 21 — R.P.D. Operations Room
- 22 — R.P.D. Library
- 23 — Gun Shop Kendo alley
- 24 — ARK corridor
- 25 — ARK Operations Room
What Happens When You Find All 25 Mr. Raccoons?
Destroying all 25 completes the You Little Rascal! challenge and unlocks its trophy/achievement. The challenge also awards 2,000 CP.
The more useful gameplay reward is Advanced Tuning for Leon’s weapons.
Advanced Tuning allows Leon to push compatible weapons beyond their standard upgrade level, making the Mr. Raccoon hunt worthwhile even if you aren’t interested in trophy completion.
Are Mr. Raccoons Missable?
Yes, during a particular playthrough.
Resident Evil Requiem does not offer a conventional chapter-select system, so leaving an area can prevent you from returning to a statue later in that run. PowerPyx specifically recommends keeping manual saves around area transitions if you’re collecting everything during your first playthrough.
The good news is that your completed Mr. Raccoons remain counted across saves and subsequent playthroughs.
That means you don’t need a perfect 25/25 run. If you miss one, you can return through an appropriate save or pick it up during a later playthrough without resetting the ones you’ve already destroyed.
Do Mr. Raccoons Carry Over Between Playthroughs?
Yes.
Mr. Raccoon progress is persistent, so previously destroyed statues remain counted when you start another run.
This is especially useful if you miss one of the statues tied to a temporary story section. Rather than restarting the entire collection, you can simply target the missing statue during a later run.
How to Find Mr. Raccoons More Easily
The game gives you a couple of useful clues even though it doesn’t mark every statue automatically.
Listen for the sound
Mr. Raccoons make a distinctive noise when you’re close. If you hear it but can’t see anything, stop following the objective and check nearby shelves, containers, pipes, furniture, and elevated surfaces.
Check optional rooms
A number of statues are located in places that are not required for story progression, including the Café Oasis, Workshop, Bunkroom, and Library.
Look above and below eye level
Several of the harder collectibles aren’t sitting directly in your path. The most notable examples are the Courtyard overwatch statue, highway vehicle, sewage pipe, and Kendo alley window.
Bring a scoped weapon when possible
Long-range statues such as the Logistics Warehouse rooftop and Care Center overwatch are much easier to hit with Leon’s scoped rifle.
The Mr. Raccoons Most Likely to Be Missed
If you’re not following a checklist, pay special attention to these:
#5 — Medication Room: You need the empty cell rather than the occupied one.
#6 — Records Room: The closet requires Leon’s Hatchet.
#10 — Care Center Overwatch: Shoot the statue before leaving the sniper position.
#12 — Logistics Warehouse: Look out toward the highway and use the sniper rifle.
#17 — Sewage Pipe: Look down from the crane shortcut.
#22 — Library: The statue is behind books inside the central bookshelf.
#23 — Kendo Alley: Look up toward the open window.
These aren’t necessarily the only easy-to-miss statues, but they’re the locations where a player following the main objective is most likely to walk straight past the collectible.
Resident Evil Requiem Mr. Raccoon Tips for a 100% Run
The easiest way to handle the collection is to treat the statues as part of your normal route, not as a separate cleanup job.
For the Care Center, check every optional room as soon as you have the required wristband or Joint Plug. During East Raccoon City, pause at each major landmark instead of assuming the collectible is somewhere near the next objective.
Most importantly, keep an eye on the character listed in the guide. Several of the Care Center statues are split between Grace and Leon, and the game doesn’t let you freely switch between them.
For a first completion run, I’d also keep a manual save before major story transitions. There is no reason to make a 20-hour collectible hunt harder than it needs to be.
Final Thoughts
The Mr. Raccoon hunt is worth doing even if you’re not normally a collectible hunter.
You get the You Little Rascal! trophy/achievement and 2,000 CP, but the more practical payoff is Advanced Tuning for Leon’s weapons.
The important thing is to remember the handful of statues that can disappear as the story progresses. Grab those when you reach them, keep your saves around major transitions, and use the checklist above rather than relying on memory.
For the rest of the Requiem completion checklist, see our Resident Evil Requiem Safe Codes & Combinations guide and Resident Evil Requiem: All Weapons & How to Unlock Them guide.
Sources & Updates
Last reviewed: September 2026
The 25 Mr. Raccoon Memoriam locations, character requirements, progression details, persistence between playthroughs, and completion rewards were cross-checked against current Resident Evil Requiem references, including PowerPyx, VGC, PC Gamer, Vandal, and GameSpot.
How we verify: The guide follows the game’s progression order rather than relying on a single map-numbering system. Where different guides describe the same area using different landmark names, the location is described using the most recognizable in-game landmark or route.
Guide note: Mr. Raccoon numbering in this article is the numbering used by Loot Strategist for this guide and should not be treated as an official in-game numbering system.

