Tag: Resident Evil Requiem

Resident Evil Requiem: Best Weapons & Upgrades

Resident Evil Requiem: Best Weapons & Upgrades

Resident Evil Requiem gives Leon plenty of guns to play with, but that doesn’t mean you should buy every weapon you come across.

Credits are limited, inventory space matters, and some weapons are far more useful than others during a normal playthrough. The right upgrades can make a bigger difference than simply carrying a larger arsenal.

So if you’re wondering which weapons are actually worth buying and upgrading in Resident Evil Requiem, this guide cuts through the clutter.

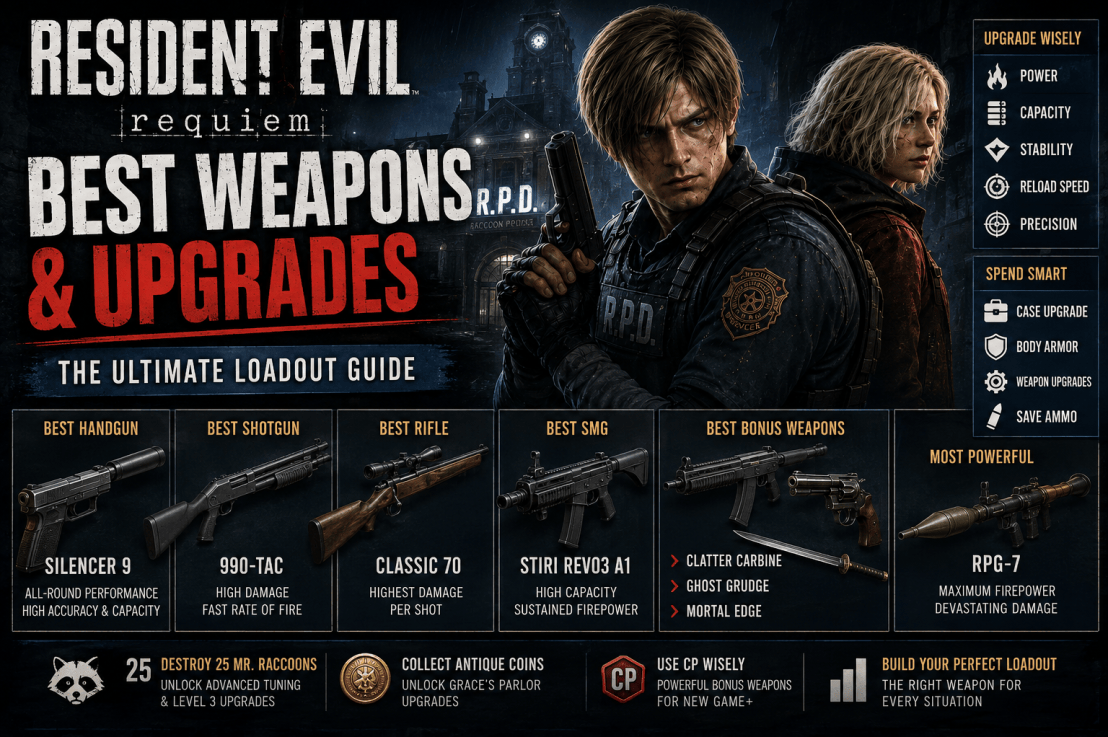
Our short list: the Silencer 9 is the best all-purpose handgun, the 990-TAC is the shotgun I’d prioritize first, and the Classic 70 is the rifle I’d keep once it becomes available. For players working through New Game+ and bonus content, weapons such as the Clatter Carbine, Ghost Grudge, Mortal Edge, and RPG-7 become much more attractive.

If you want the complete weapon list and acquisition locations first, check our [Resident Evil Requiem: All Weapons & How to Unlock Them] guide.

How We Rank the Best Weapons

There isn’t one objectively “best” weapon in Resident Evil Requiem.

Our recommendations are based on damage, ammunition economy, upgrade potential, availability, inventory space, versatility, and how useful a weapon is during a normal playthrough.

First-run weapons are also judged differently from bonus weapons. A gun that is fantastic after you’ve finished the campaign isn’t necessarily the smartest purchase when you’re still scraping together Credits in East Raccoon City.

That’s the distinction that matters when you’re deciding what to spend your money on.

Quick rule: Don’t spend Credits trying to build a collection. Build a loadout you can actually afford to feed.


Best Weapons in Resident Evil Requiem at a Glance

WeaponBest ForRecommendation
Silencer 9Best all-purpose handgun★★★★★
990-TACBest early shotgun★★★★★
Classic 70Best rifle★★★★★
Stiri REVO3 A1Best general-purpose SMG★★★★☆
RequiemHeavy targets and specific enemies★★★★☆
Clatter CarbineBest post-game automatic weapon★★★★★
Ghost GrudgeHeavy single-target damage★★★★☆
Mortal EdgeBest bonus melee weapon★★★★☆
RPG-7Maximum firepower★★★★★

The important distinction is that not every weapon needs an upgrade path. Leon’s weapons can be upgraded at Supply Boxes, while Grace’s normal firearms do not have conventional weapon upgrades.


Best Handgun: Silencer 9

If you’re buying one handgun for Leon and want something that will remain useful for most of the game, make it the Silencer 9.

It costs 5,500 Credits at the Supply Box in East Raccoon City. Its built-in suppressor is useful, but the real appeal is the combination of precision, stability, rate of fire, and magazine capacity. It starts with a 17-round capacity and has a strong selection of upgrades.

Silencer 9 upgrades

The first upgrade tier includes:

  • Add-on Suppressor — increases Power
  • Aluminum Trigger — improves Rate of Fire
  • High-Capacity Mag. — increases ammunition capacity

The second tier improves those same components, while the third tier becomes available through Advanced Tuning.

What should you upgrade first?

For a normal playthrough, I’d prioritize:

  1. Add-on Suppressor
  2. High-Capacity Mag.
  3. Aluminum Trigger

The suppressor upgrade gives you more damage, while the larger magazine gives you more breathing room when several enemies are pushing you at once.

Don’t rush to buy every upgrade immediately. Credits are better spent on the weapons and defensive upgrades that actually change how you play.


Best Shotgun: 990-TAC

The 990-TAC is one of the easiest recommendations in the entire game.

It costs 7,000 Credits and is worth replacing the earlier MSBG 500 with once the Supply Box becomes available. The 990-TAC’s semi-automatic action gives it a much higher rate of fire than the pump-action alternatives, and its tight spread makes it useful beyond point-blank range.

990-TAC upgrades

Its upgrade tree includes:

  • Ceramic Coated Barrel — Power
  • Stock — Stability
  • Carbon Tube Extension — Reload Speed and capacity
  • Dot Sight — Precision

The first upgrade I’d buy is the Ceramic Coated Barrel. Damage matters most when you’re using the shotgun to stop an enemy before it reaches you.

After that, the Carbon Tube Extension is a sensible investment because the additional capacity and reload improvement make the weapon easier to use under pressure.

If you’re short on Credits, don’t feel obligated to max every stat. A couple of well-chosen upgrades will do more for a first playthrough than emptying your wallet into a single gun.


Best Rifle: Classic 70

This is one place where weapon rankings can get misleading.

The Marksman 1A looks tempting because you can find it in an East Raccoon City BSAA container, but the Classic 70 is the rifle I’d recommend keeping for a normal playthrough.

The Classic 70 has the highest damage per shot among the rifle options highlighted by current weapon comparisons. Its trade-off is obvious: the bolt-action operation and slower reload make follow-up shots considerably slower.

That isn’t necessarily a bad thing.

The Classic 70 is at its best when you’re using it deliberately—putting a powerful round into a dangerous target rather than trying to use it like an assault rifle.

Should you keep the Marksman 1A?

You can, but there’s little reason to build your entire loadout around it if you’re happy with the Classic 70.

The Marksman 1A can also be bought later if you don’t have room for it when you first discover it.


Best SMG: Stiri REVO3 A1

The Stiri REVO3 A1 is the practical choice when you want sustained automatic fire.

It costs 6,000 Credits and starts with a 30-round magazine. Its upgrade path can push that capacity to 40, 45, and eventually 50 rounds, giving it plenty of ammunition for encounters where precision shooting isn’t enough.

Its most useful upgrades are:

  • Long Flash Guard — Power
  • Folding Stock — Stability
  • High-Capacity Mag. — Magazine capacity
  • Dot Sight — Precision

I’d start with the Long Flash Guard, then take the High-Capacity Mag. if you’re regularly burning through ammunition.

The Stiri is not the weapon I’d tell a first-time player to dump every Credit into. The Silencer 9 and 990-TAC are more important early purchases.

But once your core loadout is established, the Stiri gives Leon a useful automatic option.


Requiem: Save It for the Targets That Deserve It

The Requiem is a powerful revolver that uses 12.7x55mm ammunition. It isn’t a weapon you want to treat like a conventional handgun.

Its base Power is already high, while its rate of fire, reload speed, and stability are deliberately poor.

That makes ammunition conservation important.

The Requiem is particularly useful against tougher enemies and certain special encounters. Current guides specifically recommend it for targets including the basement girl, East Wing Chunk, Zombie Chef, and Blister Heads.

If you upgrade it, the Ported Barrel is the straightforward damage choice. The Barrel Jacket is more useful if you want better handling and faster follow-up shots.

Don’t burn through Requiem ammunition just because you have the gun equipped.


Best Post-Game Weapon: Clatter Carbine

Once you’ve finished the story and start spending CP on bonus weapons, the Clatter Carbine becomes one of the most appealing purchases.

It’s an assault rifle available through the Special Content menu after your first playthrough. It costs 6,000 CP.

This is where the weapon economy changes.

During your first run, you’re balancing every Credit against ammunition, armor, inventory upgrades, and essential weapons. In post-game content, you have considerably more freedom to build a specialized loadout.

The Clatter Carbine is therefore an excellent candidate if you want an automatic weapon that can handle a wide range of encounters.


Best Heavy-Hitting Bonus Firearm: Ghost Grudge

The Ghost Grudge is a 12.7x55mm revolver available through Special Content for 1,000 CP after completing the game.

It’s a much more specialized purchase than the Silencer 9 or 990-TAC, but that’s exactly why it works well as a bonus weapon.

Use it when you want to put serious damage into a single target rather than conserve every round for routine enemies.

It’s particularly attractive once you’re doing repeat runs and have already established your normal loadout.


Best Bonus Melee Weapon: Mortal Edge

The Mortal Edge is worth keeping in mind for players who like to use melee aggressively.

You can obtain it during the story after the hatchet-wielding boss, and the weapon has higher damage and better durability than the standard Hatchet. It is also available as a 3,000 CP bonus weapon.

The biggest reason to use it isn’t simply damage.

Mortal Edge gives you a more forgiving melee option, making it particularly attractive for players who are comfortable parrying and using melee to conserve ammunition.

If you’re trying to play efficiently, that’s a meaningful advantage.


Best Bonus Weapon for Grace

Grace’s weapons work differently from Leon’s.

Her standard firearms cannot be upgraded at Supply Boxes, so you shouldn’t approach her equipment the same way you approach Leon’s guns.

For bonus content, however, Grace gets two notable options:

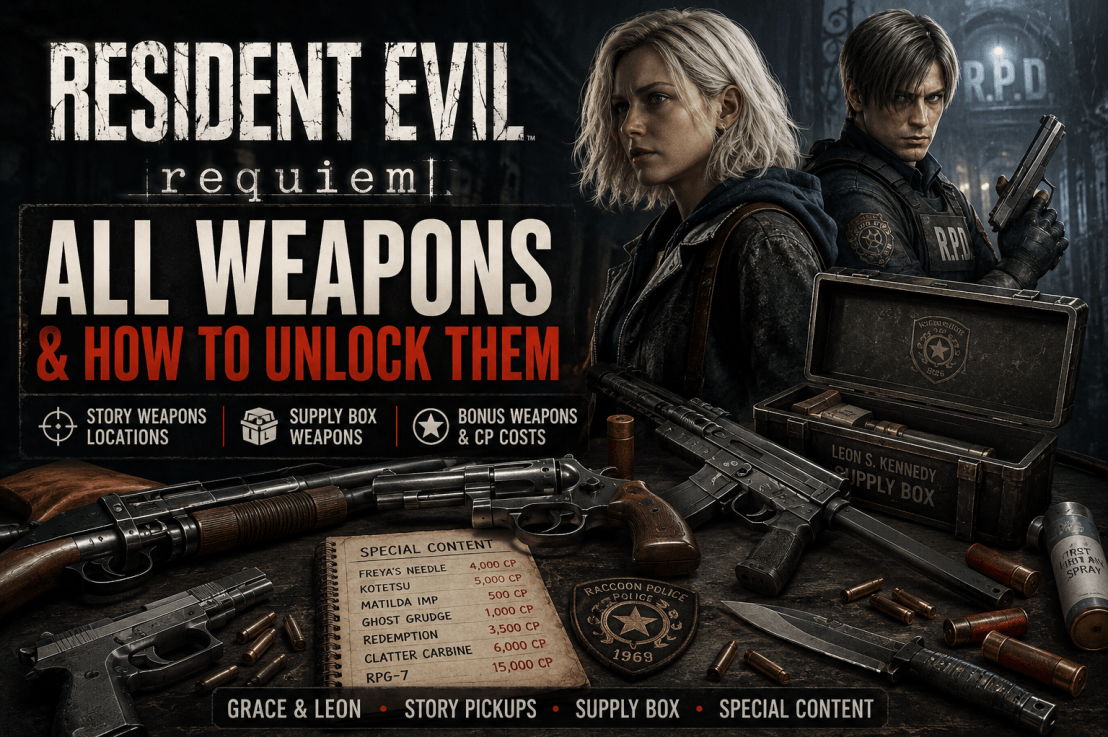
  • Freya’s Needle — 4,000 CP
  • Kotetsu — 5,000 CP

Both are unlocked through Special Content after completing a first playthrough.

Freya’s Needle gives Grace a full-auto pistol, while Kotetsu is an unbreakable knife.

If you prefer conserving ammunition and already enjoy Grace’s melee-heavy approach, Kotetsu is the more interesting utility purchase. If you’d rather have a firearm that changes her combat options, Freya’s Needle is the obvious choice.


R.I.P. Knife: An Insanity-Difficulty Exception

The R.I.P. Knife deserves its own category because it isn’t simply another damage upgrade.

On Insanity difficulty, it can be purchased in the Care Center’s Parlor for Antique Coins and replaces one of the standard Parlor rewards. Its special purpose is producing more Blood when used, making it particularly useful for players learning how to manage Grace’s resources on the harder difficulty.

The Parlor’s normal upgrade selection also changes on Insanity, so don’t follow a Casual/Standard shopping list blindly.

If you’re preparing specifically for Insanity, our [Resident Evil Requiem: Complete Puzzle Solutions] guide can also help with the Blood Analyzer and related progression.


What Should You Buy First?

This is where weapon guides usually become less useful than they should be.

Knowing that the 990-TAC is good doesn’t help much if you’re sitting on 8,000 Credits and wondering whether to buy the shotgun, upgrade your case, or purchase armor.

For a first Leon playthrough, I’d use this order:

1. Case Upgrade

The Case Upgrade costs 4,000 Credits and increases Leon’s inventory from 8×12 to 8×13. It’s a one-time purchase and makes every subsequent section easier to manage.

2. 990-TAC

At 7,000 Credits, this is the first weapon purchase I’d prioritize.

3. Silencer 9

At 5,500 Credits, the Silencer 9 gives you a dependable handgun for the bulk of Leon’s encounters.

4. Body Armor

Body Armor Level 1 costs 8,000 Credits, while Level 2 costs another 15,000 Credits on the normal difficulties.

Don’t underestimate this purchase. Surviving a hit is sometimes worth more than squeezing another fraction of damage out of a weapon.

5. Weapon Upgrades

Once your basic equipment is covered, start putting Credits into the weapons you actually use.

This priority broadly matches current Supply Box recommendations, which put the Case Upgrade, 990-TAC, Silencer 9, Body Armor, and then weapon upgrades near the top of the shopping list.


Credits vs. CP: Don’t Mix Them Up

Resident Evil Requiem uses two currencies for different purposes.

Credits are your normal gameplay currency. You earn them during Leon’s sections and spend them at Supply Boxes on weapons, ammunition, armor, inventory upgrades, and weapon upgrades.

CP (Challenge Points) are used for bonus content.

That means you shouldn’t look at a 6,000-CP bonus weapon and think it’s competing directly with your 6,000-Credit Stiri purchase.

They’re two separate progression economies.

Save Credits for surviving the current run. Spend CP on the toys you want for subsequent runs.


Advanced Tuning and the 25 Mr. Raccoons

If you’re serious about maximizing Leon’s weapons, there’s another reason to hunt down the game’s collectibles.

Destroying all 25 Mr. Raccoon Memoriams unlocks the Advanced Tuning reward, allowing compatible Leon weapons to access their third upgrade tier.

That’s a substantial late-game investment, particularly if you’re planning multiple runs.

If you haven’t collected them all yet, our [Resident Evil Requiem: All Mr. Raccoon Locations] guide has the complete list.

And because Requiem has no traditional chapter select, it’s worth paying attention to collectible opportunities during your normal exploration rather than assuming you can clean everything up later.


Best First-Playthrough Loadout

If you want a straightforward Leon loadout without wasting Credits, I’d build around:

Handgun: Silencer 9
Shotgun: 990-TAC
Rifle: Classic 70
Heavy weapon: Requiem
Automatic weapon: Stiri REVO3 A1
Melee: Mortal Edge when available
Defense: Body Armor

You don’t need to carry every weapon.

Inventory space is valuable, and carrying guns you rarely use simply because you found them isn’t automatically an advantage. Leon can sell weapons at Supply Boxes and buy them again later if necessary, so don’t be afraid to clean up your inventory.

The better approach is to carry weapons that cover different jobs.

The Silencer 9 handles routine enemies. The 990-TAC handles close-range emergencies. The Classic 70 gives you a powerful precision option. The Requiem is there when something needs to stop being your problem immediately.

That’s enough firepower for most situations.


Best New Game+ Spending Order

New Game+ is where the bonus weapons start making much more sense.

If you’ve already finished the campaign and have CP available, I’d prioritize:

  1. Clatter Carbine
  2. Ghost Grudge
  3. Mortal Edge
  4. Kotetsu
  5. Freya’s Needle
  6. Matilda IMP
  7. Redemption
  8. RPG-7

The RPG-7 is the obvious choice if you simply want maximum destructive power, but its high CP cost makes it more of a luxury purchase than a first bonus weapon. The RPG-7 costs 15,000 CP, with its infinite-ammo option requiring another major CP investment.

Likewise, Redemption is powerful but highly specialized. It fires a single rifle round and must be reloaded after every shot, so its damage comes with a very obvious handling cost.


Which Upgrades Are Actually Worth Buying?

You don’t need to max every weapon.

For most players, upgrade priority should look something like this:

Handgun

Prioritize Power and Magazine Capacity.

The Silencer 9 already has strong handling, so increasing its damage and giving yourself more shots before reloading are the most noticeable improvements.

Shotgun

Prioritize Power, followed by Reload Speed/Capacity.

The 990-TAC is already fast-firing. Making each shell hit harder is usually more valuable than obsessing over every handling stat.

SMG

Prioritize Power and Magazine Capacity.

Automatic weapons chew through ammunition quickly. A larger magazine reduces the number of interruptions during hectic fights.

Requiem

Prioritize Power if you use it as a specialist weapon.

If you find the recoil and slow handling frustrating, the Barrel Jacket or Weighted Grip can make it easier to control.

Bonus Weapons

Don’t automatically spend CP and then immediately dump Credits into every upgrade available.

Try the weapon first.

If it changes how you play and solves a problem your normal loadout has, invest in it. If it simply duplicates a weapon you already like, save the money.


Final Verdict: Which Weapons Should You Actually Use?

For a standard first playthrough, you don’t need the fanciest arsenal in the game.

The Silencer 9, 990-TAC, and Classic 70 form the core of the Leon loadout I’d recommend. Add the Stiri REVO3 A1 if you want sustained automatic fire, and keep the Requiem for enemies that justify its ammunition.

Once you’ve finished the campaign, the equation changes. Clatter Carbine becomes a strong all-round bonus choice, Ghost Grudge gives you serious single-target firepower, and Mortal Edge is an excellent melee upgrade.

The RPG-7 is there when subtlety has officially left the building.

For Grace, don’t waste time looking for conventional weapon upgrades—her standard firearms don’t use Leon’s Supply Box upgrade system. Focus instead on her unique tools, Parlor upgrades, and the bonus weapons unlocked through Special Content.

Most importantly, spend your Credits with a purpose.

A fully upgraded collection looks impressive. A small loadout that you can keep supplied, protect with armor, and use confidently is what actually gets you through Requiem.


Frequently Asked Questions

What is the best handgun in Resident Evil Requiem?

The Silencer 9 is our pick for the best all-purpose handgun. It combines good damage, precision, rate of fire, and a large magazine, and it has a useful upgrade tree.

What is the best shotgun in Resident Evil Requiem?

The 990-TAC is our recommended shotgun. Its semi-automatic action gives it an excellent rate of fire, while its upgrade path can make its spread and damage even more effective.

What is the best rifle?

For a normal playthrough, we’d choose the Classic 70. It has excellent damage per shot but sacrifices firing and reload speed.

Can Grace upgrade her weapons?

No. Grace’s standard weapons don’t have Leon-style weapon upgrades at Supply Boxes.

Is the Stiri REVO3 A1 worth buying?

Yes, particularly if you want an automatic weapon. Its 30-round base magazine can be expanded through upgrades, making it useful when sustained fire matters.

Is the RPG-7 worth buying?

It’s worth it for players who want maximum firepower in subsequent runs, but at 15,000 CP, it isn’t the first bonus weapon I’d recommend buying. Infinite RPG ammunition is a separate CP purchase.

What should I buy first in Leon’s campaign?

Our priority is Case Upgrade → 990-TAC → Silencer 9 → Body Armor → weapon upgrades. This keeps inventory and survivability ahead of unnecessary weapon spending.


Sources & Updates

Last reviewed: September 2026

This guide was fact-checked against current Resident Evil Requiem weapon, upgrade, collectible, and Supply Box information. Particular attention was given to weapon costs, upgrade availability, bonus weapons, the 25 Mr. Raccoon Advanced Tuning unlock, and Insanity-specific equipment changes.

Because weapon rankings are partly subjective, this guide offers editorial recommendations rather than claims of an objectively superior weapon in every situation.

For related Requiem resources, see our All Weapons & How to Unlock Them, All Mr. Raccoon Locations, Complete Puzzle Solutions, All Safe Codes & Combinations, and Complete Walkthrough guides.
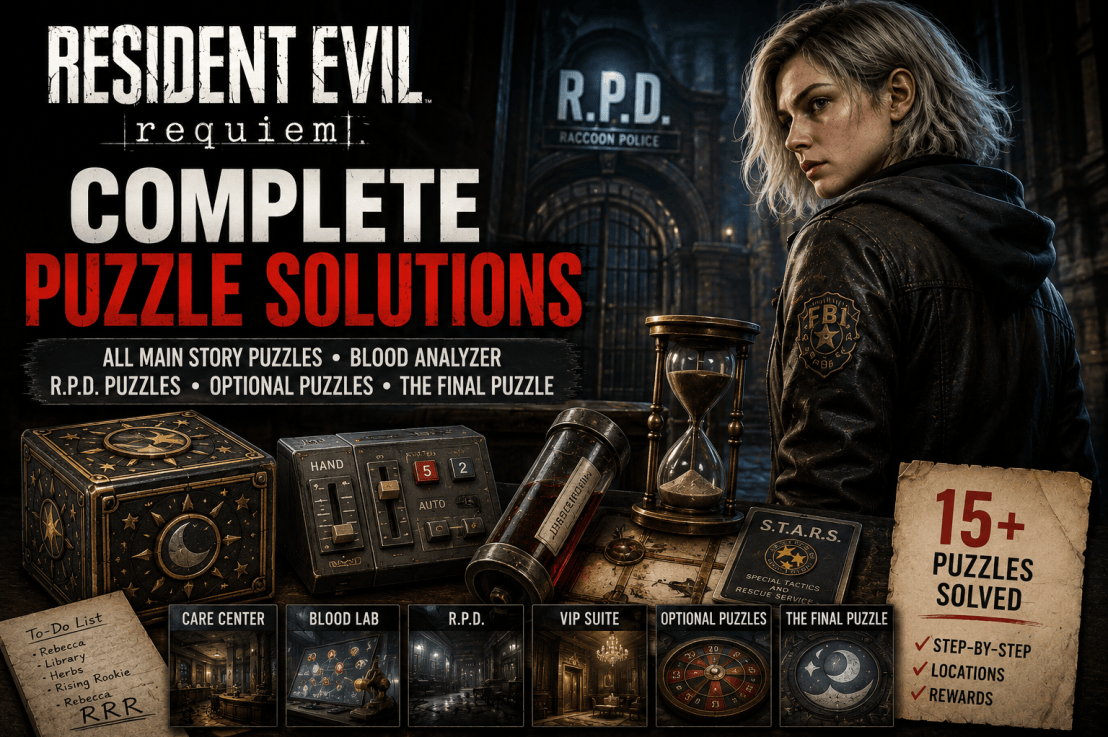
Resident Evil Requiem: Complete Puzzle Solutions

Resident Evil Requiem: Complete Puzzle Solutions

Resident Evil Requiem’s puzzles range from straightforward symbol combinations to Blood Analyzer tests, inventory-based mechanisms, and a post-game secret that took the community days—and some datamining—to fully unravel.

This guide covers the main story puzzles, optional Blood Analyzer puzzles, R.P.D. puzzles, and The Final Puzzle, with the solution, location, required items, and the important details that are easy to miss.

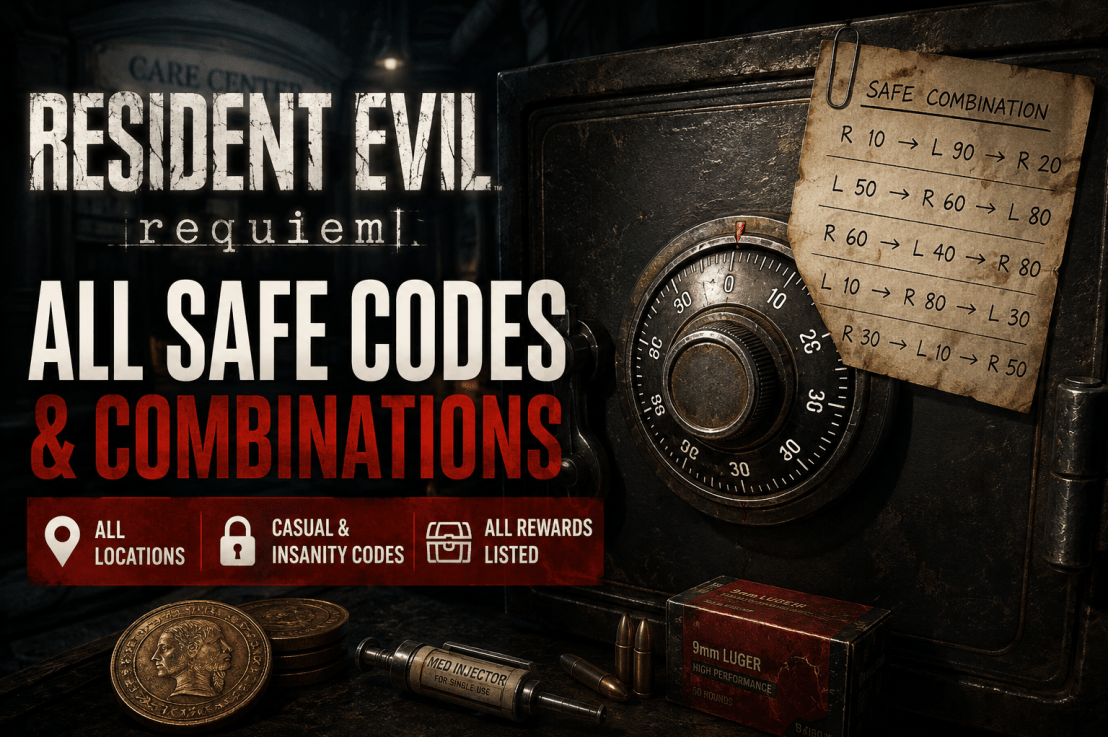
The separate Resident Evil Requiem Safe Codes & Combinations guide covers the game’s five combination safes, including the different Insanity codes. Keeping those in their own article makes it easier to find the exact safe combination without burying the puzzle solutions under another long list.

Spoiler warning: This guide includes story progression, late-game areas, optional puzzles, and the full post-game Final Puzzle sequence.

Resident Evil Requiem Puzzle Solutions: Quick Reference

PuzzleLocationSolution / ActionRequired?
Chairman’s Office Puzzle BoxCare Center, West WingMoon → Sun → Star → MoonYes
Lead Researcher’s Office Puzzle BoxCare Center, East WingStar → Sun → Moon → SunYes
Organ Transport BoxCare Center GarageHAND → middle → 5 → 2 → AUTOYes
Organless CorpseCare Center Examination RoomInsert the Artificial Lungs, then Artificial HeartYes
Denatured BloodBlood LabLeft-middle nodeOptional
Converged BloodEast Wing ClosetTop-middle → second from bottomOptional
Reversible BloodBlood Lab side roomBottom-left → center → top-right → second from topOptional
Polymerized BloodEast Wing Closet, InsanityMiddle-left → middle-right → middle-bottomOptional / Insanity
Security Manager’s Office BoxIsolation WardBring Emily to the boxYes
VIP Suite Double HelixCare Center CourtyardOpen wine bottle, take Helix, insert itYes
VIP Suite HourglassCare Center CourtyardInspect and rotate the hourglassOptional / Final Puzzle
R.P.D. S.T.A.R.S. BriefcaseR.P.D.RRROptional
Barry’s Scavenger HuntR.P.D.Follow Barry’s clues and open JoJo’s lockerOptional
Roulette WheelCare Center ParlorShoot 29, 15, or 7, then spin to that numberOptional
The Final PuzzleLead Researcher’s Office12-symbol celestial sequencePost-game

The core story-puzzle solutions are consistent across current references; Insanity specifically adds the Polymerized Blood specimen, while safe combinations are the major difficulty-based exception.


How Resident Evil Requiem’s Puzzles Work

Most of the game’s puzzles fall into three categories.

Symbol puzzles use the Moon, Sun, and Star symbols and usually involve finding a visual clue somewhere in the room.

Inspection puzzles require you to rotate or examine an object from your inventory or interact with a specific environmental object.

Analyzer puzzles use Grace’s Blood Analysis Machine, where the correct nodes have to be selected in sequence.

The R.P.D. section adds a couple of optional clue chains, while The Final Puzzle is in a completely different category: it spans two playthroughs and was solved through a combination of in-game clues, community research, and datamining.


1. Chairman’s Office Puzzle Box — Moon Quartz

Location: Care Center, West Wing, 2F, Chairman’s Office
Character: Grace

The first Quartz puzzle box is found inside the Chairman’s Office.

To solve it naturally, pick up the Pencil from the back room and use it on the notebook in the office. Shading the page reveals the correct celestial sequence.

Solution

Moon → Sun → Star → Moon

Enter the four symbols in that order.

Reward

Moon Quartz

This is the first of the three Quartz pieces needed for the Care Center progression.

Quick answer

Moon → Sun → Star → Moon


2. Lead Researcher’s Office Puzzle Box — Sun Quartz

Location: Care Center, East Wing, 2F, Lead Researcher’s Office
Character: Grace

The second Quartz box is locked with a padlock.

First, collect the Corrosive from the Conference Room at the end of the nearby hallway. Use it on the padlock, then inspect the photographs around the office. The symbols hidden in the backgrounds provide the combination.

Solution

Star → Sun → Moon → Sun

Reward

Sun Quartz

Quick answer

Star → Sun → Moon → Sun

This is also the puzzle connected to the later Final Puzzle, but that secret sequence is handled separately below.


3. Organ Transport Box — Artificial Lungs

Location: Care Center, West Wing, 1F, Garage
Character: Grace

After obtaining the Level 1 ID Wristband, you can access the Garage and find the Organ Transport Box.

You need to inspect the box from your inventory, then rotate it to expose the control panel on the back.

Solution

  1. Set the lower-right switch to HAND.
  2. Move the right-hand slider to the middle position.
  3. Press Button 5.
  4. Press Button 2.
  5. Return the lower-right switch to AUTO.

Quick answer

HAND → Middle → 5 → 2 → AUTO

Reward

Artificial Lungs

You need the Artificial Lungs for the next major puzzle in the Examination Room.


4. Organless Corpse — Artificial Heart

Location: Care Center, Examination Room
Character: Grace

Once you have the Artificial Lungs, return to the corpse in the Examination Room.

This isn’t a conventional code puzzle. The solution is simply to install the artificial organs in the correct order.

Solution

Insert the Artificial Lungs, then the Artificial Heart.

The corpse wakes up after the second organ is installed.

Reward

Defeating the resulting enemy encounter gives you the Level 2 ID Wristband, allowing you to progress deeper into the Care Center. Current puzzle references identify this as a progression puzzle rather than an optional encounter.


5. Blood Analyzer Puzzles

Location: Care Center Blood Lab and related rooms
Character: Grace

The Blood Analyzer is home to several optional puzzles that unlock crafting recipes.

There are three specimens on Casual/Standard, while Insanity introduces a fourth Polymerized specimen in place of the Converged sample at the corresponding location.

The analyzer puzzles are worth doing if you’re building Grace’s crafting options, but they’re not all required to finish the story.


5.1 Denatured Blood Specimen

Location: Blood Lab

Solution

Select the left-middle node.

That’s the only input needed for the Denatured sample.

Reward

The analysis unlocks additional crafting options, including Handgun Ammo and the Hemolytic Injector.


5.2 Converged Blood Specimen

Location: East Wing Closet
Difficulty: Casual/Standard

You’ll reach this sample through the Level 1 door near the Waiting Room.

Solution

Top-middle → second node from the bottom

The sequence is only two selections.

Reward

The analysis unlocks recipes for the Med Injector and 12.7x55mm Ammo.

That ammunition is used by the Requiem revolver, so this is one of the more useful optional analyses if you plan to rely on the weapon.


5.3 Reversible Blood Specimen

Location: Blood Lab side room
Difficulty: All

The Reversible specimen is behind a locked door requiring the appropriate ID Wristband.

Solution

Enter:

Bottom-left → Center → Top-right → Second from top

This is the longest of the standard Blood Analyzer sequences.

Reward

The analysis unlocks the Steroids and Stabilizer recipes.


5.4 Polymerized Blood Specimen — Insanity

Location: East Wing Closet
Difficulty: Insanity only

On Insanity, the usual Converged specimen is replaced with the Polymerized sample.

Solution

Middle-left → Middle-right → Middle-bottom

Three selections solve it.

Reward

The Polymerized analysis unlocks the R.I.P. Knife and additional ammunition-related rewards on Insanity.


6. Security Manager’s Office Puzzle Box

Location: Isolation Ward / Security Manager’s Office
Character: Grace

This one looks like another symbol puzzle, but there isn’t a combination to decode.

Interact with the notebook on the table, then examine the puzzle box. You’ll obtain the Level 3 ID Wristband.

Use it to reach Emily’s cell.

Solution

Bring Emily to the Puzzle Box.

Emily opens it automatically.

That’s the entire puzzle. You do not need to decode the Braille yourself.

Useful tip

You can leave Emily on the couch in the nearby safe room while you clear the surrounding enemies, then bring her to the box once the area is safer. PowerPyx specifically recommends this approach.


7. VIP Suite Double Helix Puzzle

Location: Care Center Courtyard, VIP Suite
Character: Grace

The VIP Suite contains a lectern with two helixes already in place. You need to find the third.

The missing piece is hidden inside a wine bottle near the entrance.

Solution

  1. Pick up the wine bottle.
  2. Inspect it from your inventory.
  3. Rotate it until the hidden Double Helix Model is revealed.
  4. Take the Helix.
  5. Insert it into the lectern.

The mechanism then opens the route required for story progression.

Important: the Hourglass is a separate puzzle

The hourglass isn’t needed for the Double Helix solution.

However, it is not simply a useless distraction. The hourglass becomes an important clue in the Final Puzzle chain because rotating it reveals the hidden message “U = 380,000.”

That distinction matters: ignore it for the VIP Suite door, but don’t ignore it if you’re solving the Final Puzzle.


8. Hourglass Puzzle

Location: VIP Suite
Character: Grace
Purpose: Final Puzzle clue

Inspect the hourglass and rotate it.

As the sand moves, a hidden inscription appears:

U = 380,000

That number is part of the celestial-distance clue chain used to decode The Final Puzzle.

This isn’t a standalone progression puzzle, so you can leave it alone during a normal run.


9. R.P.D. S.T.A.R.S. Briefcase

Location: R.P.D., S.T.A.R.S. Office
Character: Leon

The R.P.D. contains an optional briefcase puzzle whose solution is:

RRR

The clues begin with Barry’s To-Do List.

Follow the chain through the Captain’s Office and Library until you inspect the relevant photograph inside the Medicinal Benefits of Herbs book. The clue points to Rebecca, the “rising rookie,” giving you RRR as the combination.

Solution

R → R → R

Reward

Power Shades Charm

This is one of the game’s better optional R.P.D. rewards, so it’s worth solving if you’re already exploring the station.


10. Barry’s Scavenger Hunt

Location: R.P.D.
Character: Leon

The scavenger-hunt puzzle is separate from the S.T.A.R.S. briefcase, even though both are connected to Barry’s clues.

Follow the messages and inspect the TV in the Operations Room.

You’ll eventually obtain JoJo’s Locker Key.

Take the key to JoJo’s Locker in the West Office.

Reward

S.T.A.R.S. Emblem Charm

The important thing here is simply not to confuse this with the RRR briefcase. They’re two different optional puzzle chains.


11. Roulette Wheel Puzzle

Location: Care Center, Parlor
Character: Grace

The Parlor contains a roulette table with a small optional challenge.

Solution

Shoot one of these numbers:

29, 15, or 7

Then interact with the wheel and spin it until it lands on the number you shot.

Reward

1 Antique Coin

The reward is only granted once.

A manual save beforehand is useful if you’re short on ammunition and don’t want to spend rounds repeatedly experimenting with the wheel.


12. The Final Puzzle

Location: Lead Researcher’s Office
Character: Grace
Availability: After completing the game once

The Final Puzzle is optional and is not required for the story or a trophy/achievement.

It rewards:

20,000 CP

What makes it unusual is how it was discovered. The game’s clues were pieced together through player investigation and datamining, and the complete procedure was later reproduced without mods on console. VGC describes it as a multi-step challenge involving the Processing Room, the Hourglass, Blood Analysis clues, Marie’s Doll, and the Lead Researcher’s Office puzzle box.

The Final Puzzle code

Once the setup is complete, the final sequence is:

Sun → Sun → Star → Sun → Moon → Star → Sun → Moon → Sun → Moon → Star → Moon

Entering this sequence in the Lead Researcher’s Office puzzle box completes the challenge—provided Emily is with you and Marie’s Doll is in your inventory.


Step 1: Reach the Processing Room

On your first playthrough, progress through the Care Center Basement until you reach the Processing Room.

PowerPyx’s current procedure says to allow 115 bodies to fall into the bloodied water before draining it. VGC’s reproduced procedure instead establishes the trigger by waiting 15 minutes in the Processing Room before draining the water. Both sources agree on the broader requirement: this is a hidden timed/flag-based trigger rather than an ordinary puzzle instruction.

For a practical guide, I’d use the reproducible method:

  1. Enter the Processing Room.
  2. Make a manual save.
  3. Wait approximately 15 minutes before draining the water.
  4. Drain the water.
  5. Proceed through the grinder section.
  6. Do not personally kill the zombies during the grinder sequence.

VGC confirms this procedure can be reproduced on console without mods.


Step 2: Complete the grinder section correctly

After draining the water, continue through the grinder section.

The important condition is that the zombies must be killed by the grinder, not by Grace.

If you accidentally kill one yourself, reload your earlier Processing Room save and repeat the sequence.

PowerPyx also documents a later blood-pool confirmation message indicating the trigger worked correctly.


Step 3: Flush the toilet eight times

Continue through the Care Center until you’re back in Central Hall with Emily.

Take Emily to the Restroom in the West Wing, accessed from the corridor between the Kitchen and Dining Room.

Flush the same toilet eight times.

There is no obvious confirmation message, so count carefully. VGC and PowerPyx both document the eight-flush requirement.


Step 4: Find Marie’s Doll

Continue through the Courtyard Lab section.

During the escape sequence, look for Marie’s Doll on the stairs shortly before Grace’s panic-run sequence.

Collect the doll and finish the game.

This is important because the doll carries over to your next run.


Step 5: Start a new playthrough

Begin another run.

When you reach the Care Center as Grace, Marie’s Doll will be available in her Item Box if you’ve completed the setup correctly.

Continue until you have access to Emily again.


Step 6: Return to the Lead Researcher’s Office

During the second run:

  1. Progress through the Care Center.
  2. Obtain the Level 3 ID Wristband.
  3. Free Emily.
  4. Make sure Marie’s Doll is in your inventory.
  5. Carry Emily to the Lead Researcher’s Office.
  6. Interact with the Quartz Puzzle Box.

The Severed Hand is not required in your inventory for this final interaction, although its Blood Analyzer message is part of the clue chain that helped the community decode the celestial sequence. VGC explicitly notes that the hand is not required for the final step.


Step 7: Enter the Final Puzzle sequence

Input:

Sun → Sun → Star → Sun → Moon → Star → Sun → Moon → Sun → Moon → Star → Moon

If you’ve completed the hidden setup correctly, a laugh will play and the Final Puzzle challenge will be completed.

Where did the 12-symbol sequence come from?

The community discovered that the Blood Analyzer’s Severed Hand sequence:

GGC AAG AUA ACG UGU CAU

can be translated through the protein sequence into GLITCH.

Additional clues hidden in the game’s files and objects connect:

  • G = 150,000,000
  • U = 380,000
  • C = 4.2 ly

Those values point toward celestial distances, which form the basis of the Sun/Moon/Star substitution. The resulting sequence is the 12-symbol input shown above.

This is worth including because it explains why the Final Puzzle has that strange solution instead of simply dumping the code on the reader.


Do Puzzle Solutions Change on Insanity?

For the standard story puzzles, no.

The Chairman’s Office, Lead Researcher’s Office, Organ Transport Box, Security Manager’s Office, and VIP Suite puzzles use the same solutions.

The major puzzle-related Insanity difference is the Blood Analyzer, where the Polymerized specimen appears in place of the standard Converged setup.

Safe combinations are also different on Insanity, but those are covered separately in our Resident Evil Requiem Safe Codes & Combinations guide.


Which Puzzles Are Required?

For the main story, the puzzles you need to solve are:

  • Chairman’s Office Puzzle Box
  • Lead Researcher’s Office Puzzle Box
  • Organ Transport Box
  • Organless Corpse
  • Security Manager’s Office interaction
  • VIP Suite Double Helix

The following are optional:

  • Blood Analyzer specimens
  • Hourglass clue
  • R.P.D. S.T.A.R.S. Briefcase
  • Barry’s Scavenger Hunt
  • Roulette Wheel
  • The Final Puzzle

That distinction is useful if you’re simply trying to finish the game without spending time on optional rewards.


Quick Puzzle Cheat Sheet

Main Story

Chairman’s Office:
Moon → Sun → Star → Moon

Lead Researcher’s Office:
Star → Sun → Moon → Sun

Organ Transport Box:
HAND → Middle → 5 → 2 → AUTO

Organless Corpse:
Artificial Lungs → Artificial Heart

Security Manager’s Office:
Bring Emily to the box

VIP Suite:
Open wine bottle → collect Double Helix → insert into lectern

Blood Analyzer

Denatured:
Left-middle

Converged:
Top-middle → second from bottom

Reversible:
Bottom-left → center → top-right → second from top

Polymerized:
Middle-left → middle-right → middle-bottom

R.P.D. / Optional

S.T.A.R.S. Briefcase:
RRR

Barry’s Scavenger Hunt:
Operations Room TV → JoJo’s Locker Key → West Office locker

Roulette:
Shoot 29, 15, or 7 → spin to that number

Final Puzzle

Sun → Sun → Star → Sun → Moon → Star → Sun → Moon → Sun → Moon → Star → Moon


Resident Evil Requiem Puzzle Tips

The safest way to handle Requiem’s puzzles is to read the room before assuming everything is a combination.

The first two Quartz boxes genuinely require symbol solutions. The Security Manager’s Office box does not. The Organ Transport Box is solved through inventory inspection. The Blood Analyzer is based on selecting nodes in sequence. The R.P.D. adds clue chains rather than conventional lock puzzles.

And then there’s the Final Puzzle, which is deliberately obscure and spans multiple runs.

If you are following a first playthrough, don’t worry about solving every optional puzzle immediately. The Blood Analyzer rewards are useful, but you can finish the story without completing every specimen. Likewise, the R.P.D. puzzles and Roulette Wheel can wait if you are more interested in progression.

For completionists, however, I’d save the Final Puzzle for a dedicated run. Its hidden setup is too specific to casually stumble through, and having the procedure written down makes the two-playthrough requirement much less frustrating.


Related Resident Evil Requiem Guides

Resident Evil Requiem: All Safe Codes & Combinations
For every safe location, Standard/Casual combination, Insanity combination, and reward.

Resident Evil Requiem: All Weapons & How to Unlock Them
For story weapons, hidden pickups, Supply Box firearms, and Special Content unlocks.

Resident Evil Requiem: All Mr. Raccoon Locations
For the full 25-Raccoon checklist and the Advanced Tuning reward.

Resident Evil Requiem: Puzzles, Safe Codes & Weapons Guide
Our broader Requiem hub covering the game’s main puzzle, weapon, and safe-code topics.


Sources & Updates

Last reviewed: September 2026

Puzzle solutions and progression details were cross-checked against current Resident Evil Requiem references, including PowerPyx, VGC, Game8, and current community documentation. The main story puzzles were compared across multiple current references, while the Final Puzzle was checked against both PowerPyx and VGC’s reproduced procedures.

How we verify: Straightforward story puzzles are presented where current references agree. When a puzzle has an unusual or disputed interpretation, the guide explains the actual player action instead of forcing a potentially misleading classification. The Final Puzzle is explicitly identified as a community-discovered, datamining-assisted solution, rather than presenting that sequence as an obvious in-game clue.

Resident Evil Requiem: All Mr. Raccoon Locations

Resident Evil Requiem: All Mr. Raccoon Locations

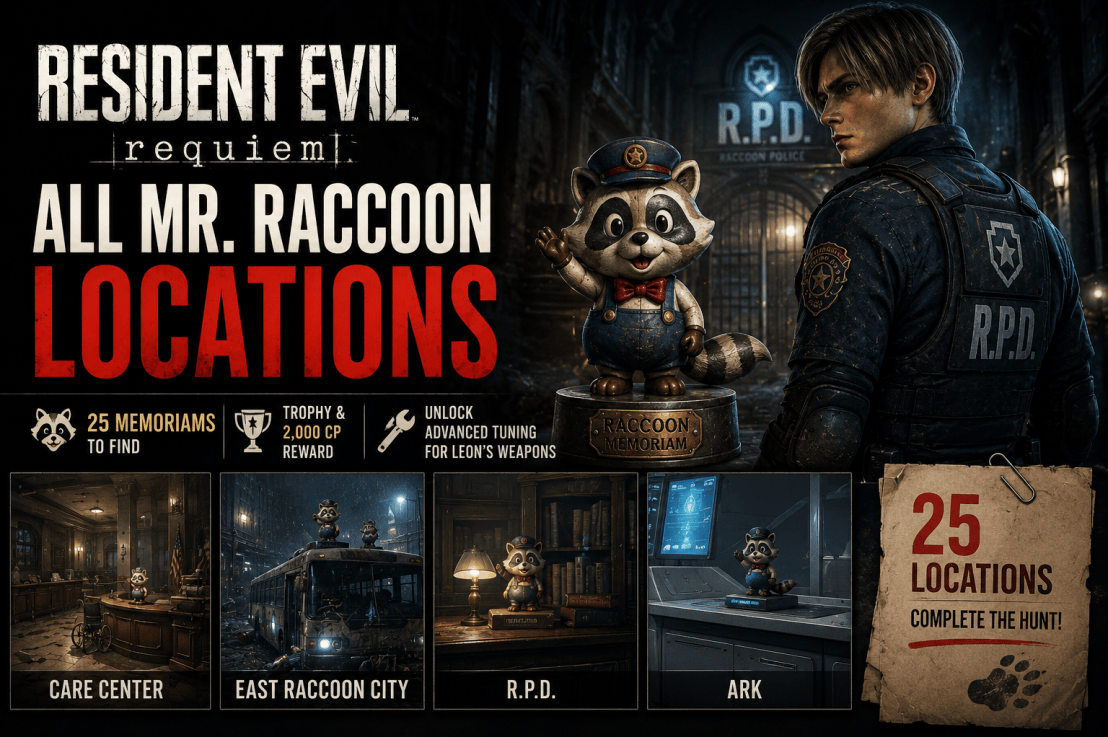
Resident Evil Requiem has 25 Mr. Raccoon Memoriams hidden across the Care Center, East Raccoon City, Raccoon City Center, the R.P.D., and the ARK. Destroying all 25 completes the You Little Rascal! challenge and unlocks a trophy/achievement, along with 2,000 Challenge Points and Advanced Tuning for Leon’s weapons.

The statues are small, and a few are tucked into places you would have little reason to check during a normal playthrough. Some are also tied to a specific character or a particular story sequence, so following them in story order is the safest way to clear the collection.

This guide covers all 25 Mr. Raccoon locations, including the character you need, how to reach each statue, and the collectibles that are easiest to miss.

Spoiler warning: The locations below reveal several story areas and progression details. They’re arranged in roughly the order you’ll encounter them during the campaign.

Resident Evil Requiem Mr. Raccoon Locations: Quick Reference

#AreaCharacterLocation
1Care CenterLeonRehabilitation Ward
2Care CenterGraceEast Wing Lobby
3Care CenterGraceCorridor east of Waiting Room
4Care CenterGraceKitchenette
5Care CenterGraceMedication Room
6Care CenterLeonRecords Room
7Care Center BasementGraceWorkshop
8Care Center BasementGraceBunkroom
9Care Center CourtyardGracePrivate Lab
10Care Center CourtyardLeonOverwatch/sniper section
11East Raccoon CityLeonCafé Oasis
12East Raccoon CityLeonLogistics Warehouse Roof
13East Raccoon CityLeonUnderground Parking Garage
14East Raccoon CityLeonBus near Cedarbrook Apartments
15East Raccoon CityLeonCedarbrook Apartments
16East Raccoon CityLeonGas Station
17East Raccoon CityLeonOpen sewage pipe
18East Raccoon CityLeonRidgewood Station
19East Raccoon CityLeonWillis Tower
20Raccoon City CenterLeonDestroyed tanker
21R.P.D.LeonOperations Room
22R.P.D.LeonLibrary
23Raccoon City CenterLeonGun Shop Kendo alley
24ARKLeonCorridor near Staff Room
25ARKGraceOperations Room

There are 25 total Mr. Raccoon Memoriams, and this ordering follows the game’s progression rather than an arbitrary map order.


How Mr. Raccoon Memoriams Work

Mr. Raccoon Memoriams are small collectible figures that can be destroyed by shooting them or hitting them with a melee weapon. They also produce a distinctive sound when you’re close, which is one of the best clues when a statue is hidden behind scenery or inside an object.

You can check your overall total under Challenges → You Little Rascal!. The game does not provide a detailed area-by-area tracker, so keeping your own checklist is useful.

There is also no traditional chapter-select system for returning to every earlier section. Individual statues can therefore be missable during a run, particularly when a story sequence closes off an area. However, the Mr. Raccoons you’ve already destroyed remain counted across saves and later playthroughs.

After your first playthrough, you can also purchase Raccoon maps from the Bonus Menu, which makes cleanup runs considerably easier.


Care Center — Mr. Raccoons #1–10

The first ten Mr. Raccoons are concentrated around the Rhodes Hill Care Center, its basement, courtyard, and the connected overwatch section. You’ll need both Leon and Grace to collect all ten.

Mr. Raccoon #1 — Rehabilitation Ward

Character: Leon
Location: Rehabilitation Ward

This is the easiest Mr. Raccoon in the game.

After Leon cuts through the early door with the chainsaw, continue through the next doorway. The statue is sitting on a fireplace directly ahead of you.

Shoot it before heading upstairs.


Mr. Raccoon #2 — East Wing Lobby

Character: Grace
Location: East Wing Lobby

Once Grace uses the East Wing Keycard to enter Central Hall, look toward the reception desk.

The Mr. Raccoon is sitting on the desk in front of you.


Mr. Raccoon #3 — East of the Waiting Room

Character: Grace
Location: Corridor east of the Waiting Room

From the Waiting Room, head east along the corridor before going upstairs toward the Lead Researcher’s Office.

The statue is positioned near the end of the corridor. It isn’t hidden behind a puzzle or locked door, but its placement makes it easy to walk past while following the main route.


Mr. Raccoon #4 — Kitchenette

Character: Grace
Location: Kitchenette near the Office

After obtaining the Level 1 Wristband, use it to open the door south of the Kitchen and go upstairs.

In the Kitchenette, look beside the sink for the Mr. Raccoon.


Mr. Raccoon #5 — Medication Room

Character: Grace
Location: Medication Room

This one requires the Level 3 Wristband.

Go through the Guard Office toward the area where the girl is held in a cell. Use the wristband on the empty room on the left, not the girl’s cell.

The Mr. Raccoon is behind the bed.

This is one of the easier Care Center statues to miss because the correct room isn’t the obvious choice.


Mr. Raccoon #6 — Records Room

Character: Leon
Location: Records Room

When Leon returns to the Care Center, head to the Records Room and listen for the familiar rattling sound.

The statue is inside a closet that Leon can break open with his Hatchet. Grace cannot access it in the same way.


Mr. Raccoon #7 — Workshop

Character: Grace
Location: Care Center Basement, Workshop

During Grace’s basement section, reach the Holding Cells corridor and use the Joint Plug to open the Workshop.

The Mr. Raccoon is sitting on the workbench just inside.


Mr. Raccoon #8 — Bunkroom

Character: Grace
Location: Care Center Basement, Bunkroom

Use a Joint Plug at the Boiler Room power distributor to open the connected rooms.

Enter the Bunkroom and look at the television.

The Mr. Raccoon is sitting on top of it.


Mr. Raccoon #9 — Private Lab

Character: Grace
Location: Care Center Courtyard, Private Lab

After solving the puzzle in the VIP Room, take the elevator down into the underground section.

Continue through the area until you reach the Private Lab, where you interact with a computer as part of the story.

The statue is on the desk to the right of the computer.


Mr. Raccoon #10 — Courtyard Overwatch

Character: Leon
Location: Care Center Courtyard, sniper/overwatch section

This is one of the most easily missed Mr. Raccoons in the game.

When Leon regains control, climb through the window and cross the rooftop until you reach the staircase. Do not go through the wooden door at the top.

Instead, turn left and use the sniper rifle to look down into the garden.

The statue is sitting on the base of one of the lit garden lamps. You need to shoot it from your elevated position.

Important: once you leave this position, you cannot simply return to it later in the story. This is one of the statues I’d make sure to collect immediately.


East Raccoon City — Mr. Raccoons #11–19

The next nine Mr. Raccoons are spread around East Raccoon City. This section is where following the correct order saves the most backtracking.

Mr. Raccoon #11 — Café Oasis

Character: Leon
Location: Café Oasis

When Leon regains control in East Raccoon City, follow the road until the first major intersection.

Turn right and enter the first open building on the left: Café Oasis.

The statue is behind the counter.


Mr. Raccoon #12 — Logistics Warehouse Roof

Character: Leon
Location: Logistics Warehouse rooftop

After collecting the Distributor on the rooftop, Leon automatically uses the binoculars to survey the surrounding area.

Before moving on, turn around and face the highway.

Look toward the vehicle wreck on the highway and use the sniper rifle to take out the Mr. Raccoon sitting on top of the van.

This is another collectible where a scoped weapon makes the job much easier.


Mr. Raccoon #13 — Underground Parking Garage

Character: Leon
Location: Underground Parking Garage

After obtaining the Cedarbrook Apartments Key, use it at the Central Camp gate near the elevator.

Go downstairs and enter the door on the right.

When you reach the first enemy where the stealth-kill tutorial appears, enter the room on the left. The Mr. Raccoon is sitting on a box inside.


Mr. Raccoon #14 — Bus Near Cedarbrook Apartments

Character: Leon
Location: Bus on the street outside Cedarbrook Apartments

Continue through the East Raccoon City story until you trigger the cutscene that gives Leon the BSAA Container Keys.

After the scene, you’ll be on the street outside Cedarbrook Apartments.

Walk farther west along the road and check the bus.

The Mr. Raccoon is sitting in the driver’s seat.


Mr. Raccoon #15 — Cedarbrook Apartments

Character: Leon
Location: Cedarbrook Apartments, upper floor

Enter Cedarbrook Apartments and progress until you obtain the Crank.

Return upstairs and use the Crank to open the balcony gate.

Climb the next ladder and turn right onto the upper apartment floor. Continue to the back of the floor and check the open refrigerator.

The Mr. Raccoon is inside.

Do not go downstairs after reaching this upper floor. The refrigerator is near the end of the route toward the rooftop.


Mr. Raccoon #16 — Gas Station

Character: Leon
Location: Gas Station

Return to the road outside Cedarbrook Apartments.

Shoot down the ladder on the opposite side of the street, climb up, and drop into the Gas Station area.

Inside the Gas Station, look for the statue on a metal shelf.


Mr. Raccoon #17 — Open Sewage Pipe

Character: Leon
Location: Western end of the main road

Head toward the western end of the main road, where you’ll find a large crane.

Activate the crane to create a shortcut toward Central Camp.

As you cross the new route, look down and to the left.

The Mr. Raccoon is sitting inside an open sewage pipe.

This is a good example of why it’s worth checking the environment during traversal instead of sprinting directly to the next objective.


Mr. Raccoon #18 — Ridgewood Station

Character: Leon
Location: Underground train section

Use the Fuel Can on the generator near the large crane.

Once the gate opens, continue through the underground route until you automatically reach a train compartment.

The Mr. Raccoon is sitting on a passenger seat inside the train car.


Mr. Raccoon #19 — Willis Tower

Character: Leon
Location: Willis Tower

After obtaining the Fuel Can, return to Central Camp.

Use the elevator to reach the roof and follow the route to the generator. Fill it with fuel and activate it, then use the zipline to reach Willis Tower.

Once inside, head upstairs and follow the seating area into the adjacent room.

The Mr. Raccoon is sitting on a shelf.


Raccoon City Center & R.P.D. — Mr. Raccoons #20–23

Four more Mr. Raccoons remain before the final two in the ARK.

Mr. Raccoon #20 — Destroyed Tanker

Character: Leon
Location: Raccoon City Center

After the motorcycle sequence, when Leon is back on foot, turn slightly left.

The Mr. Raccoon is sitting in the rubble in front of the destroyed tanker.


Mr. Raccoon #21 — R.P.D. Operations Room

Character: Leon
Location: Operations Room

Inside the R.P.D., enter the Operations Room.

Check the left side of the room, where rubble and a wooden barricade conceal the statue.


Mr. Raccoon #22 — R.P.D. Library

Character: Leon
Location: Library

From the Operations Room, follow the route toward the Library and climb up to the second floor.

The Mr. Raccoon is hidden inside the large central bookshelf.

Look at the north-facing side and check the lower shelves. The statue is tucked behind a pile of books.

This is one of the hardest statues to spot without knowing exactly where to aim.


Mr. Raccoon #23 — Gun Shop Kendo Alley

Character: Leon
Location: Alley beside Gun Shop Kendo

After the Gun Shop Kendo cutscene, turn around before continuing.

Enter the open alley and look toward the far end.

The Mr. Raccoon is sitting in an open window, just to the left of the large Umbrella billboard.

Don’t confuse this location with the W870 Police shotgun, which is inside Gun Shop Kendo itself.


ARK — Mr. Raccoons #24–25

The final two Mr. Raccoons are found in the ARK.

Mr. Raccoon #24 — ARK Entrance Corridor

Character: Leon
Location: Corridor near the Staff Room

After entering the ARK and passing through the decontamination tunnel, head right.

Check the corridor near the Staff Room.

The Mr. Raccoon is behind a box.

This is the penultimate statue.


Mr. Raccoon #25 — ARK Operations Room

Character: Grace
Location: Operations Room

The final Mr. Raccoon is collected during Grace’s ARK section.

After passing through the area containing the Lickers and locked containers, you’ll eventually reach the Operations Room as part of the route toward the Noblesse Orb.

The Mr. Raccoon is in the same room, in front of the large monitor on the left side.

Destroying this statue brings your total to 25/25.


All 25 Mr. Raccoons: Quick Checklist

Use this list while playing:

  • 1 — Rehabilitation Ward
  • 2 — East Wing Lobby
  • 3 — Corridor east of Waiting Room
  • 4 — Kitchenette
  • 5 — Medication Room
  • 6 — Records Room
  • 7 — Basement Workshop
  • 8 — Basement Bunkroom
  • 9 — Private Lab
  • 10 — Care Center Overwatch
  • 11 — Café Oasis
  • 12 — Logistics Warehouse Roof
  • 13 — Underground Parking Garage
  • 14 — Cedarbrook bus
  • 15 — Cedarbrook Apartments
  • 16 — Gas Station
  • 17 — Open sewage pipe
  • 18 — Ridgewood Station
  • 19 — Willis Tower
  • 20 — Destroyed tanker
  • 21 — R.P.D. Operations Room
  • 22 — R.P.D. Library
  • 23 — Gun Shop Kendo alley
  • 24 — ARK corridor
  • 25 — ARK Operations Room

What Happens When You Find All 25 Mr. Raccoons?

Destroying all 25 completes the You Little Rascal! challenge and unlocks its trophy/achievement. The challenge also awards 2,000 CP.

The more useful gameplay reward is Advanced Tuning for Leon’s weapons.

Advanced Tuning allows Leon to push compatible weapons beyond their standard upgrade level, making the Mr. Raccoon hunt worthwhile even if you aren’t interested in trophy completion.


Are Mr. Raccoons Missable?

Yes, during a particular playthrough.

Resident Evil Requiem does not offer a conventional chapter-select system, so leaving an area can prevent you from returning to a statue later in that run. PowerPyx specifically recommends keeping manual saves around area transitions if you’re collecting everything during your first playthrough.

The good news is that your completed Mr. Raccoons remain counted across saves and subsequent playthroughs.

That means you don’t need a perfect 25/25 run. If you miss one, you can return through an appropriate save or pick it up during a later playthrough without resetting the ones you’ve already destroyed.


Do Mr. Raccoons Carry Over Between Playthroughs?

Yes.

Mr. Raccoon progress is persistent, so previously destroyed statues remain counted when you start another run.

This is especially useful if you miss one of the statues tied to a temporary story section. Rather than restarting the entire collection, you can simply target the missing statue during a later run.


How to Find Mr. Raccoons More Easily

The game gives you a couple of useful clues even though it doesn’t mark every statue automatically.

Listen for the sound

Mr. Raccoons make a distinctive noise when you’re close. If you hear it but can’t see anything, stop following the objective and check nearby shelves, containers, pipes, furniture, and elevated surfaces.

Check optional rooms

A number of statues are located in places that are not required for story progression, including the Café Oasis, Workshop, Bunkroom, and Library.

Look above and below eye level

Several of the harder collectibles aren’t sitting directly in your path. The most notable examples are the Courtyard overwatch statue, highway vehicle, sewage pipe, and Kendo alley window.

Bring a scoped weapon when possible

Long-range statues such as the Logistics Warehouse rooftop and Care Center overwatch are much easier to hit with Leon’s scoped rifle.


The Mr. Raccoons Most Likely to Be Missed

If you’re not following a checklist, pay special attention to these:

#5 — Medication Room: You need the empty cell rather than the occupied one.

#6 — Records Room: The closet requires Leon’s Hatchet.

#10 — Care Center Overwatch: Shoot the statue before leaving the sniper position.

#12 — Logistics Warehouse: Look out toward the highway and use the sniper rifle.

#17 — Sewage Pipe: Look down from the crane shortcut.

#22 — Library: The statue is behind books inside the central bookshelf.

#23 — Kendo Alley: Look up toward the open window.

These aren’t necessarily the only easy-to-miss statues, but they’re the locations where a player following the main objective is most likely to walk straight past the collectible.


Resident Evil Requiem Mr. Raccoon Tips for a 100% Run

The easiest way to handle the collection is to treat the statues as part of your normal route, not as a separate cleanup job.

For the Care Center, check every optional room as soon as you have the required wristband or Joint Plug. During East Raccoon City, pause at each major landmark instead of assuming the collectible is somewhere near the next objective.

Most importantly, keep an eye on the character listed in the guide. Several of the Care Center statues are split between Grace and Leon, and the game doesn’t let you freely switch between them.

For a first completion run, I’d also keep a manual save before major story transitions. There is no reason to make a 20-hour collectible hunt harder than it needs to be.


Final Thoughts

The Mr. Raccoon hunt is worth doing even if you’re not normally a collectible hunter.

You get the You Little Rascal! trophy/achievement and 2,000 CP, but the more practical payoff is Advanced Tuning for Leon’s weapons.

The important thing is to remember the handful of statues that can disappear as the story progresses. Grab those when you reach them, keep your saves around major transitions, and use the checklist above rather than relying on memory.

For the rest of the Requiem completion checklist, see our Resident Evil Requiem Safe Codes & Combinations guide and Resident Evil Requiem: All Weapons & How to Unlock Them guide.


Sources & Updates

Last reviewed: September 2026

The 25 Mr. Raccoon Memoriam locations, character requirements, progression details, persistence between playthroughs, and completion rewards were cross-checked against current Resident Evil Requiem references, including PowerPyx, VGC, PC Gamer, Vandal, and GameSpot.

How we verify: The guide follows the game’s progression order rather than relying on a single map-numbering system. Where different guides describe the same area using different landmark names, the location is described using the most recognizable in-game landmark or route.

Guide note: Mr. Raccoon numbering in this article is the numbering used by Loot Strategist for this guide and should not be treated as an official in-game numbering system.

Resident Evil Requiem: All Weapons & How to Unlock Them

Resident Evil Requiem: All Weapons & How to Unlock Them

Resident Evil Requiem splits its arsenal between Grace Ashcroft’s survival-focused inventory and Leon S. Kennedy’s larger, upgradeable arsenal. Some weapons are automatic story pickups, others are hidden in optional areas, and several powerful firearms can only be unlocked through the game’s Special Content system.

This guide covers the weapons you can obtain during the campaign, Leon’s Supply Box firearms, the post-game bonus weapons, and Grace’s Insanity-exclusive R.I.P. Knife. It also points out the weapons that are easiest to miss and explains which upgrades are actually worth prioritizing.

Spoilers ahead: Weapon locations include later-game areas, boss rewards, and post-game unlocks.

Resident Evil Requiem Weapons: Quick Reference

WeaponCharacterHow to Unlock
S&S M232GraceCare Center, Bar & Lounge
B934GraceCare Center, Dining Room
RequiemGrace / LeonStory progression
Makeshift KnifeGraceCare Center Filing Room; additional copies can be found/crafted
Hunting KnifeGraceDropped by an enemy near the Dining Room/Filing Room
HatchetLeonStarting weapon
Alligator SnapperLeonStarting weapon
MSBG 500LeonCare Center Attic
Classic 70LeonStory progression
Silencer 9LeonBuy from Supply Box
990-TACLeonBuy from Supply Box
Stiri REVO3 A1LeonBuy from Supply Box
GalLeonEast Raccoon City Underground Parking Garage
Marksman 1ALeonBSAA Container 03
W870 PoliceLeonGun Shop Kendo
Mortal EdgeLeonCommander boss / Special Content
Freya’s NeedleGraceSpecial Content
KotetsuGraceSpecial Content
Matilda IMPLeonSpecial Content
Ghost GrudgeLeonSpecial Content
RedemptionLeonSpecial Content
Clatter CarbineLeonSpecial Content
RPG-7LeonSpecial Content
R.I.P. KnifeGraceInsanity-only Parlor reward

The main weapon references agree on the story weapons, Supply Box firearms, eight Special Content weapons, and the separate Insanity-only R.I.P. Knife.


How the Weapon System Works

Grace and Leon handle weapons differently.

Grace can store weapons in the storage chest found in safe rooms. Her standard weapons do not use Leon’s upgrade system. She instead relies heavily on inventory management, crafting, and resource conservation.

Leon cannot store weapons in the same way. His Supply Boxes let him buy weapons, ammunition, upgrades, and gear. Weapons he no longer wants can be sold and purchased again later, which helps when inventory space becomes a problem.

Leon can normally upgrade compatible weapons through the Supply Box, while Advanced Tuning unlocks a further upgrade level after you destroy all 25 Mr. Raccoon memoriams.


Grace’s Weapons

Grace’s arsenal is smaller, but several of her weapons are easy to overlook during the Care Center sections.

S&S M232

Character: Grace
Type: Handgun
Location: Care Center, West Wing, 2F, Bar & Lounge

The S&S M232 is Grace’s personal handgun. Story events cause her to lose it earlier in the campaign, but you can recover it from the Bar & Lounge, where it sits on the bar counter.

The weapon is beside the Bar & Lounge safe, so this is a good place to handle both objectives during the same visit. For the combination, see our Resident Evil Requiem Safe Codes & Combinations guide.

B934

Character: Grace
Type: Handgun
Location: Care Center, West Wing, 1F, Dining Room

The B934 is found on the floor of the Dining Room after you pass through the Kitchen. It is one of Grace’s early firearms and is worth picking up immediately rather than leaving it behind.

One important difficulty detail: a current GameFAQs reference places the B934 in the East Wing Waiting Room on Insanity, so don’t assume the Standard location carries over unchanged when playing on the highest difficulty.

Requiem

Character: Grace and Leon
Type: Assault revolver
How to unlock: Story progression

Requiem is Leon’s starting high-caliber revolver before he hands it to Grace during the Care Center sequence. Grace later returns it to Leon. The weapon uses 12.7x55mm ammunition and is built around high damage and penetration rather than high capacity.

For Leon, it is also one of the better long-term upgrade candidates because its Supply Box upgrades improve stability, rate of fire, reload speed, and power.

Makeshift Knife

Character: Grace
Type: Melee
Location: Care Center Filing Room

You can find the Makeshift Knife in a locker in the Filing Room, next to the Dining Room. Additional knives can be found elsewhere, and Grace can craft more after obtaining the necessary recipe.

It is mainly a defensive tool. When an enemy grabs Grace, the knife can be used to fight her way free, but its durability is limited.

Hunting Knife

Character: Grace
Type: Melee
Location: Near the Dining Room/Filing Room

The Hunting Knife is carried by an enemy near the Dining Room and Filing Room. Once that enemy is dealt with, you can collect the weapon.

Like the Makeshift Knife, it has limited durability and cannot be sharpened or repaired the way Leon maintains his Hatchet.


Leon’s Story Weapons

Leon gets a considerably larger selection of conventional firearms.

Hatchet

Character: Leon
Type: Melee
How to unlock: Starting weapon

The Hatchet is Leon’s default melee weapon. It can parry certain enemy attacks and can also be used to finish staggered enemies. It loses sharpness with use, but unlike Grace’s knives, Leon can restore it by sharpening the blade.

The Hatchet can also receive Supply Box upgrades for power and durability, making it worth maintaining throughout the campaign.

Alligator Snapper

Character: Leon
Type: Handgun
How to unlock: Starting weapon

The Alligator Snapper is Leon’s standard semi-automatic handgun and is available from the beginning. It’s a straightforward sidearm rather than a specialist weapon, so it remains useful while you’re building up credits for the rest of Leon’s arsenal.

MSBG 500

Character: Leon
Type: Shotgun
Location: Care Center Attic

You’ll find the MSBG 500 on the floor in the Attic during Leon’s Care Center section, on the route toward the Chunk encounter.

It’s a compact pump-action shotgun with a five-shell capacity and several available upgrades, including components that increase power, reload speed, or rate of fire.

Classic 70

Character: Leon
Type: Rifle
Location: Victor’s private study / story progression

The Classic 70 is a bolt-action rifle obtained when you regain control of Leon after the Courtyard events. It becomes the key weapon for the long-range sequence where Leon has to protect Grace from a distance.

It comes with a standard scope, while the Silver Finish Scope can later be found in an open container in the Parking Garage behind the R.P.D.

If you enjoy deliberate headshots and conserve rifle ammunition, the Classic 70 is one of Leon’s most satisfying campaign weapons.

Gal

Character: Leon
Type: Submachine gun
Location: East Raccoon City Underground Parking Garage

The Gal is hidden in the northwestern section of the flooded Underground Parking Garage, near the area where you search for the Battery Key. Another current guide describes it as being inside the shed just beyond the partially submerged cars.

It has a large magazine and is designed for sustained automatic fire rather than precision.

Marksman 1A

Character: Leon
Type: Semi-automatic rifle
Location: BSAA Container 03, East Raccoon City

The Marksman 1A is inside BSAA Container 03 at the far end of the main street in East Raccoon City. You’ll need the BSAA Container Key to open it.

It holds 10 rifle rounds normally, with upgrades increasing capacity and rate of fire.

If the rifle doesn’t fit in your inventory when you find it, you don’t necessarily lose access to it permanently; PowerPyx notes that it can still be purchased later from Supply Boxes.

W870 Police

Character: Leon
Type: Shotgun
Location: Gun Shop Kendo, Raccoon City Center

After the Gun Shop Kendo cutscene, turn around. The W870 Police is sitting on a shelf behind the door.

The shotgun starts with five shells and can be upgraded for additional capacity, power, and stability.

For a standard playthrough, this is one of the most useful pickups to keep in Leon’s rotation because it gives you a reliable pump-action option without requiring a Special Content unlock.

Mortal Edge

Character: Leon
Type: Melee
How to unlock: Defeat the Commander in the ARK

Mortal Edge is dropped by the Commander after the ARK boss fight. It has a larger parry window than the standard Hatchet and cannot be upgraded.

After completing the game, Mortal Edge can also be unlocked through Special Content for 3,000 CP and then purchased from Leon’s Supply Box. Current references agree on the 3,500-CP Special Content cost.


Leon’s Supply Box Weapons

Three standard firearms are purchased directly from Supply Boxes.

WeaponTypeSupply Box Cost
Silencer 9HandgunSee Supply Box
990-TACShotgun7,000 Credits
Stiri REVO3 A1SMG6,000 Credits

The exact weapon prices are visible at the Supply Box, while the current GameFAQs item guide lists the 990-TAC at 7,000 Credits and Stiri REVO3 A1 at 6,000 Credits.

Silencer 9

The Silencer 9 is Leon’s suppressed handgun. The built-in suppressor reduces the sound of its shots, making it useful when you want a quieter sidearm rather than another high-damage option.

990-TAC

The 990-TAC is a semi-automatic shotgun with a higher capacity than the MSBG 500. It can take a Dot Sight, extended tube, upgraded barrel, and stock.

Stiri REVO3 A1

The Stiri REVO3 A1 is a compact SMG with a 30-round magazine. Its upgrade path can improve precision, power, capacity, and stability.


Special Content Weapons

After building up Challenge Points, you can spend CP in Special Content to unlock several bonus weapons.

Once unlocked, Grace receives her weapons through her item box, while Leon can obtain his through Supply Boxes.

Freya’s Needle

Character: Grace
Cost: 4,000 CP

Freya’s Needle is a lightweight machine pistol that uses handgun ammunition. It prioritizes a high rate of fire over precision, making it a useful aggressive option for repeat runs.

Kotetsu

Character: Grace
Cost: 5,000 CP

Kotetsu is an unbreakable knife.

For Grace, that makes it one of the strongest quality-of-life purchases in Special Content. Standard knives wear down; Kotetsu does not.

Matilda IMP

Character: Leon
Cost: 500 CP

Matilda IMP is a polymer-frame handgun. Its Folding Stock upgrade enables three-round burst fire, turning it into a compact alternative to a conventional handgun.

At 500 CP, it is also one of the cheapest bonus weapons to unlock.

Ghost Grudge

Character: Leon
Cost: 1,000 CP

Ghost Grudge is a large revolver that uses 12.7x55mm ammunition. It cannot receive normal weapon upgrades, although charms can still affect it.

It is a straightforward choice for players who want another heavy-hitting revolver without spending the higher CP required for the game’s other late-game weapons.

Redemption

Character: Leon
Cost: 3,500 CP

Redemption is a break-action, single-shot handgun that uses rifle ammunition. Each shot hits hard, but you need to reload after every round.

Because sources sometimes classify it differently, this guide uses the game’s functional description—single-shot handgun—rather than forcing it into a disputed category.

Clatter Carbine

Character: Leon
Cost: 6,000 CP

The Clatter Carbine is a suppressed assault rifle that holds 40 rounds of machine-gun ammunition. It is available through Special Content after completing the game and cannot receive normal Supply Box weapon upgrades.

For a repeat run, this is one of the most straightforward ways to give Leon sustained automatic fire without relying on a conventional SMG.

RPG-7

Character: Leon
Cost: 15,000 CP

The RPG-7 is the game’s dedicated rocket launcher. It becomes available through Special Content after completing the game for 15,000 CP.

It has no normal weapon upgrades. Infinite ammo is a separate Special Content unlock costing 35,000 CP.


R.I.P. Knife — Insanity Exclusive

Character: Grace
Difficulty: Insanity
Cost: 5 Antique Coins

The R.I.P. Knife is a special Grace weapon tied to Insanity difficulty.

You can obtain it from the Parlor by spending five Antique Coins. PowerPyx also notes that a blood specimen in the 1F Waiting Room Closet can provide the crafting recipe.

Its main advantage is resource generation: it produces more blood than the standard knives, which matters when you’re crafting Grace’s blood-based items.

Because it is difficulty-exclusive, I treat the R.I.P. Knife separately from the main campaign and Special Content weapon lists.


The Weapons Most Worth Hunting Down

Not every weapon in Requiem requires a detour, but a few are easy to miss.

S&S M232

Check the Bar & Lounge on 2F of the West Wing. You’re already close to an important safe, so this is an easy pickup to combine with another objective.

Gal

Don’t leave the East Raccoon City Underground Parking Garage without checking the northwestern section. This is an optional pickup and one of the easiest guns to walk past.

Marksman 1A

The Marksman 1A is locked inside BSAA Container 03. If you are collecting weapons, this is worth the key detour.

W870 Police

The Kendo sequence can distract you from the shotgun sitting directly behind you after the cutscene. Turn around before leaving the shop.

Classic 70 Scope

The rifle itself is story progression, but its Silver Finish Scope is an optional pickup in the Parking Garage behind the R.P.D.


Best Weapons for a First Playthrough

There is no single “best weapon” for every situation, but a few choices stand out.

RoleBest PickWhy
Grace high-damage firearmRequiemHigh-power 12.7x55mm revolver
Grace meleeHunting Knife / Makeshift KnifeUse them defensively and conserve durability
Leon general handgunAlligator SnapperReliable starting sidearm
Leon shotgunW870 PoliceStrong pump-action option with useful upgrades
Leon long-rangeClassic 70Strong, precise rifle with useful scope options
Leon automatic weaponStiri REVO3 A1 / GalHigh sustained fire
Best bonus knifeKotetsuInfinite durability
Best heavy bonus weaponRPG-7Maximum burst damage

For Grace, the Requiem is the obvious choice when a fight calls for raw firearm damage. For Leon, the W870 Police is an excellent all-purpose shotgun, while the Classic 70 rewards players who are comfortable taking precise shots rather than burning through ammunition. Those recommendations are based on how the weapons’ documented stats, upgrade paths, and intended roles fit together rather than on a single damage number.


Best Bonus Weapons to Unlock First

You don’t need to buy every Special Content weapon immediately.

For Grace: Kotetsu

At 5,000 CP, Kotetsu removes the durability problem from Grace’s knife. If you frequently rely on defensive knife attacks, that’s a meaningful improvement rather than a novelty unlock.

For Leon: Matilda IMP

At only 500 CP, Matilda IMP is the cheapest bonus firearm and can eventually be configured for three-round bursts. It’s an easy early purchase once you’ve unlocked Special Content.

For Leon: Clatter Carbine

At 6,000 CP, Clatter Carbine is a much larger investment, but it gives Leon suppressed automatic fire in a dedicated assault-rifle package.

For Leon: RPG-7

Save the RPG-7 for when you have plenty of CP. The 15,000 CP unlock cost is significant, and infinite RPG ammo is another 35,000 CP on top of that.


Can Grace Upgrade Her Weapons?

Not in the same way Leon can.

Grace’s normal weapons don’t use Leon’s Supply Box tuning system. Her progression is built around collecting weapons, managing storage space, crafting resources, and using passive upgrades such as charms.

Leon, by contrast, can purchase weapon upgrades through Supply Boxes. After all 25 Mr. Raccoon memoriams are destroyed, Advanced Tuning becomes available and adds another upgrade level.

That difference is worth remembering when deciding whether a gun deserves space in Leon’s inventory. A weapon with several useful upgrade paths can age better than a stronger weapon that has no tuning options.


Do Weapons Carry Over to New Runs?

Several weapons and bonuses become part of the post-game system rather than being permanent story pickups.

Leon can sell weapons to Supply Boxes and buy them back later, while Grace uses her storage chests to manage weapons between sections. Special Content purchases remain available once unlocked and can then be retrieved through the relevant storage system.

This is particularly useful on repeat runs, when the value of bonus weapons like Kotetsu, Matilda IMP, Clatter Carbine, and RPG-7 becomes much clearer.


What About Grenades, Molotovs, and Acid?

These are combat items, but I would not mix them into the main firearm list.

Grace

  • Molotov Cocktail
  • Bottle of Acid

Both can be found during the story and can be crafted after Grace obtains the relevant recipes.

Leon

  • Hand Grenades
  • Stacked Hand Grenades

Leon can find grenades and craft additional ammunition using the appropriate resources.

Keeping these in a separate section makes the weapon list easier to use without pretending that every throwable is a conventional weapon.


Resident Evil Requiem Weapon Cheat Sheet

For a quick reference during a playthrough:

WeaponCharacterUnlock / Location
S&S M232GraceCare Center Bar & Lounge
B934GraceCare Center Dining Room
RequiemGrace / LeonStory
Makeshift KnifeGraceFiling Room / crafted
Hunting KnifeGraceEnemy near Dining Room/Filing Room
HatchetLeonStarting weapon
Alligator SnapperLeonStarting weapon
MSBG 500LeonCare Center Attic
Classic 70LeonStory
GalLeonUnderground Parking Garage
Marksman 1ALeonBSAA Container 03
W870 PoliceLeonGun Shop Kendo
Silencer 9LeonSupply Box
990-TACLeonSupply Box
Stiri REVO3 A1LeonSupply Box
Mortal EdgeLeonCommander / Special Content
Freya’s NeedleGrace4,000 CP
KotetsuGrace5,000 CP
Matilda IMPLeon500 CP
Ghost GrudgeLeon1,000 CP
RedemptionLeon3,500 CP
Clatter CarbineLeon6,000 CP
RPG-7Leon15,000 CP
R.I.P. KnifeGrace5 Antique Coins on Insanity

The standard weapon locations and Special Content costs above are supported by current PowerPyx, GameSpot, Game8, and GameFAQs references.


Final Tips for Collecting Every Weapon

If you’re collecting weapons rather than simply trying to finish the story, keep four places in mind:

Care Center: check the Dining Room, Filing Room, Bar & Lounge, and Attic.

East Raccoon City: check the Underground Parking Garage and BSAA Container 03.

Raccoon City Center: don’t leave Gun Shop Kendo without checking behind the door after the cutscene.

Post-game: check Special Content for the bonus weapons you want, then use the appropriate item or Supply Box to claim them.

And if you are pursuing full completion, remember that Advanced Tuning is tied to destroying all 25 Mr. Raccoon memoriams, not to simply acquiring a certain number of weapons.


Sources & Updates

Last reviewed: August 2026

Weapon locations, unlock conditions, Supply Box behavior, and Special Content costs were cross-checked against current Resident Evil Requiem references from PowerPyx, GameSpot, Game8, and GameFAQs. Where source terminology differs—for example, how some databases classify Redemption—the guide uses the least ambiguous description rather than presenting a disputed label as fact.

How we verify: We prioritize details that are independently consistent across current references, and we flag or avoid hard claims when reputable sources disagree. This is particularly important for bonus-content terminology and weapon categorization.

Related Resident Evil Requiem Guides

Resident Evil Requiem Safe Codes: All Combinations & Locations

Resident Evil Requiem Safe Codes: All Combinations & Locations

Resident Evil Requiem: All Safe Codes & Combinations

Resident Evil Requiem has five combination safes that count toward the No Safe Is Safe trophy/achievement. Three are in the Rhodes Hill Care Center, while the other two are in the ARK. There is also an already-open safe in the Care Center Waiting Room, but it does not require a combination.

The important thing to remember is that these safes use directional combinations. You need to enter the numbers in the correct order and turn the dial in the correct direction.

Resident Evil Requiem Safe Codes: Quick Reference

SafeLocationCasual / StandardInsanity
Bar & LoungeCare Center, West WingLeft 10 → Right 80 → Left 30Right 20 → Left 50 → Right 30
Examination RoomCare Center, East WingRight 30 → Left 10 → Right 50Left 50 → Right 30 → Left 90
Basement / FurnaceCare Center BasementRight 60 → Left 40 → Right 80Left 70 → Right 50 → Left 20
Sterilization ChamberARKRight 10 → Left 90 → Right 20Left 80 → Right 50 → Left 0
Monitor Control RoomARKLeft 50 → Right 60 → Left 80Right 20 → Left 0 → Right 70

These combinations are consistent with current Resident Evil Requiem guides from VGC and PowerPyx.

Looking for the other major puzzles and weapon information? See our Resident Evil Requiem Puzzles, Safe Codes & Weapons Guide.

How Safe Combinations Work

Resident Evil Requiem does not use ordinary three-digit keypad codes. Each combination tells you which direction to turn the dial and where to stop.

For example:

Right 30 → Left 10 → Right 50

Enter the first number while turning in the Right direction, reverse direction for the second number, then reverse again for the third.

The directional input is part of the combination. Knowing the three numbers alone is not enough.

You also do not need to find the clue first. Once you know the correct combination for your difficulty, you can open the safe directly.


1. Bar & Lounge Safe

Location

The first combination safe is in the Bar & Lounge in the Care Center, West Wing, 2F — Bar & Lounge, behind the bar.

Likewise: Care Center, East Wing, 1F — Examination Room

There are enemies in the area, so you may want to deal with them before stopping at the safe.

Casual / Standard

Left 10 → Right 80 → Left 30

Insanity

Right 20 → Left 50 → Right 30

Reward

The safe contains 3 Antique Coins. The coins can be spent at the Parlor on upgrades.

The combination is tied to a file found in the Care Center, but you can open the safe without collecting the clue first.

Location → code → reward → useful clue/location detail


2. Examination Room Safe

Location

The second safe is in the Examination Room in the Care Center’s East Wing.

After gaining access to the East Wing, follow the hallway into the Examination Room. The safe is along the wall inside the room.

Casual / Standard

Right 30 → Left 10 → Right 50

Insanity

Left 50 → Right 30 → Left 90

Reward

You will find 3 Antique Coins inside.

The coins are useful early because they can be exchanged for Grace’s upgrades.


3. Waiting Room Safe

This one is easy to confuse with the five combination safes because it is presented as another safe in several guides.

The safe behind the desk in the Care Center Waiting Room is already open.

There is no combination to enter.

Reward

2 Antique Coins.

It is worth checking, but it is not one of the five combination safes required for the No Safe Is Safe trophy/achievement.


4. Basement / Furnace Safe

Location

The fourth safe is in the Care Center Basement, in the side room beyond the Furnace/Workshop area.

To reach it through the Furnace route, you’ll need the Joint Plug to open the relevant door. There is also an alternate route through the Workshop’s crawl space.

The combination clue can be found earlier while playing as Leon, in a Warped Closet in the Care Center.

Casual / Standard

Right 60 → Left 40 → Right 80

Insanity

Left 70 → Right 50 → Left 20

Reward

The safe contains:

  • Raccoon Roundup Map (Rhodes Hill)
  • 10 Handgun Ammo

The map marks the Mr. Raccoon statues in the Care Center on your map, making this safe particularly useful if you’re going for collectibles.


5. Sterilization Chamber Safe

Location

The next safe is in the Sterilization Chamber of the ARK.

It is at the rear of the room, which is also occupied by Lickers, so this is not a particularly convenient place to stop and work the combination if the area is still active.

The clue for the safe can be found later in Bioweapon Repository 05.

Casual / Standard

Right 10 → Left 90 → Right 20

Insanity

Left 80 → Right 50 → Left 0

Reward

Inside you’ll find:

  • 1 Med Injector
  • 15 Handgun Ammo
  • 1 Molotov Cocktail

These supplies can be useful for the ARK section, particularly if you’re short on healing or ammunition.


6. Monitor Control Room Safe

Location

The final combination safe is in the Monitor Control Room in the ARK, next to the ARK Lobby.

The combination clue is found in Bioweapon Repository 05.

Casual / Standard

Left 50 → Right 60 → Left 80

Insanity

Right 20 → Left 0 → Right 70

Reward

The safe contains:

  • 1 Med Injector
  • 1 Bottle of Acid
  • 1 Empty Bottle

The Acid can be useful against the Lickers in this part of the game.


All Insanity Safe Codes

Playing on Insanity? These are the five combinations you need:

Bar & Lounge
Right 20 → Left 50 → Right 30

Examination Room
Left 50 → Right 30 → Left 90

Basement / Furnace
Left 70 → Right 50 → Left 20

Sterilization Chamber
Left 80 → Right 50 → Left 0

Monitor Control Room
Right 20 → Left 0 → Right 70

The safe locations do not change on Insanity, but the combinations do. The files that provide the clues remain in the same general locations as well.


Do You Need to Find the Safe Clues?

No.

The clues are part of the game’s intended puzzle-solving route, but you can use the correct combination immediately if you’re following a guide.

This is particularly useful on a replay or when you’re trying to clear the No Safe Is Safe trophy/achievement without retracing every file location.


How Many Safes Are in Resident Evil Requiem?

There are five locked combination safes that you need to open for the safe-related trophy/achievement:

  1. Bar & Lounge
  2. Examination Room
  3. Basement / Furnace
  4. Sterilization Chamber
  5. Monitor Control Room

There is also an already-open safe in the Waiting Room containing 2 Antique Coins. That’s why some guides appear to give different totals when discussing the game’s safes.


No Safe Is Safe Trophy/Achievement

Opening all five combination safes unlocks No Safe Is Safe.

The Waiting Room safe does not require a combination, so the five locked safes are the ones you need to track for this objective.


Resident Evil Requiem Safe Code Cheat Sheet

For a quick reference during a playthrough:

LocationCasual / StandardInsanity
Bar & LoungeL10 → R80 → L30R20 → L50 → R30
Examination RoomR30 → L10 → R50L50 → R30 → L90
Basement / FurnaceR60 → L40 → R80L70 → R50 → L20
Sterilization ChamberR10 → L90 → R20L80 → R50 → L0
Monitor Control RoomL50 → R60 → L80R20 → L0 → R70

L = Left
R = Right


Sources & Updates

Last verified: August 2026

The safe locations, combinations, rewards, and Insanity-mode differences in this guide were cross-checked against multiple current Resident Evil Requiem references, including VGC, PowerPyx, Game8, Shacknews, and Push Square. Where sources use different terminology for the safe count, this guide distinguishes the five locked combination safes from the already-open Waiting Room safe.

Related Resident Evil Requiem Guides

Resident Evil Requiem Guide: All Puzzle Solutions, Safe Codes & Weapons

Resident Evil Requiem Guide: All Puzzle Solutions, Safe Codes & Weapons


Capcom’s Resident Evil Requiem delivers a masterclass in dual-protagonist survival horror. Navigating the Rhodes Hill Chronic Care Center and surrounding ruins requires balancing resource-conscious stealth as FBI analyst Grace Ashcroft with high-octane combat efficiency as Leon S. Kennedy.

Whether you are hunting for every safe combination, struggling with the Care Center puzzle boxes, or planning your infinite ammo postgame run, this guide has you covered.


🧩 Key Story Puzzles & Solutions

Progression in Requiem heavily depends on environmental clues. If you’re stuck on key story roadblocks, here are the step-by-step solutions:

1. Care Center Celestial Puzzle Boxes (Quartz Keys)

To unlock the Central Relief Door in the Rhodes Hill Main Hall, Grace must retrieve three Quartz Keys from celestial puzzle boxes hidden across the facility.

  • Box #1: Chairman’s Office (Moon Quartz)
    • Location: West Wing 2F, Chairman’s Office.
    • Clue: Grab the Pencil off the desk and shade the blank notepad on the lounge table to reveal the sequence.
    • Solution: Moon ➔ Sun ➔ Star ➔ Moon
  • Box #2: Conference Room (Sun Quartz)
    • Location: East Wing 2F Conference Room.
    • Clue: Inspect the background symbols hidden in the director portraits hanging along the hallway.
    • Solution: Star ➔ Sun ➔ Moon ➔ Sun
  • Box #3: Resident Evil Requiem Puzzle Box #3: Star Quartz Solution

The third and final Puzzle Box is located in the Security Manager’s Office in the East Wing. You’ll need a Level 2 ID Wristband to reach the area.

Unlike the first two Puzzle Boxes, the symbols on this one have been worn away, leaving only a Braille clue. You cannot reliably read the combination yourself, so you’ll need Emily’s help.

How to solve Puzzle Box #3

  1. Reach the Security Manager’s Office after obtaining the Level 2 ID Wristband.
  2. Examine the Puzzle Box and the notebook on the Security Manager’s desk.
  3. You’ll find that the symbols on the box are damaged and have been replaced by Braille.
  4. Obtain access to Emily and bring her to the Puzzle Box.
  5. Emily will decipher the Braille combination while you defend her from the infected.
  6. Enter the following sequence:

Star → Star → Moon → Sun

  1. Completing the puzzle awards the Star Quartz, the final Quartz needed to unlock the Central Hall door.

Puzzle Box #3 solution

⭐ Star → ⭐ Star → 🌙 Moon → ☀️ Sun

Quick answer: Star – Star – Moon – Sun

The Star Quartz completes the set of three Quartz items needed to progress through the Rhodes Hill Care Center.


2. All Safe Combinations (Standard vs. Insanity)

Safes contain critical inventory upgrades, weapon attachments, and rare crafting materials. Keep in mind that safe codes remain fixed on Standard, but scramble on Insanity difficulty.

Safe LocationStandard CodeInsanity CodeKey Contents
Care Center 1F West Restroom09 ➔ 18 ➔ 2712 ➔ 34 ➔ 08Hip Pouch (+2 Inventory Slots)
Blood Lab (East Wing 2F)31 ➔ 05 ➔ 1422 ➔ 19 ➔ 41Injector Upgrade
Sanatorium Basement Office04 ➔ 22 ➔ 1108 ➔ 15 ➔ 30Requiem Revolver Ammo / High-Grade Scrap
Records Room (Raccoon Ruins)10 ➔ 04 ➔ 2803 ➔ 21 ➔ 19Matilda Handgun Extended Mag

Looking for every safe combination?
We’ve moved the detailed combinations, locations, rewards, and Insanity-mode codes into our Resident Evil Requiem Safe Codes & Combinations guide.


3. Blood Specimen Analyzer Sequence

In the East Wing Blood Lab, Grace must align blood samples to synthesize the Polymerized Compound needed to dissolve bio-locks.

  • Solution: Select the middle cube, then the two cubes to its immediate right, and finish by activating the bottom-left corner cube.

🔫 Weapons Loadout & Priority Upgrades

Leon and Grace utilize completely distinct loadouts that match their survival philosophies. Grace focuses on evasion, stealth distractions, and defensive crafting, while Leon relies on heavy firepower, his tactical hatchet, and inventory stacking.

Grace’s Survival Arsenal

  • Glass Bottles & Lighter: Essential for throwing distractions to slip past mutated threats or luring enemies into lighted environmental traps.
  • Hemolytic Injector: Craftable once reaching the East Wing. Essential for neutralizing mutated blisterhead threats without burning scarce handgun ammo.
    • Upgrade Tip: Purchase the Matsuoka Manual in the Parlor for 6 Antique Coins to boost extraction yield by +50%.

Leon’s Heavy Arsenal

  • Matilda Handgun (Custom VP70): Leon’s reliable starter sidearm.
    • Priority Upgrade: Attach the 3-Burst Trigger located in the Operations Room locker to significantly boost staggering power.
  • Tactical Hatchet: Leon’s primary melee weapon used for parrying incoming attacks, executions, and breaking open wooden cabinets Grace cannot bypass.
  • Requiem Revolver (.44 Magnum): Delivers massive single-target damage capable of stopping boss charges in their tracks. Unlocked in the Lower Sanatorium using the Master Keycard.

🏆 Unlocking Infinite Ammo & Special Content

Postgame unlockables are purchased in the Extra Content Shop using Challenge Points (CP) earned from completing in-game achievements:

  • Infinite Ammo (All Weapons): Clear the main campaign on Hardcore or Insanity difficulty with an ‘S’ Rank (finish under 3 hours with 5 or fewer manual typewriter saves).
  • Indestructible Combat Hatchet: Locate and destroy all 25 Mr. Raccoon statues hidden across a single playthrough.
  • Chicago Typewriter: Clear the campaign on any difficulty without using a single healing item.

💡 Planning your full 2026 gaming calendar? Keep up with all upcoming AAA launch windows and platform news on our 2026 Video Game Release Schedule.

Related Resident Evil Requiem Guides