
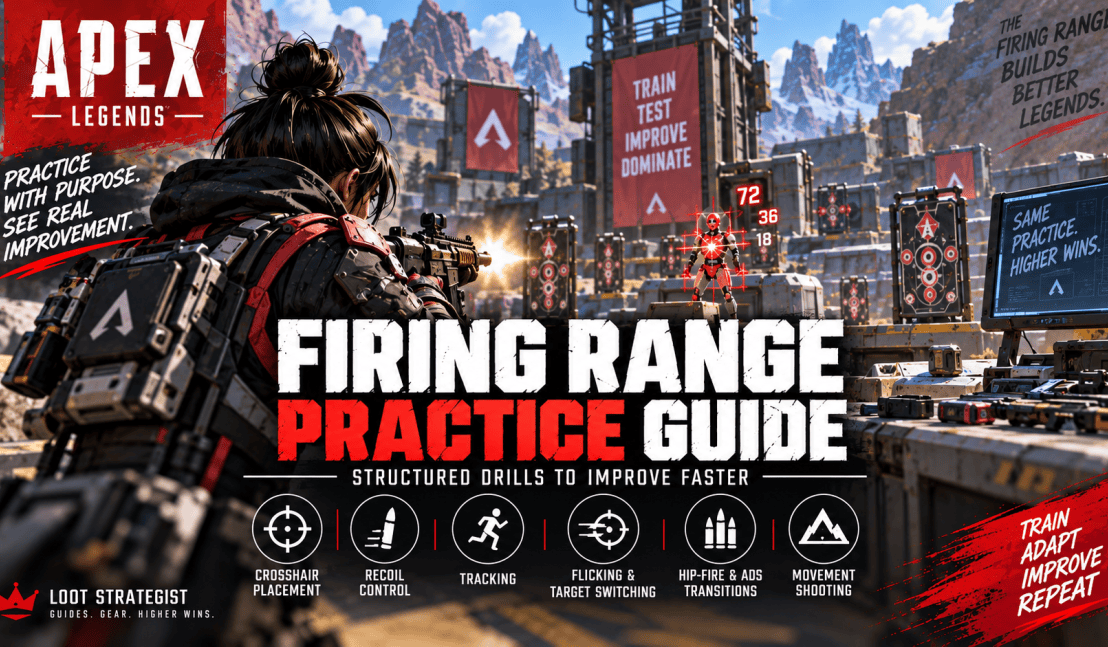
Apex Legends Firing Range Practice Guide: Structured Drills to Improve Faster
The Apex Legends Firing Range becomes much more useful when you stop treating it as a place to empty magazines and start treating it as a training lab.
You can spend 20 minutes shooting targets and leave without knowing whether you improved anything. Or you can spend those same 20 minutes working on one specific weakness, increasing the difficulty in controlled steps, and then testing that skill in a real match.
EA currently recommends the Firing Range for practicing weaker shots, tracking, flicking, recoil, movement, hip-fire, and sensitivity testing. The Range itself was redesigned as an evolving training platform for shooting, movement, weapon experimentation, squad tactics, and combat practice. (EA Help)
That makes it ideal for deliberate practice.
The important part is having a reason for every drill.
Diagnose → Isolate → Drill → Add Pressure → Transfer
This guide shows you how to use that process without turning practice into a second job.
The Training Method
A productive session follows five stages.
Diagnose
Identify the specific problem appearing in your matches.
Isolate
Practice that skill under simple conditions so you can see what is actually going wrong.
Drill
Repeat it with a clear objective instead of shooting randomly.
Add Pressure
Introduce movement, recoil, target switching, distance, or other complications.
Transfer
Take the skill into a real match and see whether it still works when another player is shooting back.
That final step is critical.
The Firing Range gives you a controlled environment. A live match does not.
1. Enter the Range With One Question
Don’t begin with:
“What should I practice?”
Begin with:
“What went wrong in my last few matches?”
Maybe your crosshair repeatedly starts too low.
Maybe you lose moving targets as soon as they change direction.
Maybe your recoil looks controlled until you start strafing.
Maybe your target switches are slow.
Maybe your aim is fine in the Range but falls apart in close combat.
Each problem calls for a different drill.
EA itself recommends using the Range to practice shots you feel weaker at. (EA Help)
That is a better starting point than following the same routine every day regardless of what is actually holding you back.
2. Start With Your Normal Setup
Practice with the settings you normally use in matches.
That includes your:
- sensitivity,
- FOV,
- controller settings,
- keybinds,
- and other relevant controls.
The point is to train the skill you will use in the game—not a temporary configuration that disappears when you queue.
EA’s current settings guidance recommends using the Firing Range to test sensitivity and find a setup that feels comfortable, while noting that there isn’t one setting combination that works for everyone. (EA Help)
So use the Range to test settings when needed.
Once you’ve chosen a configuration to evaluate, stop changing it every few minutes.
Train first. Tweak only when you have a reason.
For the full settings discussion, use your Apex Legends Settings Guide.
3. Drill 1: Crosshair Placement
Crosshair placement is one of the highest-value skills to practice because it reduces how much correction you need when an enemy actually appears.
EA recommends keeping the crosshair where enemies might appear and using the Firing Range to practice those shots. (EA Help)
How to practice
Move around the Range without immediately shooting.
Approach a target or piece of terrain.
Before you reveal the target, place your crosshair where an enemy is most likely to appear.
Then check how much correction is required.
Repeat from different directions.
What you’re measuring
How far did the crosshair have to move?
The less correction needed, the better your starting position.
Increase the difficulty
Start with stationary targets.
Then practice approaching corners.
Then combine the drill with movement.
The objective isn’t speed.
It’s learning to arrive at the fight with your crosshair already close to the right place.
4. Drill 2: Smooth Tracking
Tracking is the ability to keep your aim on a moving target.
EA specifically recommends practicing smooth mouse movement while following moving targets and also practicing while standing or moving. (EA Help)
How to practice
Start by tracking without firing.
Once the movement feels controlled, add shooting.
Then add your own movement.
Watch for three problems
Overshooting — your crosshair passes the target.
Under-correcting — your crosshair repeatedly trails behind.
Jerky movement — you make several large corrections instead of one smooth adjustment.
If you’re constantly overshooting, don’t increase the speed.
Reduce it.
Smooth control comes first.
5. Drill 3: Recoil + Tracking
Stationary recoil practice teaches you how a weapon behaves.
It doesn’t fully prepare you for a moving fight.
This drill combines:
Weapon recoil
Target movement
Your own movement
EA recommends using the Range to become familiar with weapon recoil and to practice shooting while moving. (EA Help)
How to practice
Choose a weapon you regularly use.
Begin against a moving target.
Track while firing.
Then add your own strafing.
Your goal
Keep the target centered while making recoil corrections.
If the aim falls apart, remove one difficulty.
For example:
Moving target + stationary player
before:
Moving target + moving player
That’s what isolation is for.
6. Drill 4: Flicking + Target Switching
Flicking is rapid target acquisition.
Target switching adds another requirement: once you reach the new target, you have to stabilize and fire.
EA recommends flicking between widely separated targets and changing the target order rather than memorizing one sequence. (EA Help)
How to practice
Choose two targets.
Shoot the first.
Move quickly to the second.
Stop accurately.
Shoot.
Then reverse the order.
After that, add a third target.
The useful sequence
Acquire → Stabilize → Fire → Switch
Do not sacrifice the stabilization step simply to make the drill faster.
A fast miss is still a miss.
7. Drill 5: Hip-Fire, ADS and Movement Transfer
Close-range Apex fights can require a different aiming approach from a longer-range engagement.
EA specifically recommends practicing hip-fire for fast, close-range combat. (EA Help)
Instead of practicing hip-fire and ADS as completely separate skills, combine them.
Start close
Track with hip-fire while moving.
Create distance
Transition to ADS when additional precision becomes useful.
Repeat
Move between the two ranges without stopping.
The purpose isn’t to memorize a fixed distance where you “must” switch.
It’s to make your aiming choice deliberate.
For broader movement mechanics, your Apex Legends Movement Guide is the better resource.
8. Increase Difficulty in Layers
A good drill becomes harder gradually.
Use this progression:
Level 1 — Control
Perform the skill without unnecessary movement.
Level 2 — Consistency
Repeat it without big mistakes.
Level 3 — Movement
Add your own movement or target movement.
Level 4 — Pressure
Introduce recoil, multiple targets, target switching, or changing distances.
Level 5 — Transfer
Use the skill in a real match.
If you skip directly from Level 1 to Level 5, you may not know what broke.
Layered progression tells you exactly where the problem starts.
9. Don’t Chase Range Scores
A number can be useful if the test is consistent.
A random target count isn’t.
Instead of asking:
“Did I hit more targets today?”
ask:
Did I overshoot less?
Did I lose the moving target less often?
Did the recoil stay controlled while moving?
Did I stabilize faster after switching targets?
Did the skill survive my next matches?
Those are more meaningful measurements because they connect directly to the problem you’re trying to solve.
10. Build a Problem → Drill → Progression Routine
This is where structured practice becomes much more useful than random warm-ups.
| Problem | Start with | Add difficulty |
|---|---|---|
| Crosshair starts too low | Pre-aim targets | Add corners and movement |
| Overshooting targets | Slow flicks | Increase speed and distance |
| Losing moving targets | Smooth tracking | Add your own movement |
| Recoil breaks while moving | Stationary recoil | Add tracking and strafing |
| Slow target switches | Two targets | Add three targets and movement |
| Close-range misses | Hip-fire tracking | Add direction changes |
| Good Range aim, poor match aim | Movement + target switching | Add terrain and live combat |
This should be one of the most useful parts of the article because it gives you a direct answer to:
“What should I practice today?”
11. The Firing Range Should Be a Laboratory
Use the Range to answer questions.
Not just to shoot things.
For example:
Does my recoil remain controlled while strafing?
Can I track a target after changing direction?
How accurate are my flicks when the targets are farther apart?
Can I maintain hip-fire while moving?
How quickly can I acquire a second target?
That mindset changes the entire session.
Instead of practicing for a vague goal like “better aim,” you’re testing a specific skill.
EA’s current guidance supports using the Firing Range for this kind of targeted practice, including tracking, flicking, recoil, and sensitivity testing. (EA Help)
12. Use the Range to Learn Your Weapons
You don’t need to practice every weapon in the game during every session.
Choose one you actually use regularly.
Study:
Recoil
Firing behavior
Practical range
Tracking feel
Target-switching behavior
EA notes that weapons have different characteristics, including firing speed, bullet drop, and recoil. (EA Help)
The useful outcome is familiarity.
When you already understand how a weapon behaves, you have more attention available for the rest of the fight.
You can then add a second weapon and practice switching between them.
13. Keep Settings Testing Separate From Skill Training
The Firing Range is a perfectly good place to test sensitivity.
But changing sensitivity during a tracking drill makes the result harder to interpret.
Do this instead:
Test setting → choose value → run drill → evaluate
rather than:
Miss → change sensitivity → miss → change sensitivity again
The Apex Legends Settings Guide covers sensitivity, FOV, controller settings, and other configuration decisions in greater detail.
This page should remain about practice methodology.
14. The 10-Minute Warm-Up
When you simply want to prepare before playing, don’t overcomplicate it.
Minutes 1–2
Crosshair placement.
Minutes 3–4
Smooth tracking.
Minutes 5–6
Recoil with a familiar weapon.
Minutes 7–8
Flicks and target switching.
Minutes 9–10
Movement shooting or hip-fire.
Then play.
The warm-up is not supposed to exhaust you.
It’s there to get your hands and eyes working before a match.
EA recommends regular aim practice and specifically points players toward the Firing Range for weaker shots and core aiming skills. (EA Help)
15. The 20-Minute Focus Session
When you’re actually trying to improve a weakness, use a more deliberate structure.
Five minutes — Isolate
Work on the core mechanic without unnecessary complexity.
Five minutes — Repeat
Do the same task until the movement becomes more consistent.
Five minutes — Add pressure
Introduce movement, recoil, target switching, or distance.
Five minutes — Transfer
Build a more realistic sequence using movement and terrain, then take the skill into matches.
If you know your specific weakness already, this is more valuable than simply repeating a generic warm-up for twice as long.
16. Practice the Skill You Actually Need
This is where many training sessions go wrong.
You are already good at tracking.
You enjoy tracking.
So you spend another 20 minutes tracking targets.
Meanwhile, you keep overshooting every target switch.
Your practice feels productive.
Your weakness doesn’t change.
Instead:
Spend most of your deliberate practice on the skill that keeps costing you fights.
Maintain strengths.
Prioritize weaknesses.
17. The Range Cannot Reproduce a Real Match
This is one of the most important limitations to understand.
The Firing Range can isolate mechanics.
A real match adds:
Pressure
Unpredictable movement
Multiple targets
Sound
Limited resources
Positioning
Decision-making
Consequences for failure
That means Range performance is useful evidence, but it isn’t the final test.
The final test is whether you perform the skill when someone is trying to kill you.
18. Use the Transfer Ladder
Move from simple to realistic conditions:
Range → More Complex Range Drill → Live Match
For example:
Tracking
Stationary tracking
→ moving target
→ your own movement
→ movement + recoil
→ live fight
Target switching
Two targets
→ three targets
→ movement
→ movement + cover
→ live fight
Recoil
Wall pattern
→ stationary target
→ moving target
→ movement + tracking
→ live fight
That progression is more useful than assuming one successful Range drill means the skill is finished.
19. Review the Result After a Match
After your first few matches, ask:
Did the skill appear naturally?
If yes, increase the drill difficulty next time.
If no, identify where it broke.
For example:
“Tracking was fine in the Range but fell apart when the enemy changed direction.”
That’s useful.
So is:
“Recoil was controlled until I started strafing.”
Or:
“I could switch targets quickly, but I needed too many corrections afterward.”
Those observations tell you what to train next.
That’s the Transfer stage of the framework.
20. Use Firing Range Features Without Building Your Routine Around Them
EA has continued adding and adjusting Firing Range tools over time. For example, the 2026 Overclocked update added Range settings including Infinite Healing, Self-Revive, and a Hardlight rebuild button. (EA)
Those features can reduce downtime during certain exercises.
But they should remain optional.
The exact Range interface and available tools can change with future updates.
Your core routine should continue to work without relying on one temporary button or menu option.
Common Firing Range Practice Mistakes
Practicing without a goal
You spend time shooting without knowing what you’re trying to improve.
Changing sensitivity constantly
You can’t tell whether your mechanics or settings caused the difference.
Training only stationary aim
Your match opponents move.
Increasing difficulty too quickly
You introduce several problems before mastering the original one.
Practicing only what feels comfortable
The weakness remains untouched.
Chasing scores instead of consistency
A bigger number doesn’t necessarily mean better transfer.
Staying in the Range forever
Practice should eventually return to real matches.
Blaming aim for every death
Sometimes positioning, timing, or fight selection is the actual problem.
A Simple Firing Range Practice Checklist
Before the session:
What specific weakness am I training?
During the drill:
Can I perform the basic skill consistently?
When it becomes comfortable:
What is the next difficulty layer?
After the session:
What improved?
What still breaks?
In your next match:
Did the skill transfer?
If you can’t answer those questions, the session probably needs a clearer objective.
Final Thoughts
The Firing Range is valuable because it lets you isolate problems that are difficult to see in the middle of a match.
Use that advantage.
Don’t enter simply because you feel like your aim is “off.”
Identify what is actually failing.
Isolate it.
Practice it.
Add movement or pressure.
Then take it back into a match.
The most useful practice cycle is:
Diagnose → Isolate → Drill → Add Pressure → Transfer
That gives every session a purpose.
You don’t need twelve complicated drills.
You don’t need a two-hour warm-up.
And you don’t need to chase a perfect Range score.
You need to know what you’re fixing.
Then make the exercise just difficult enough to expose whether the problem is actually improving.
The Firing Range is where you isolate the skill.
The match is where you prove it.
Apex Legends Firing Range Cheat Sheet
Need a quick warm-up?
10 minutes:
Crosshair → Tracking → Recoil → Target Switching → Movement
Need deliberate practice?
20 minutes:
Isolate → Repeat → Add Pressure → Transfer
Not sure what to train?
Review your last matches.
Keep overshooting?
Flick control.
Lose moving targets?
Tracking.
Lose control while strafing?
Recoil + movement.
Slow target switches?
Two- and three-target drills.
Good Range aim, poor match aim?
Add pressure and focus on transfer.
Frequently Asked Questions
What should I practice first in the Apex Legends Firing Range?
Start with the skill that is causing the most obvious problem in your matches. Crosshair placement, tracking, recoil, and target switching are good starting points. EA specifically recommends using the Range for weaker shots and aim practice. (EA Help)
How long should I practice in the Firing Range?
A 10-minute routine works well as a warm-up. For deliberate skill improvement, a focused 20-minute session is often enough when you’re working on one specific weakness.
What is the best Firing Range drill?
There isn’t one universal best drill. Different exercises train different skills. The best drill is the one that directly addresses the mistake you’re making in real matches.
How do I practice recoil?
Choose a weapon you regularly use, observe its recoil at the wall or against targets, then repeat while making controlled corrections. Once that feels consistent, add tracking and movement. EA recommends using the Firing Range to become familiar with weapon recoil. (EA Help)
How do I practice tracking?
Begin by following moving targets without firing, then add shooting and your own movement. EA specifically recommends smooth tracking practice against moving targets. (EA Help)
How do I practice flicking?
Use targets at different positions, move between them, and focus on stopping accurately before trying to increase speed. Change the target order so the drill requires genuine acquisition rather than memorization. EA recommends varying the target pattern during flick practice. (EA Help)
Should I practice with one weapon or many?
Start with one or two weapons you actually use often. Familiarity with their recoil and firing behavior makes practice easier to evaluate. Add variety after the fundamentals are consistent.
Should I change my sensitivity in the Firing Range?
The Range is an appropriate place to test sensitivity, but make deliberate changes rather than changing it after every missed shot. EA specifically recommends the Firing Range for sensitivity testing. (EA Help)
Can I practice movement in the Firing Range?
Yes. EA describes the Range as a training environment for shooting and movement, and its current aim guidance recommends tracking targets while moving. (EA Help)
Can I practice with friends?
Yes. EA designed the Firing Range to support squad practice and combat training with friends, including duels and combat dummies. (EA)
Why is my aim good in the Firing Range but bad in matches?
The Range isolates mechanics. Matches add pressure, unpredictable movement, multiple enemies, positioning, audio, and consequences. Increase drill difficulty gradually, then test the skill in real matches.
Should I practice every day?
You don’t need to. Consistent, purposeful sessions are more useful than long sessions without a goal. A short warm-up before matches and occasional focused training can be enough.
How do I know whether my training is working?
Measure the mistakes rather than just the number of targets hit. Look for fewer overshoots, better target retention, tighter recoil control, cleaner target switches, or better transfer into actual fights.
Sources & Updates
Last reviewed: September 14, 2026
EA’s current Best Settings for Apex Legends on PC guide was used to verify documented recommendations involving Firing Range practice, crosshair placement, tracking, recoil, flicking, hip-fire, movement, weapon characteristics, and sensitivity testing. (EA Help)
EA’s Arsenal update introduced the redesigned Firing Range as an evolving training platform for warming up, shooting and movement practice, weapon experimentation, squad tactics, combat dummies, duels, and simulated combat. (EA)
EA’s Overclocked Patch Notes document additional Firing Range settings introduced in 2026, including Infinite Healing, Self-Revive, and a Hardlight rebuild button. These features are treated as optional conveniences rather than requirements because the Range continues to evolve. (EA)
EA’s current Apex news feed confirms that the game continues to receive frequent updates, with Marked Midseason Designer’s Notes published September 10, 2026 and other recent game updates. This guide therefore focuses on durable practice methodology instead of temporary Range features or weapon-meta recommendations. (EA)
The training methodology in this guide—Diagnose → Isolate → Drill → Add Pressure → Transfer—is Loot Strategist editorial analysis designed to turn Firing Range time into measurable practice rather than random warm-up shooting.
For related guides, see the Apex Legends Aim Guide, Apex Legends Settings Guide, Apex Legends Movement Guide, Apex Legends Positioning Guide, and Apex Legends Fight Guide.
 Gaming Guides, Builds, Loot & Strategies