Tag: Apex Legends Aim Drills

Apex Legends Firing Range Guide: Practice Drills

Apex Legends Firing Range Guide: Practice Drills

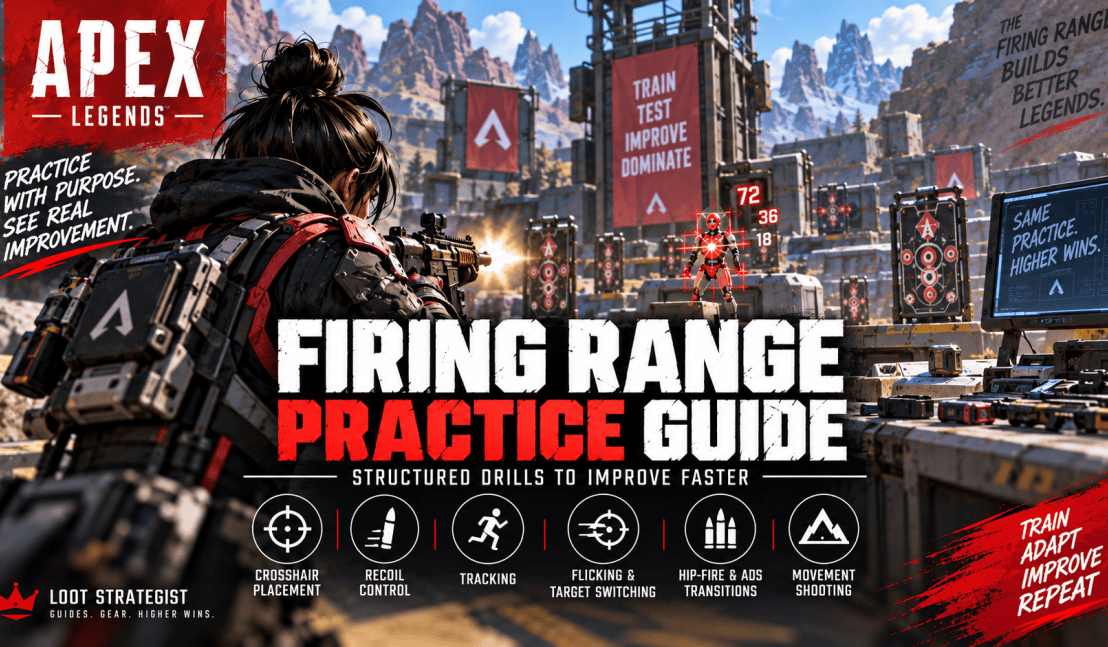
Apex Legends Firing Range Practice Guide: Structured Drills to Improve Faster

The Apex Legends Firing Range becomes much more useful when you stop treating it as a place to empty magazines and start treating it as a training lab.

You can spend 20 minutes shooting targets and leave without knowing whether you improved anything. Or you can spend those same 20 minutes working on one specific weakness, increasing the difficulty in controlled steps, and then testing that skill in a real match.

EA currently recommends the Firing Range for practicing weaker shots, tracking, flicking, recoil, movement, hip-fire, and sensitivity testing. The Range itself was redesigned as an evolving training platform for shooting, movement, weapon experimentation, squad tactics, and combat practice. (EA Help)

That makes it ideal for deliberate practice.

The important part is having a reason for every drill.

Diagnose → Isolate → Drill → Add Pressure → Transfer

This guide shows you how to use that process without turning practice into a second job.


The Training Method

A productive session follows five stages.

Diagnose

Identify the specific problem appearing in your matches.

Isolate

Practice that skill under simple conditions so you can see what is actually going wrong.

Drill

Repeat it with a clear objective instead of shooting randomly.

Add Pressure

Introduce movement, recoil, target switching, distance, or other complications.

Transfer

Take the skill into a real match and see whether it still works when another player is shooting back.

That final step is critical.

The Firing Range gives you a controlled environment. A live match does not.


1. Enter the Range With One Question

Don’t begin with:

“What should I practice?”

Begin with:

“What went wrong in my last few matches?”

Maybe your crosshair repeatedly starts too low.

Maybe you lose moving targets as soon as they change direction.

Maybe your recoil looks controlled until you start strafing.

Maybe your target switches are slow.

Maybe your aim is fine in the Range but falls apart in close combat.

Each problem calls for a different drill.

EA itself recommends using the Range to practice shots you feel weaker at. (EA Help)

That is a better starting point than following the same routine every day regardless of what is actually holding you back.


2. Start With Your Normal Setup

Practice with the settings you normally use in matches.

That includes your:

  • sensitivity,
  • FOV,
  • controller settings,
  • keybinds,
  • and other relevant controls.

The point is to train the skill you will use in the game—not a temporary configuration that disappears when you queue.

EA’s current settings guidance recommends using the Firing Range to test sensitivity and find a setup that feels comfortable, while noting that there isn’t one setting combination that works for everyone. (EA Help)

So use the Range to test settings when needed.

Once you’ve chosen a configuration to evaluate, stop changing it every few minutes.

Train first. Tweak only when you have a reason.

For the full settings discussion, use your Apex Legends Settings Guide.


3. Drill 1: Crosshair Placement

Crosshair placement is one of the highest-value skills to practice because it reduces how much correction you need when an enemy actually appears.

EA recommends keeping the crosshair where enemies might appear and using the Firing Range to practice those shots. (EA Help)

How to practice

Move around the Range without immediately shooting.

Approach a target or piece of terrain.

Before you reveal the target, place your crosshair where an enemy is most likely to appear.

Then check how much correction is required.

Repeat from different directions.

What you’re measuring

How far did the crosshair have to move?

The less correction needed, the better your starting position.

Increase the difficulty

Start with stationary targets.

Then practice approaching corners.

Then combine the drill with movement.

The objective isn’t speed.

It’s learning to arrive at the fight with your crosshair already close to the right place.


4. Drill 2: Smooth Tracking

Tracking is the ability to keep your aim on a moving target.

EA specifically recommends practicing smooth mouse movement while following moving targets and also practicing while standing or moving. (EA Help)

How to practice

Start by tracking without firing.

Once the movement feels controlled, add shooting.

Then add your own movement.

Watch for three problems

Overshooting — your crosshair passes the target.

Under-correcting — your crosshair repeatedly trails behind.

Jerky movement — you make several large corrections instead of one smooth adjustment.

If you’re constantly overshooting, don’t increase the speed.

Reduce it.

Smooth control comes first.


5. Drill 3: Recoil + Tracking

Stationary recoil practice teaches you how a weapon behaves.

It doesn’t fully prepare you for a moving fight.

This drill combines:

Weapon recoil

Target movement

Your own movement

EA recommends using the Range to become familiar with weapon recoil and to practice shooting while moving. (EA Help)

How to practice

Choose a weapon you regularly use.

Begin against a moving target.

Track while firing.

Then add your own strafing.

Your goal

Keep the target centered while making recoil corrections.

If the aim falls apart, remove one difficulty.

For example:

Moving target + stationary player

before:

Moving target + moving player

That’s what isolation is for.


6. Drill 4: Flicking + Target Switching

Flicking is rapid target acquisition.

Target switching adds another requirement: once you reach the new target, you have to stabilize and fire.

EA recommends flicking between widely separated targets and changing the target order rather than memorizing one sequence. (EA Help)

How to practice

Choose two targets.

Shoot the first.

Move quickly to the second.

Stop accurately.

Shoot.

Then reverse the order.

After that, add a third target.

The useful sequence

Acquire → Stabilize → Fire → Switch

Do not sacrifice the stabilization step simply to make the drill faster.

A fast miss is still a miss.


7. Drill 5: Hip-Fire, ADS and Movement Transfer

Close-range Apex fights can require a different aiming approach from a longer-range engagement.

EA specifically recommends practicing hip-fire for fast, close-range combat. (EA Help)

Instead of practicing hip-fire and ADS as completely separate skills, combine them.

Start close

Track with hip-fire while moving.

Create distance

Transition to ADS when additional precision becomes useful.

Repeat

Move between the two ranges without stopping.

The purpose isn’t to memorize a fixed distance where you “must” switch.

It’s to make your aiming choice deliberate.

For broader movement mechanics, your Apex Legends Movement Guide is the better resource.


8. Increase Difficulty in Layers

A good drill becomes harder gradually.

Use this progression:

Level 1 — Control

Perform the skill without unnecessary movement.

Level 2 — Consistency

Repeat it without big mistakes.

Level 3 — Movement

Add your own movement or target movement.

Level 4 — Pressure

Introduce recoil, multiple targets, target switching, or changing distances.

Level 5 — Transfer

Use the skill in a real match.

If you skip directly from Level 1 to Level 5, you may not know what broke.

Layered progression tells you exactly where the problem starts.


9. Don’t Chase Range Scores

A number can be useful if the test is consistent.

A random target count isn’t.

Instead of asking:

“Did I hit more targets today?”

ask:

Did I overshoot less?

Did I lose the moving target less often?

Did the recoil stay controlled while moving?

Did I stabilize faster after switching targets?

Did the skill survive my next matches?

Those are more meaningful measurements because they connect directly to the problem you’re trying to solve.


10. Build a Problem → Drill → Progression Routine

This is where structured practice becomes much more useful than random warm-ups.

ProblemStart withAdd difficulty
Crosshair starts too lowPre-aim targetsAdd corners and movement
Overshooting targetsSlow flicksIncrease speed and distance
Losing moving targetsSmooth trackingAdd your own movement
Recoil breaks while movingStationary recoilAdd tracking and strafing
Slow target switchesTwo targetsAdd three targets and movement
Close-range missesHip-fire trackingAdd direction changes
Good Range aim, poor match aimMovement + target switchingAdd terrain and live combat

This should be one of the most useful parts of the article because it gives you a direct answer to:

“What should I practice today?”


11. The Firing Range Should Be a Laboratory

Use the Range to answer questions.

Not just to shoot things.

For example:

Does my recoil remain controlled while strafing?

Can I track a target after changing direction?

How accurate are my flicks when the targets are farther apart?

Can I maintain hip-fire while moving?

How quickly can I acquire a second target?

That mindset changes the entire session.

Instead of practicing for a vague goal like “better aim,” you’re testing a specific skill.

EA’s current guidance supports using the Firing Range for this kind of targeted practice, including tracking, flicking, recoil, and sensitivity testing. (EA Help)


12. Use the Range to Learn Your Weapons

You don’t need to practice every weapon in the game during every session.

Choose one you actually use regularly.

Study:

Recoil

Firing behavior

Practical range

Tracking feel

Target-switching behavior

EA notes that weapons have different characteristics, including firing speed, bullet drop, and recoil. (EA Help)

The useful outcome is familiarity.

When you already understand how a weapon behaves, you have more attention available for the rest of the fight.

You can then add a second weapon and practice switching between them.


13. Keep Settings Testing Separate From Skill Training

The Firing Range is a perfectly good place to test sensitivity.

But changing sensitivity during a tracking drill makes the result harder to interpret.

Do this instead:

Test setting → choose value → run drill → evaluate

rather than:

Miss → change sensitivity → miss → change sensitivity again

The Apex Legends Settings Guide covers sensitivity, FOV, controller settings, and other configuration decisions in greater detail.

This page should remain about practice methodology.


14. The 10-Minute Warm-Up

When you simply want to prepare before playing, don’t overcomplicate it.

Minutes 1–2

Crosshair placement.

Minutes 3–4

Smooth tracking.

Minutes 5–6

Recoil with a familiar weapon.

Minutes 7–8

Flicks and target switching.

Minutes 9–10

Movement shooting or hip-fire.

Then play.

The warm-up is not supposed to exhaust you.

It’s there to get your hands and eyes working before a match.

EA recommends regular aim practice and specifically points players toward the Firing Range for weaker shots and core aiming skills. (EA Help)


15. The 20-Minute Focus Session

When you’re actually trying to improve a weakness, use a more deliberate structure.

Five minutes — Isolate

Work on the core mechanic without unnecessary complexity.

Five minutes — Repeat

Do the same task until the movement becomes more consistent.

Five minutes — Add pressure

Introduce movement, recoil, target switching, or distance.

Five minutes — Transfer

Build a more realistic sequence using movement and terrain, then take the skill into matches.

If you know your specific weakness already, this is more valuable than simply repeating a generic warm-up for twice as long.


16. Practice the Skill You Actually Need

This is where many training sessions go wrong.

You are already good at tracking.

You enjoy tracking.

So you spend another 20 minutes tracking targets.

Meanwhile, you keep overshooting every target switch.

Your practice feels productive.

Your weakness doesn’t change.

Instead:

Spend most of your deliberate practice on the skill that keeps costing you fights.

Maintain strengths.

Prioritize weaknesses.


17. The Range Cannot Reproduce a Real Match

This is one of the most important limitations to understand.

The Firing Range can isolate mechanics.

A real match adds:

Pressure

Unpredictable movement

Multiple targets

Sound

Limited resources

Positioning

Decision-making

Consequences for failure

That means Range performance is useful evidence, but it isn’t the final test.

The final test is whether you perform the skill when someone is trying to kill you.


18. Use the Transfer Ladder

Move from simple to realistic conditions:

Range → More Complex Range Drill → Live Match

For example:

Tracking

Stationary tracking
→ moving target
→ your own movement
→ movement + recoil
→ live fight

Target switching

Two targets
→ three targets
→ movement
→ movement + cover
→ live fight

Recoil

Wall pattern
→ stationary target
→ moving target
→ movement + tracking
→ live fight

That progression is more useful than assuming one successful Range drill means the skill is finished.


19. Review the Result After a Match

After your first few matches, ask:

Did the skill appear naturally?

If yes, increase the drill difficulty next time.

If no, identify where it broke.

For example:

“Tracking was fine in the Range but fell apart when the enemy changed direction.”

That’s useful.

So is:

“Recoil was controlled until I started strafing.”

Or:

“I could switch targets quickly, but I needed too many corrections afterward.”

Those observations tell you what to train next.

That’s the Transfer stage of the framework.


20. Use Firing Range Features Without Building Your Routine Around Them

EA has continued adding and adjusting Firing Range tools over time. For example, the 2026 Overclocked update added Range settings including Infinite Healing, Self-Revive, and a Hardlight rebuild button. (EA)

Those features can reduce downtime during certain exercises.

But they should remain optional.

The exact Range interface and available tools can change with future updates.

Your core routine should continue to work without relying on one temporary button or menu option.


Common Firing Range Practice Mistakes

Practicing without a goal

You spend time shooting without knowing what you’re trying to improve.

Changing sensitivity constantly

You can’t tell whether your mechanics or settings caused the difference.

Training only stationary aim

Your match opponents move.

Increasing difficulty too quickly

You introduce several problems before mastering the original one.

Practicing only what feels comfortable

The weakness remains untouched.

Chasing scores instead of consistency

A bigger number doesn’t necessarily mean better transfer.

Staying in the Range forever

Practice should eventually return to real matches.

Blaming aim for every death

Sometimes positioning, timing, or fight selection is the actual problem.


A Simple Firing Range Practice Checklist

Before the session:

What specific weakness am I training?

During the drill:

Can I perform the basic skill consistently?

When it becomes comfortable:

What is the next difficulty layer?

After the session:

What improved?

What still breaks?

In your next match:

Did the skill transfer?

If you can’t answer those questions, the session probably needs a clearer objective.


Final Thoughts

The Firing Range is valuable because it lets you isolate problems that are difficult to see in the middle of a match.

Use that advantage.

Don’t enter simply because you feel like your aim is “off.”

Identify what is actually failing.

Isolate it.

Practice it.

Add movement or pressure.

Then take it back into a match.

The most useful practice cycle is:

Diagnose → Isolate → Drill → Add Pressure → Transfer

That gives every session a purpose.

You don’t need twelve complicated drills.

You don’t need a two-hour warm-up.

And you don’t need to chase a perfect Range score.

You need to know what you’re fixing.

Then make the exercise just difficult enough to expose whether the problem is actually improving.

The Firing Range is where you isolate the skill.

The match is where you prove it.


Apex Legends Firing Range Cheat Sheet

Need a quick warm-up?

10 minutes:

Crosshair → Tracking → Recoil → Target Switching → Movement

Need deliberate practice?

20 minutes:

Isolate → Repeat → Add Pressure → Transfer

Not sure what to train?

Review your last matches.

Keep overshooting?

Flick control.

Lose moving targets?

Tracking.

Lose control while strafing?

Recoil + movement.

Slow target switches?

Two- and three-target drills.

Good Range aim, poor match aim?

Add pressure and focus on transfer.


Frequently Asked Questions

What should I practice first in the Apex Legends Firing Range?

Start with the skill that is causing the most obvious problem in your matches. Crosshair placement, tracking, recoil, and target switching are good starting points. EA specifically recommends using the Range for weaker shots and aim practice. (EA Help)

How long should I practice in the Firing Range?

A 10-minute routine works well as a warm-up. For deliberate skill improvement, a focused 20-minute session is often enough when you’re working on one specific weakness.

What is the best Firing Range drill?

There isn’t one universal best drill. Different exercises train different skills. The best drill is the one that directly addresses the mistake you’re making in real matches.

How do I practice recoil?

Choose a weapon you regularly use, observe its recoil at the wall or against targets, then repeat while making controlled corrections. Once that feels consistent, add tracking and movement. EA recommends using the Firing Range to become familiar with weapon recoil. (EA Help)

How do I practice tracking?

Begin by following moving targets without firing, then add shooting and your own movement. EA specifically recommends smooth tracking practice against moving targets. (EA Help)

How do I practice flicking?

Use targets at different positions, move between them, and focus on stopping accurately before trying to increase speed. Change the target order so the drill requires genuine acquisition rather than memorization. EA recommends varying the target pattern during flick practice. (EA Help)

Should I practice with one weapon or many?

Start with one or two weapons you actually use often. Familiarity with their recoil and firing behavior makes practice easier to evaluate. Add variety after the fundamentals are consistent.

Should I change my sensitivity in the Firing Range?

The Range is an appropriate place to test sensitivity, but make deliberate changes rather than changing it after every missed shot. EA specifically recommends the Firing Range for sensitivity testing. (EA Help)

Can I practice movement in the Firing Range?

Yes. EA describes the Range as a training environment for shooting and movement, and its current aim guidance recommends tracking targets while moving. (EA Help)

Can I practice with friends?

Yes. EA designed the Firing Range to support squad practice and combat training with friends, including duels and combat dummies. (EA)

Why is my aim good in the Firing Range but bad in matches?

The Range isolates mechanics. Matches add pressure, unpredictable movement, multiple enemies, positioning, audio, and consequences. Increase drill difficulty gradually, then test the skill in real matches.

Should I practice every day?

You don’t need to. Consistent, purposeful sessions are more useful than long sessions without a goal. A short warm-up before matches and occasional focused training can be enough.

How do I know whether my training is working?

Measure the mistakes rather than just the number of targets hit. Look for fewer overshoots, better target retention, tighter recoil control, cleaner target switches, or better transfer into actual fights.


Sources & Updates

Last reviewed: September 14, 2026

EA’s current Best Settings for Apex Legends on PC guide was used to verify documented recommendations involving Firing Range practice, crosshair placement, tracking, recoil, flicking, hip-fire, movement, weapon characteristics, and sensitivity testing. (EA Help)

EA’s Arsenal update introduced the redesigned Firing Range as an evolving training platform for warming up, shooting and movement practice, weapon experimentation, squad tactics, combat dummies, duels, and simulated combat. (EA)

EA’s Overclocked Patch Notes document additional Firing Range settings introduced in 2026, including Infinite Healing, Self-Revive, and a Hardlight rebuild button. These features are treated as optional conveniences rather than requirements because the Range continues to evolve. (EA)

EA’s current Apex news feed confirms that the game continues to receive frequent updates, with Marked Midseason Designer’s Notes published September 10, 2026 and other recent game updates. This guide therefore focuses on durable practice methodology instead of temporary Range features or weapon-meta recommendations. (EA)

The training methodology in this guide—Diagnose → Isolate → Drill → Add Pressure → Transfer—is Loot Strategist editorial analysis designed to turn Firing Range time into measurable practice rather than random warm-up shooting.

For related guides, see the Apex Legends Aim Guide, Apex Legends Settings Guide, Apex Legends Movement Guide, Apex Legends Positioning Guide, and Apex Legends Fight Guide.
Apex Legends Aim Guide: Recoil Control, Tracking, Flicking & Aim Drills

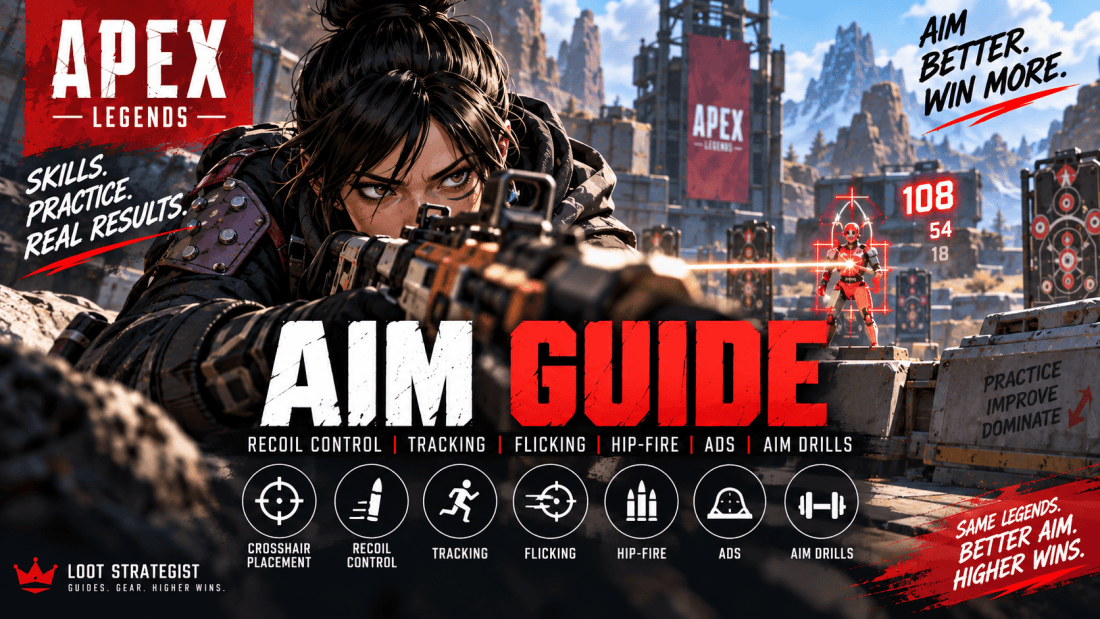
Apex Legends Aim Guide: Recoil Control, Tracking, Flicking & Aim Drills

Good aim in Apex Legends is not just about moving your crosshair onto an enemy quickly.

You have to acquire targets, track players who are moving, control recoil, switch between enemies, choose between hip-fire and ADS, and keep your aim functional while your own character is moving. A player can have excellent raw mechanics and still miss because their crosshair started in the wrong place, their corrections were too large, or they were taking a shot that their position made unnecessarily difficult.

That is why aim is better understood as a group of skills rather than one talent.

This Apex Legends aim guide focuses on the parts you can actually train: crosshair placement, tracking, recoil control, flicking, hip-fire, ADS, target switching, movement shooting, and Firing Range drills.

The most useful approach is not to practice everything at once.

Find the miss. Identify the cause. Train that skill.


The Aim Framework

Think of aiming as four stages:

Acquire

Get your crosshair onto the target efficiently.

Track

Keep the crosshair with the target as they move.

Control

Manage recoil, corrections, and your own movement.

Convert

Turn accurate aim into meaningful damage and useful combat pressure.

Acquire → Track → Control → Convert

This framework matters because good aim is not measured by how fast you can move your crosshair.

It is measured by how consistently you can put the crosshair where it needs to be and keep it there long enough to matter.


1. Crosshair Placement Comes First

The easiest way to make aiming easier is to reduce how much aiming you have to do.

Keep your crosshair near the height and location where an enemy is likely to appear.

That means avoiding habits such as:

  • looking at the floor while approaching a doorway,
  • staring at the sky while moving toward a ridge,
  • or entering a room with your crosshair nowhere near a likely enemy position.

EA’s current aim guidance specifically recommends keeping the crosshair where enemies might appear and centering the enemy on screen before shooting. (EA Help)

Good crosshair placement turns some of the reaction into preparation.

Instead of:

Enemy appears → huge crosshair movement → fire

you get:

Enemy appears → small correction → fire

That difference adds up over an entire match.


2. Pre-Aim Common Enemy Positions

Pre-aiming means placing your crosshair where you expect the opponent to appear before they arrive.

This is particularly useful around:

Doorways

Windows

Corners

Stairs

Ledges

Common peek points

You don’t need to know the exact position of the enemy.

You are simply reducing the amount of work required once they appear.

The more familiar you become with common angles and terrain, the more useful this becomes.

That is one reason aim and positioning are closely connected. Your Apex Legends Positioning Guide covers the terrain and angle side of the equation.


3. Don’t Stare at the Crosshair

Where you place your visual attention can change with distance.

EA’s current guidance suggests thinking more about the enemy at close range and the crosshair at longer ranges. (EA Help)

The practical lesson is more useful than treating that as a strict rule.

At close range, you have very little time to react to sudden movement, so maintaining awareness of the character model can help.

At longer ranges, tiny crosshair adjustments matter much more.

Your attention should adapt to the shot rather than following one rigid aiming habit.


4. Tracking: Follow the Target, Don’t Chase It

Tracking means keeping your crosshair on a moving opponent.

It is one of the most important skills in Apex because players constantly strafe, slide, change direction, climb, and reposition.

The common mistake is overreacting to every movement.

A smoother approach is to follow the target’s general path and make smaller corrections.

Think:

Smooth movement first. Correction second.

EA recommends practicing smooth mouse movement while following moving targets in the Firing Range. (EA Help)

The same principle applies to controller players. Constantly slamming the stick from one direction to the other makes it harder to keep the target centered.


5. Track the Enemy’s Movement Pattern

Not every movement change is random.

Players often:

  • strafe left and right,
  • repeat a direction,
  • change direction after taking damage,
  • move toward cover,
  • or commit to a predictable escape.

You don’t need to predict every input.

You only need enough awareness to avoid making your crosshair chase every twitch.

Watch the target’s overall movement, then keep your aim flowing with it.

This becomes particularly useful when fighting around cover, where the enemy’s available movement is already limited by the terrain.


6. Recoil Control Starts With Familiarity

There is no universal recoil movement that works perfectly for every weapon.

EA notes that Apex weapons can differ in recoil, firing behavior, bullet drop, and projectile travel characteristics. (EA Help)

You therefore don’t need to memorize every weapon in the game.

Learn the recoil behavior of the weapons you use often.

Take one into the Firing Range.

Fire at a wall.

Watch how the weapon moves.

Then make controlled corrections while shooting.

Once the basic pattern feels familiar, add movement and target tracking.

The goal is not perfect memorization.

It is making recoil control sufficiently familiar that it doesn’t consume your attention in the middle of a fight.


7. Recoil Control Isn’t Just Pulling Down

Pulling down can be part of recoil control, but it isn’t the whole technique.

Weapons can have horizontal movement as well, and EA’s current guidance specifically discusses moving your aim horizontally while firing as part of managing recoil. (EA Help)

Watch the actual weapon behavior.

Then counter it.

The correction should respond to what the gun is doing rather than follow a memorized “pull down harder” routine.


8. Practice Recoil Before Adding Speed

When learning a weapon, begin slowly.

Your first question should be:

Can I keep the shots grouped?

Then:

Can I maintain that control while tracking?

Then:

Can I maintain it while moving?

That progression matters.

If your recoil control is poor while standing still, adding rapid movement usually hides the problem instead of fixing it.


9. Don’t Fight Recoil With Tension

Overcorrecting is one of the easiest ways to make recoil worse.

You pull too far.

Then correct back.

Then overcorrect again.

The result is:

Overshoot → correction → overshoot → correction

Make the size of your input smaller.

Try:

Smooth → controlled → repeatable

rather than constantly trying to “save” a spray after you’ve already lost control.


10. Flicking Is Fast Target Acquisition

A flick is a rapid movement from one target or point to another.

It is useful when:

  • another enemy appears unexpectedly,
  • a target changes position,
  • you need to switch between opponents,
  • or your initial aim point is far away from the target.

The goal isn’t maximum speed.

A useful flick is:

The fastest movement you can consistently stop on target.

EA recommends practicing flicking between widely spaced targets in the Firing Range and varying the order in which you shoot them. (EA Help)

Start under control.

Increase speed only when accuracy survives.


11. Practice Flicks in Different Directions

Don’t train only left-to-right flicks.

Vary:

Left → Right

Right → Left

Up → Down

Down → Up

Near → Far

Far → Near

Change the sequence so your brain isn’t simply memorizing the route.

The goal is target acquisition.

Not choreography.


12. Hip-Fire vs. ADS: Choose the Tool for the Fight

A common mistake is treating ADS as the “proper” way to aim.

It isn’t.

EA specifically recommends hip-fire for fast, close-range combat. (EA Help)

Hip-fire makes more sense when:

The enemy is very close.

You need maximum freedom of movement.

The fight is happening around tight terrain.

You need to react quickly to a changing target.

ADS makes more sense when:

The target is farther away.

You need more precision.

The situation gives you time to stabilize.

The extra accuracy outweighs the mobility trade-off.

There is no universal distance where you must switch.

Learn to recognize the situation.


13. Don’t ADS Because You’re Panicking

This is an underrated aiming mistake.

An enemy suddenly appears.

You panic.

You immediately ADS.

The enemy is already moving across your screen.

Now you’re trying to combine precise aiming with a fight that demands rapid movement.

The result can be worse than controlled hip-fire.

The better habit is to choose the aiming method deliberately.

More precision isn’t always better precision.


14. Practice Hip-Fire on Purpose

Don’t wait for close-range fights to teach you how to hip-fire.

Practice it.

Start near a target.

Move laterally.

Keep the target centered.

Then add:

Direction changes

Target switching

Slides

Different distances

The objective is to make hip-fire feel like a controlled technique rather than something you panic into when an enemy gets too close.


15. Aim While Moving

Apex doesn’t ask you to aim from a shooting range booth.

You are moving.

Your opponent is moving.

Both sides are trying to survive while dealing damage.

EA’s current aim guidance recommends practicing tracking while moving as well as standing still. (EA Help)

That means your aim training should eventually combine:

Movement + tracking

Movement + recoil

Movement + target switching

The objective is not flashy movement.

It’s keeping your aim functional while making yourself harder to hit.

Your Apex Legends Movement Guide covers the actual movement mechanics separately.


16. Don’t Separate Aiming From Positioning

Not every missed shot is an aim problem.

You may have missed because:

  • you started with poor crosshair placement,
  • you were fighting from an exposed position,
  • the enemy had a better angle,
  • you were trying to shoot at an uncomfortable range,
  • or you were forced to make a difficult correction because your positioning was poor.

Your Apex Legends Positioning Guide covers how to make those shots easier before you take them.

That distinction is important:

Sometimes the best way to improve your aim is to improve the situation you’re aiming from.


17. Target Switching Is Its Own Skill

Staying on one target is only part of combat.

An Apex fight can change in an instant.

You are tracking one player.

Another enemy swings from the side.

Now you must:

Acquire → stabilize → shoot → switch

That is a different skill from pure tracking.

Practice switching between targets at different angles and distances.

Don’t make speed the only objective.

A fast target switch that lands nowhere is just a fast miss.


18. Don’t Overcorrect

Aiming errors are often caused by too much input rather than too little.

You see the target.

You move past them.

You correct.

You pass them again.

This happens when you’re reacting to the crosshair instead of controlling it.

Reduce the size of your corrections.

A useful cue is:

Get close, then refine.

The final few pixels of adjustment should feel much smaller than the original movement.


19. Diagnose the Miss Before You Train

This is where aim practice becomes far more useful.

Instead of saying:

“My aim was bad.”

Ask what actually happened.

Crosshair-placement miss

Your starting position was wrong.

Practice: pre-aim and corner-entry drills.

Overflick

You moved too far.

Practice: slower flicks with deliberate stops.

Underflick

You stopped short.

Practice: gradually increase movement distance.

Tracking miss

You couldn’t keep up with the target.

Practice: smooth tracking.

Recoil miss

Your shots drifted away during sustained fire.

Practice: recoil drills.

Target-switch miss

You couldn’t acquire the second target cleanly.

Practice: two- and three-target switching.

Decision miss

Your mechanics were fine, but the shot selection was poor.

Practice: hip-fire/ADS decisions and realistic fight scenarios.

This is more useful than simply logging more hours.


20. Don’t Blame Aim for a Positioning Mistake

Suppose you miss several shots while fighting from bad cover.

You might conclude:

“I need better aim.”

But the actual problem may be that the enemy had a clean angle while you were exposed.

Likewise, a difficult long-range shot isn’t necessarily proof that your tracking is poor.

Diagnosis matters because you want to train the skill responsible for the failure.

That is the difference between practicing aim and improving aim.


21. Your Settings Should Support Your Aim

Sensitivity matters, but changing settings constantly can become its own bad habit.

EA currently says the best mouse or controller settings depend on personal preference and recommends experimenting to find a comfortable setup. Its current competitive starting points include 3.0–5.0 mouse sensitivity with a 1.0 ADS multiplier, while some competitive controller players use 4-3 sensitivity; EA also recommends Classic response curve as a starting point for newer players. (EA Help)

Treat those numbers as starting points, not universal answers.

Your Apex Legends Settings Guide already covers the broader settings question. This article only needs the practical rule:

Make deliberate changes, test them, then give yourself time to adapt.


22. Stop Changing Sensitivity After Every Bad Game

A bad match doesn’t prove your sensitivity is wrong.

Your performance changes because of:

  • fatigue,
  • target distance,
  • different weapons,
  • positioning,
  • movement,
  • pressure,
  • and simple match-to-match variance.

Constant settings changes prevent consistency from developing.

Make a change because you identified a specific problem.

Then test that change long enough to judge it properly.


23. FOV Changes How Aim Feels

FOV affects the size and visibility of targets on screen.

EA currently recommends experimenting within 90–110 FOV and notes that 110 is common among competitive players. Higher FOV shows more of the surroundings but makes distant targets appear smaller. (EA Help)

That’s another reason not to copy another player’s settings without testing them.

A setting can be excellent for one player and uncomfortable for another.

For the full FOV and sensitivity discussion, use the Apex Legends Settings Guide.


24. Controller Players: Understand Aim Assist Without Overthinking It

EA says aim assist is automatically enabled for console players and PC players using controllers, while mouse-and-keyboard players do not receive it. EA also notes that console aim assist is stronger. (EA Help)

EA currently does not recommend turning aim assist off, although the option exists for players who want to experiment without it in the Firing Range. (EA Help)

For most players, the useful takeaway is simple:

Consistency matters more than constantly changing the assistance settings.

Build your mechanics around the input system you actually use in matches.


25. The Firing Range Should Be a Laboratory

The Firing Range is most useful when you have a question you want to answer.

Not:

“I’ll shoot targets for twenty minutes.”

Instead:

Can I track smoothly?

Can I control this weapon?

Can I switch targets without overshooting?

Can I hip-fire while moving?

Does this sensitivity feel controllable?

EA’s current guidance specifically recommends the Firing Range for testing sensitivity, tracking, flicking, recoil, movement, and related aiming skills. (EA Help)

The more specific the question, the more useful the session.


26. Five Aim Drills Worth Repeating

You don’t need ten different routines.

Five focused drills cover most of the important mechanics.

Drill 1: Crosshair Placement

Move through the Firing Range and pre-aim where targets are likely to appear.

Don’t shoot immediately.

First place the crosshair.

Then acquire the target.

Goal: reduce unnecessary crosshair movement.


Drill 2: Smooth Tracking

Follow moving targets without firing.

Then repeat while firing.

Finally, add your own movement.

Goal: maintain smooth target control without large corrections.

EA specifically recommends moving with your crosshair on moving targets as part of aim practice. (EA Help)


Drill 3: Recoil + Tracking

Choose a familiar weapon.

Track a moving target while controlling recoil.

Start at a comfortable range.

Then increase the difficulty.

Goal: manage weapon movement without losing the target.


Drill 4: Flick + Target Switch

Shoot one target.

Move quickly to a second.

Stabilize.

Shoot.

Then repeat with different target orders.

Goal: acquire new targets quickly without sacrificing accuracy.

EA recommends varying target patterns during flick practice. (EA Help)


Drill 5: Hip-Fire + ADS Transition

Start close enough for hip-fire.

Move while tracking.

Then create distance and switch to ADS when the situation calls for more precision.

Goal: choose the appropriate aiming technique rather than defaulting to one.


27. A Simple 10-Minute Aim Routine

You don’t need an hour-long warm-up before every match.

Try:

Minutes 1–2: Crosshair placement

Minutes 3–4: Tracking

Minutes 5–6: Recoil control

Minutes 7–8: Flicks and target switching

Minutes 9–10: Movement + shooting

Then spend a few extra repetitions on the weakness you identified from your previous session.

That last part matters.

A routine should adapt to your problem rather than become another activity you complete on autopilot.


28. Practice the Miss, Not Just the Mechanic

Suppose you keep missing because you stop your flick too late.

Don’t spend the next hour doing faster flicks.

Slow them down.

Suppose tracking breaks when the target changes direction.

Don’t immediately increase speed.

Practice smoother directional changes.

Suppose recoil is fine until you start moving.

Add movement.

Suppose your Firing Range aim looks good, but your matches don’t.

Practice target switching, movement, and realistic decision-making.

Your training should reproduce the conditions causing the mistake.

That’s how practice becomes specific.


29. Don’t Only Practice What Feels Good

It is easy to spend a session doing the drill you’re already comfortable with.

Tracking feels good.

So you track for 20 minutes.

Meanwhile, you still overshoot every target switch.

Train the weakness.

A useful split is:

Strong skill: maintain

Average skill: improve

Weak skill: prioritize

Your aim gets better when the training session is slightly uncomfortable.


30. Mechanical Aim vs. Combat Aim

There is a difference between being accurate in a controlled drill and being accurate in a live match.

Combat adds:

  • movement,
  • cover,
  • multiple targets,
  • sound,
  • pressure,
  • target prioritization,
  • positioning,
  • and decisions about whether to shoot at all.

That’s why your final practice stage should eventually combine the skills.

Track while moving.

Control recoil while tracking.

Switch targets.

Use the appropriate aiming mode.

Work around terrain.

The closer the drill becomes to a real situation, the more useful the transfer becomes.


31. Aim Is Easier When the Shot Is Easier

This is an important connection between your combat guides.

Good positioning can reduce the mechanical difficulty of a shot.

A strong angle gives you more time.

Cover reduces exposure.

High ground can improve visibility.

A predictable doorway simplifies target acquisition.

Your Apex Legends Positioning Guide explains those concepts in detail.

The lesson here is:

Don’t try to mechanically solve a problem that better positioning could prevent.


32. Common Apex Legends Aim Mistakes

Changing sensitivity constantly

You never give yourself enough time to adapt.

Starting with poor crosshair placement

Your first correction is larger than it needs to be.

Practicing only stationary targets

Real opponents move.

Practicing only flicks

Flicking is only one part of aiming.

ADSing every close-range fight

You may be sacrificing the movement freedom the situation requires.

Overcorrecting

Large inputs create a cycle of misses and corrections.

Ignoring target switching

Real fights rarely involve one perfectly isolated opponent.

Blaming recoil for every miss

The starting crosshair position may be the actual problem.

Training without a goal

Random shooting is harder to measure.

Practicing only strengths

Improvement slows when you never train the weaknesses.


Aim Problems → Fixes at a Glance

ProblemLikely causeBest practice
Crosshair starts too lowPoor placementPre-aim drill
Crosshair flies past targetOverflickSlower flicks
Stop short of targetUnderflickGradually increase movement
Lose moving playersTrackingSmooth tracking
Spray leaves targetRecoil controlRecoil + tracking
Miss after switching targetsAcquisitionTarget-switch drill
Struggle at point-blank rangePoor aiming-mode choiceHip-fire practice
Aim is good in Range but poor in matchesPoor transferMovement + target switching
Miss while peekingPositioning problemReassess cover and angle
Aim feels inconsistent after settings changesConstant tweakingSettle on one setup and test it

This is the part of the guide I’d bookmark.

The most useful question after a bad fight isn’t “How do I aim better?”

It’s:

“What kind of miss was that?”


Final Thoughts

Better aim in Apex Legends isn’t about making your crosshair move as quickly as possible.

It’s about making the correct movement repeatable.

Start with crosshair placement.

Learn to track smoothly.

Understand the recoil of the weapons you actually use.

Practice controlled flicks.

Know when hip-fire makes more sense than ADS.

Switch targets without losing control.

Keep your aim functional while moving.

Then diagnose your misses instead of blindly practicing more.

The most useful progression is:

Acquire → Track → Control → Convert

And the most useful training rule is even simpler:

Don’t practice aim. Practice the miss.

If your crosshair starts in the wrong place, work on placement.

If you overshoot, work on stopping.

If you lose moving targets, work on tracking.

If your spray breaks down, work on recoil.

If your Range performance doesn’t transfer to matches, add movement, pressure, and target switching.

You don’t need perfect aim.

You need reliable aim that holds up when the fight gets messy.

That’s what turns practice into better games.


Apex Legends Aim Cheat Sheet

Before the fight:
Pre-aim → correct crosshair height → choose hip-fire or ADS.

During the fight:
Track smoothly → control recoil → stay aware of movement → switch targets when needed.

After a miss:
Identify the type of error before changing your settings.

In the Firing Range:
Train one specific skill at a time.

For improvement:
Acquire → Track → Control → Convert.

For diagnosis:
Practice the miss, not just the mechanic.


Frequently Asked Questions

How do I improve my aim in Apex Legends?

Identify the type of mistake you’re making, then practice that specific skill. Crosshair placement, tracking, recoil control, flicking, target switching, and movement shooting all require slightly different training. EA currently recommends using the Firing Range for tracking, flicking, recoil practice, sensitivity testing, and related aim work. (EA Help)

What is the best way to control recoil?

Learn the recoil behavior of the weapons you use most often, then make smooth corrections while firing. Don’t rely on a single universal movement because Apex weapons can behave differently. (EA Help)

Should I hip-fire or ADS?

Use the technique that fits the engagement. Hip-fire is particularly useful for fast, close-range fights, while ADS is generally more useful when you have enough space and time to benefit from additional precision. EA specifically recommends practicing hip-fire for fast close-range combat. (EA Help)

How do I improve tracking?

Practice smooth tracking against moving targets before adding your own movement. Once you can stay on target consistently, introduce strafing, direction changes, recoil, and target switching. EA recommends practicing tracking against moving targets in the Firing Range. (EA Help)

How do I get better at flicking?

Start slowly enough that you can stop accurately on the target. Then gradually increase speed and vary the target order so you aren’t memorizing one fixed movement pattern. EA recommends practicing flicks between widely spaced targets and changing the target sequence. (EA Help)

What sensitivity should I use in Apex Legends?

There is no universally correct sensitivity. EA currently lists 3.0–5.0 mouse sensitivity with a 1.0 ADS multiplier as competitive starting points, while noting that personal preference matters. For controller, EA notes that some competitive players use 4-3 sensitivity and recommends Classic response curve as a starting point for newer players. (EA Help)

Is 110 FOV best for Apex Legends?

110 is common among competitive players, but it isn’t automatically best for everyone. EA currently recommends experimenting between 90 and 110 FOV and notes that higher FOV shows more of the environment while making distant targets appear smaller. (EA Help)

Should I turn off aim assist to improve?

EA currently says aim assist is automatically enabled for console players and PC players using controllers and does not recommend turning it off generally, although players can disable it to experiment in the Firing Range. (EA Help)

Why do I aim well in the Firing Range but miss in matches?

Live matches add movement, pressure, multiple targets, positioning, cover, target switching, and decision-making. Add those elements progressively rather than assuming your basic mechanics are broken.

Why do I keep missing even though I practice?

You may be practicing the wrong skill. Review your misses and determine whether the problem is crosshair placement, tracking, recoil, flicking, target switching, aiming-mode choice, or positioning.

How long should I practice aim?

A short, focused session can be enough. A structured 10-minute routine is often more useful than a long session of random shooting, especially when you spend the final minutes working on the weakness you identified.


Sources & Updates

Last reviewed: September 2026

EA’s current Best Settings for Apex Legends on PC guide was used to verify guidance around mouse sensitivity, ADS sensitivity, controller settings, FOV, crosshair placement, tracking, flicking, recoil, hip-fire, weapon behavior, and Firing Range practice. (EA Help)

EA’s current Aim Assist documentation was used to verify controller aim-assist behavior and EA’s current recommendation regarding enabling or disabling aim assist. (EA Help)

EA’s current PC and controller controls documentation was checked for current input terminology. (EA Help)

The training framework in this guide—Acquire → Track → Control → Convert, together with the “practice the miss” diagnostic approach—is Loot Strategist editorial analysis rather than official EA instruction.

This article deliberately avoids temporary weapon rankings, recoil tables, and Legend-specific meta advice so its core aim-training guidance remains useful as Apex Legends changes.

For related guides, see the Apex Legends Settings Guide, Apex Legends Movement Guide, Apex Legends Positioning Guide, Apex Legends Fight Guide, and Apex Legends Team Fighting Guide.