
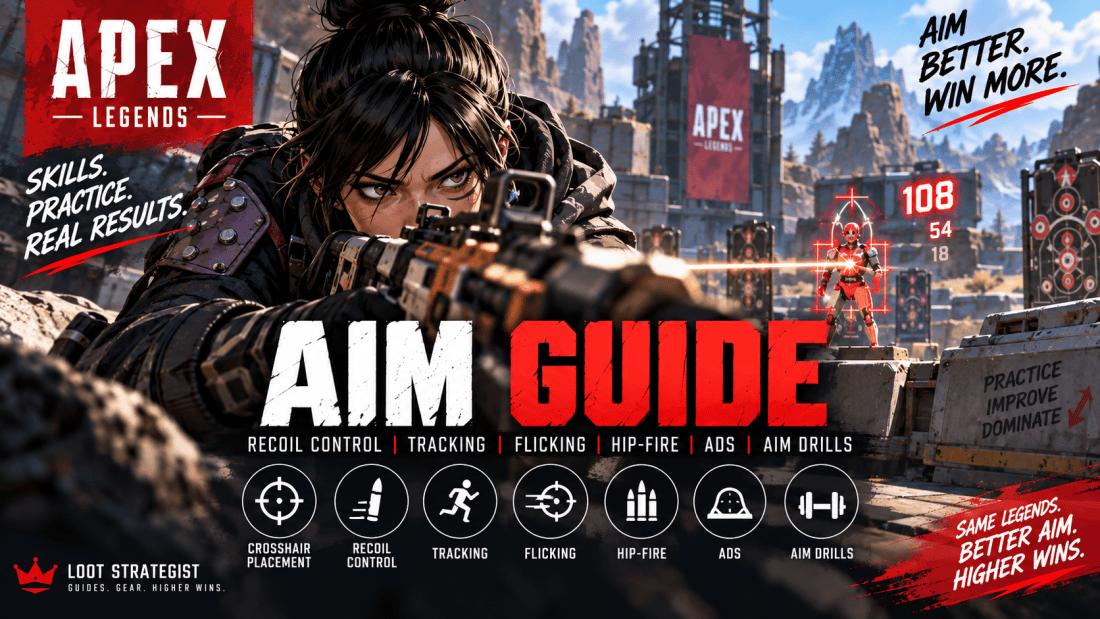
Good aim in Apex Legends is not just about moving your crosshair onto an enemy quickly.
You have to acquire targets, track players who are moving, control recoil, switch between enemies, choose between hip-fire and ADS, and keep your aim functional while your own character is moving. A player can have excellent raw mechanics and still miss because their crosshair started in the wrong place, their corrections were too large, or they were taking a shot that their position made unnecessarily difficult.
That is why aim is better understood as a group of skills rather than one talent.
This Apex Legends aim guide focuses on the parts you can actually train: crosshair placement, tracking, recoil control, flicking, hip-fire, ADS, target switching, movement shooting, and Firing Range drills.
The most useful approach is not to practice everything at once.
Find the miss. Identify the cause. Train that skill.
The Aim Framework
Think of aiming as four stages:
Acquire
Get your crosshair onto the target efficiently.
Track
Keep the crosshair with the target as they move.
Control
Manage recoil, corrections, and your own movement.
Convert
Turn accurate aim into meaningful damage and useful combat pressure.
Acquire → Track → Control → Convert
This framework matters because good aim is not measured by how fast you can move your crosshair.
It is measured by how consistently you can put the crosshair where it needs to be and keep it there long enough to matter.
1. Crosshair Placement Comes First
The easiest way to make aiming easier is to reduce how much aiming you have to do.
Keep your crosshair near the height and location where an enemy is likely to appear.
That means avoiding habits such as:
- looking at the floor while approaching a doorway,
- staring at the sky while moving toward a ridge,
- or entering a room with your crosshair nowhere near a likely enemy position.
EA’s current aim guidance specifically recommends keeping the crosshair where enemies might appear and centering the enemy on screen before shooting. (EA Help)
Good crosshair placement turns some of the reaction into preparation.
Instead of:
Enemy appears → huge crosshair movement → fire
you get:
Enemy appears → small correction → fire
That difference adds up over an entire match.
2. Pre-Aim Common Enemy Positions
Pre-aiming means placing your crosshair where you expect the opponent to appear before they arrive.
This is particularly useful around:
Doorways
Windows
Corners
Stairs
Ledges
Common peek points
You don’t need to know the exact position of the enemy.
You are simply reducing the amount of work required once they appear.
The more familiar you become with common angles and terrain, the more useful this becomes.
That is one reason aim and positioning are closely connected. Your Apex Legends Positioning Guide covers the terrain and angle side of the equation.
3. Don’t Stare at the Crosshair
Where you place your visual attention can change with distance.
EA’s current guidance suggests thinking more about the enemy at close range and the crosshair at longer ranges. (EA Help)
The practical lesson is more useful than treating that as a strict rule.
At close range, you have very little time to react to sudden movement, so maintaining awareness of the character model can help.
At longer ranges, tiny crosshair adjustments matter much more.
Your attention should adapt to the shot rather than following one rigid aiming habit.
4. Tracking: Follow the Target, Don’t Chase It
Tracking means keeping your crosshair on a moving opponent.
It is one of the most important skills in Apex because players constantly strafe, slide, change direction, climb, and reposition.
The common mistake is overreacting to every movement.
A smoother approach is to follow the target’s general path and make smaller corrections.
Think:
Smooth movement first. Correction second.
EA recommends practicing smooth mouse movement while following moving targets in the Firing Range. (EA Help)
The same principle applies to controller players. Constantly slamming the stick from one direction to the other makes it harder to keep the target centered.
5. Track the Enemy’s Movement Pattern
Not every movement change is random.
Players often:
- strafe left and right,
- repeat a direction,
- change direction after taking damage,
- move toward cover,
- or commit to a predictable escape.
You don’t need to predict every input.
You only need enough awareness to avoid making your crosshair chase every twitch.
Watch the target’s overall movement, then keep your aim flowing with it.
This becomes particularly useful when fighting around cover, where the enemy’s available movement is already limited by the terrain.
6. Recoil Control Starts With Familiarity
There is no universal recoil movement that works perfectly for every weapon.
EA notes that Apex weapons can differ in recoil, firing behavior, bullet drop, and projectile travel characteristics. (EA Help)
You therefore don’t need to memorize every weapon in the game.
Learn the recoil behavior of the weapons you use often.
Take one into the Firing Range.
Fire at a wall.
Watch how the weapon moves.
Then make controlled corrections while shooting.
Once the basic pattern feels familiar, add movement and target tracking.
The goal is not perfect memorization.
It is making recoil control sufficiently familiar that it doesn’t consume your attention in the middle of a fight.
7. Recoil Control Isn’t Just Pulling Down
Pulling down can be part of recoil control, but it isn’t the whole technique.
Weapons can have horizontal movement as well, and EA’s current guidance specifically discusses moving your aim horizontally while firing as part of managing recoil. (EA Help)
Watch the actual weapon behavior.
Then counter it.
The correction should respond to what the gun is doing rather than follow a memorized “pull down harder” routine.
8. Practice Recoil Before Adding Speed
When learning a weapon, begin slowly.
Your first question should be:
Can I keep the shots grouped?
Then:
Can I maintain that control while tracking?
Then:
Can I maintain it while moving?
That progression matters.
If your recoil control is poor while standing still, adding rapid movement usually hides the problem instead of fixing it.
9. Don’t Fight Recoil With Tension
Overcorrecting is one of the easiest ways to make recoil worse.
You pull too far.
Then correct back.
Then overcorrect again.
The result is:
Overshoot → correction → overshoot → correction
Make the size of your input smaller.
Try:
Smooth → controlled → repeatable
rather than constantly trying to “save” a spray after you’ve already lost control.
10. Flicking Is Fast Target Acquisition
A flick is a rapid movement from one target or point to another.
It is useful when:
- another enemy appears unexpectedly,
- a target changes position,
- you need to switch between opponents,
- or your initial aim point is far away from the target.
The goal isn’t maximum speed.
A useful flick is:
The fastest movement you can consistently stop on target.
EA recommends practicing flicking between widely spaced targets in the Firing Range and varying the order in which you shoot them. (EA Help)
Start under control.
Increase speed only when accuracy survives.
11. Practice Flicks in Different Directions
Don’t train only left-to-right flicks.
Vary:
Left → Right
Right → Left
Up → Down
Down → Up
Near → Far
Far → Near
Change the sequence so your brain isn’t simply memorizing the route.
The goal is target acquisition.
Not choreography.
12. Hip-Fire vs. ADS: Choose the Tool for the Fight
A common mistake is treating ADS as the “proper” way to aim.
It isn’t.
EA specifically recommends hip-fire for fast, close-range combat. (EA Help)
Hip-fire makes more sense when:
The enemy is very close.
You need maximum freedom of movement.
The fight is happening around tight terrain.
You need to react quickly to a changing target.
ADS makes more sense when:
The target is farther away.
You need more precision.
The situation gives you time to stabilize.
The extra accuracy outweighs the mobility trade-off.
There is no universal distance where you must switch.
Learn to recognize the situation.
13. Don’t ADS Because You’re Panicking
This is an underrated aiming mistake.
An enemy suddenly appears.
You panic.
You immediately ADS.
The enemy is already moving across your screen.
Now you’re trying to combine precise aiming with a fight that demands rapid movement.
The result can be worse than controlled hip-fire.
The better habit is to choose the aiming method deliberately.
More precision isn’t always better precision.
14. Practice Hip-Fire on Purpose
Don’t wait for close-range fights to teach you how to hip-fire.
Practice it.
Start near a target.
Move laterally.
Keep the target centered.
Then add:
Direction changes
Target switching
Slides
Different distances
The objective is to make hip-fire feel like a controlled technique rather than something you panic into when an enemy gets too close.
15. Aim While Moving
Apex doesn’t ask you to aim from a shooting range booth.
You are moving.
Your opponent is moving.
Both sides are trying to survive while dealing damage.
EA’s current aim guidance recommends practicing tracking while moving as well as standing still. (EA Help)
That means your aim training should eventually combine:
Movement + tracking
Movement + recoil
Movement + target switching
The objective is not flashy movement.
It’s keeping your aim functional while making yourself harder to hit.
Your Apex Legends Movement Guide covers the actual movement mechanics separately.
16. Don’t Separate Aiming From Positioning
Not every missed shot is an aim problem.
You may have missed because:
- you started with poor crosshair placement,
- you were fighting from an exposed position,
- the enemy had a better angle,
- you were trying to shoot at an uncomfortable range,
- or you were forced to make a difficult correction because your positioning was poor.
Your Apex Legends Positioning Guide covers how to make those shots easier before you take them.
That distinction is important:
Sometimes the best way to improve your aim is to improve the situation you’re aiming from.
17. Target Switching Is Its Own Skill
Staying on one target is only part of combat.
An Apex fight can change in an instant.
You are tracking one player.
Another enemy swings from the side.
Now you must:
Acquire → stabilize → shoot → switch
That is a different skill from pure tracking.
Practice switching between targets at different angles and distances.
Don’t make speed the only objective.
A fast target switch that lands nowhere is just a fast miss.
18. Don’t Overcorrect
Aiming errors are often caused by too much input rather than too little.
You see the target.
You move past them.
You correct.
You pass them again.
This happens when you’re reacting to the crosshair instead of controlling it.
Reduce the size of your corrections.
A useful cue is:
Get close, then refine.
The final few pixels of adjustment should feel much smaller than the original movement.
19. Diagnose the Miss Before You Train
This is where aim practice becomes far more useful.
Instead of saying:
“My aim was bad.”
Ask what actually happened.
Crosshair-placement miss
Your starting position was wrong.
Practice: pre-aim and corner-entry drills.
Overflick
You moved too far.
Practice: slower flicks with deliberate stops.
Underflick
You stopped short.
Practice: gradually increase movement distance.
Tracking miss
You couldn’t keep up with the target.
Practice: smooth tracking.
Recoil miss
Your shots drifted away during sustained fire.
Practice: recoil drills.
Target-switch miss
You couldn’t acquire the second target cleanly.
Practice: two- and three-target switching.
Decision miss
Your mechanics were fine, but the shot selection was poor.
Practice: hip-fire/ADS decisions and realistic fight scenarios.
This is more useful than simply logging more hours.
20. Don’t Blame Aim for a Positioning Mistake
Suppose you miss several shots while fighting from bad cover.
You might conclude:
“I need better aim.”
But the actual problem may be that the enemy had a clean angle while you were exposed.
Likewise, a difficult long-range shot isn’t necessarily proof that your tracking is poor.
Diagnosis matters because you want to train the skill responsible for the failure.
That is the difference between practicing aim and improving aim.
21. Your Settings Should Support Your Aim
Sensitivity matters, but changing settings constantly can become its own bad habit.
EA currently says the best mouse or controller settings depend on personal preference and recommends experimenting to find a comfortable setup. Its current competitive starting points include 3.0–5.0 mouse sensitivity with a 1.0 ADS multiplier, while some competitive controller players use 4-3 sensitivity; EA also recommends Classic response curve as a starting point for newer players. (EA Help)
Treat those numbers as starting points, not universal answers.
Your Apex Legends Settings Guide already covers the broader settings question. This article only needs the practical rule:
Make deliberate changes, test them, then give yourself time to adapt.
22. Stop Changing Sensitivity After Every Bad Game
A bad match doesn’t prove your sensitivity is wrong.
Your performance changes because of:
- fatigue,
- target distance,
- different weapons,
- positioning,
- movement,
- pressure,
- and simple match-to-match variance.
Constant settings changes prevent consistency from developing.
Make a change because you identified a specific problem.
Then test that change long enough to judge it properly.
23. FOV Changes How Aim Feels
FOV affects the size and visibility of targets on screen.
EA currently recommends experimenting within 90–110 FOV and notes that 110 is common among competitive players. Higher FOV shows more of the surroundings but makes distant targets appear smaller. (EA Help)
That’s another reason not to copy another player’s settings without testing them.
A setting can be excellent for one player and uncomfortable for another.
For the full FOV and sensitivity discussion, use the Apex Legends Settings Guide.
24. Controller Players: Understand Aim Assist Without Overthinking It
EA says aim assist is automatically enabled for console players and PC players using controllers, while mouse-and-keyboard players do not receive it. EA also notes that console aim assist is stronger. (EA Help)
EA currently does not recommend turning aim assist off, although the option exists for players who want to experiment without it in the Firing Range. (EA Help)
For most players, the useful takeaway is simple:
Consistency matters more than constantly changing the assistance settings.
Build your mechanics around the input system you actually use in matches.
25. The Firing Range Should Be a Laboratory
The Firing Range is most useful when you have a question you want to answer.
Not:
“I’ll shoot targets for twenty minutes.”
Instead:
Can I track smoothly?
Can I control this weapon?
Can I switch targets without overshooting?
Can I hip-fire while moving?
Does this sensitivity feel controllable?
EA’s current guidance specifically recommends the Firing Range for testing sensitivity, tracking, flicking, recoil, movement, and related aiming skills. (EA Help)
The more specific the question, the more useful the session.
26. Five Aim Drills Worth Repeating
You don’t need ten different routines.
Five focused drills cover most of the important mechanics.
Drill 1: Crosshair Placement
Move through the Firing Range and pre-aim where targets are likely to appear.
Don’t shoot immediately.
First place the crosshair.
Then acquire the target.
Goal: reduce unnecessary crosshair movement.
Drill 2: Smooth Tracking
Follow moving targets without firing.
Then repeat while firing.
Finally, add your own movement.
Goal: maintain smooth target control without large corrections.
EA specifically recommends moving with your crosshair on moving targets as part of aim practice. (EA Help)
Drill 3: Recoil + Tracking
Choose a familiar weapon.
Track a moving target while controlling recoil.
Start at a comfortable range.
Then increase the difficulty.
Goal: manage weapon movement without losing the target.
Drill 4: Flick + Target Switch
Shoot one target.
Move quickly to a second.
Stabilize.
Shoot.
Then repeat with different target orders.
Goal: acquire new targets quickly without sacrificing accuracy.
EA recommends varying target patterns during flick practice. (EA Help)
Drill 5: Hip-Fire + ADS Transition
Start close enough for hip-fire.
Move while tracking.
Then create distance and switch to ADS when the situation calls for more precision.
Goal: choose the appropriate aiming technique rather than defaulting to one.
27. A Simple 10-Minute Aim Routine
You don’t need an hour-long warm-up before every match.
Try:
Minutes 1–2: Crosshair placement
Minutes 3–4: Tracking
Minutes 5–6: Recoil control
Minutes 7–8: Flicks and target switching
Minutes 9–10: Movement + shooting
Then spend a few extra repetitions on the weakness you identified from your previous session.
That last part matters.
A routine should adapt to your problem rather than become another activity you complete on autopilot.
28. Practice the Miss, Not Just the Mechanic
Suppose you keep missing because you stop your flick too late.
Don’t spend the next hour doing faster flicks.
Slow them down.
Suppose tracking breaks when the target changes direction.
Don’t immediately increase speed.
Practice smoother directional changes.
Suppose recoil is fine until you start moving.
Add movement.
Suppose your Firing Range aim looks good, but your matches don’t.
Practice target switching, movement, and realistic decision-making.
Your training should reproduce the conditions causing the mistake.
That’s how practice becomes specific.
29. Don’t Only Practice What Feels Good
It is easy to spend a session doing the drill you’re already comfortable with.
Tracking feels good.
So you track for 20 minutes.
Meanwhile, you still overshoot every target switch.
Train the weakness.
A useful split is:
Strong skill: maintain
Average skill: improve
Weak skill: prioritize
Your aim gets better when the training session is slightly uncomfortable.
30. Mechanical Aim vs. Combat Aim
There is a difference between being accurate in a controlled drill and being accurate in a live match.
Combat adds:
- movement,
- cover,
- multiple targets,
- sound,
- pressure,
- target prioritization,
- positioning,
- and decisions about whether to shoot at all.
That’s why your final practice stage should eventually combine the skills.
Track while moving.
Control recoil while tracking.
Switch targets.
Use the appropriate aiming mode.
Work around terrain.
The closer the drill becomes to a real situation, the more useful the transfer becomes.
31. Aim Is Easier When the Shot Is Easier
This is an important connection between your combat guides.
Good positioning can reduce the mechanical difficulty of a shot.
A strong angle gives you more time.
Cover reduces exposure.
High ground can improve visibility.
A predictable doorway simplifies target acquisition.
Your Apex Legends Positioning Guide explains those concepts in detail.
The lesson here is:
Don’t try to mechanically solve a problem that better positioning could prevent.
32. Common Apex Legends Aim Mistakes
Changing sensitivity constantly
You never give yourself enough time to adapt.
Starting with poor crosshair placement
Your first correction is larger than it needs to be.
Practicing only stationary targets
Real opponents move.
Practicing only flicks
Flicking is only one part of aiming.
ADSing every close-range fight
You may be sacrificing the movement freedom the situation requires.
Overcorrecting
Large inputs create a cycle of misses and corrections.
Ignoring target switching
Real fights rarely involve one perfectly isolated opponent.
Blaming recoil for every miss
The starting crosshair position may be the actual problem.
Training without a goal
Random shooting is harder to measure.
Practicing only strengths
Improvement slows when you never train the weaknesses.
Aim Problems → Fixes at a Glance
| Problem | Likely cause | Best practice |
|---|---|---|
| Crosshair starts too low | Poor placement | Pre-aim drill |
| Crosshair flies past target | Overflick | Slower flicks |
| Stop short of target | Underflick | Gradually increase movement |
| Lose moving players | Tracking | Smooth tracking |
| Spray leaves target | Recoil control | Recoil + tracking |
| Miss after switching targets | Acquisition | Target-switch drill |
| Struggle at point-blank range | Poor aiming-mode choice | Hip-fire practice |
| Aim is good in Range but poor in matches | Poor transfer | Movement + target switching |
| Miss while peeking | Positioning problem | Reassess cover and angle |
| Aim feels inconsistent after settings changes | Constant tweaking | Settle on one setup and test it |
This is the part of the guide I’d bookmark.
The most useful question after a bad fight isn’t “How do I aim better?”
It’s:
“What kind of miss was that?”
Final Thoughts
Better aim in Apex Legends isn’t about making your crosshair move as quickly as possible.
It’s about making the correct movement repeatable.
Start with crosshair placement.
Learn to track smoothly.
Understand the recoil of the weapons you actually use.
Practice controlled flicks.
Know when hip-fire makes more sense than ADS.
Switch targets without losing control.
Keep your aim functional while moving.
Then diagnose your misses instead of blindly practicing more.
The most useful progression is:
Acquire → Track → Control → Convert
And the most useful training rule is even simpler:
Don’t practice aim. Practice the miss.
If your crosshair starts in the wrong place, work on placement.
If you overshoot, work on stopping.
If you lose moving targets, work on tracking.
If your spray breaks down, work on recoil.
If your Range performance doesn’t transfer to matches, add movement, pressure, and target switching.
You don’t need perfect aim.
You need reliable aim that holds up when the fight gets messy.
That’s what turns practice into better games.
Apex Legends Aim Cheat Sheet
Before the fight:
Pre-aim → correct crosshair height → choose hip-fire or ADS.
During the fight:
Track smoothly → control recoil → stay aware of movement → switch targets when needed.
After a miss:
Identify the type of error before changing your settings.
In the Firing Range:
Train one specific skill at a time.
For improvement:
Acquire → Track → Control → Convert.
For diagnosis:
Practice the miss, not just the mechanic.
Frequently Asked Questions
How do I improve my aim in Apex Legends?
Identify the type of mistake you’re making, then practice that specific skill. Crosshair placement, tracking, recoil control, flicking, target switching, and movement shooting all require slightly different training. EA currently recommends using the Firing Range for tracking, flicking, recoil practice, sensitivity testing, and related aim work. (EA Help)
What is the best way to control recoil?
Learn the recoil behavior of the weapons you use most often, then make smooth corrections while firing. Don’t rely on a single universal movement because Apex weapons can behave differently. (EA Help)
Should I hip-fire or ADS?
Use the technique that fits the engagement. Hip-fire is particularly useful for fast, close-range fights, while ADS is generally more useful when you have enough space and time to benefit from additional precision. EA specifically recommends practicing hip-fire for fast close-range combat. (EA Help)
How do I improve tracking?
Practice smooth tracking against moving targets before adding your own movement. Once you can stay on target consistently, introduce strafing, direction changes, recoil, and target switching. EA recommends practicing tracking against moving targets in the Firing Range. (EA Help)
How do I get better at flicking?
Start slowly enough that you can stop accurately on the target. Then gradually increase speed and vary the target order so you aren’t memorizing one fixed movement pattern. EA recommends practicing flicks between widely spaced targets and changing the target sequence. (EA Help)
What sensitivity should I use in Apex Legends?
There is no universally correct sensitivity. EA currently lists 3.0–5.0 mouse sensitivity with a 1.0 ADS multiplier as competitive starting points, while noting that personal preference matters. For controller, EA notes that some competitive players use 4-3 sensitivity and recommends Classic response curve as a starting point for newer players. (EA Help)
Is 110 FOV best for Apex Legends?
110 is common among competitive players, but it isn’t automatically best for everyone. EA currently recommends experimenting between 90 and 110 FOV and notes that higher FOV shows more of the environment while making distant targets appear smaller. (EA Help)
Should I turn off aim assist to improve?
EA currently says aim assist is automatically enabled for console players and PC players using controllers and does not recommend turning it off generally, although players can disable it to experiment in the Firing Range. (EA Help)
Why do I aim well in the Firing Range but miss in matches?
Live matches add movement, pressure, multiple targets, positioning, cover, target switching, and decision-making. Add those elements progressively rather than assuming your basic mechanics are broken.
Why do I keep missing even though I practice?
You may be practicing the wrong skill. Review your misses and determine whether the problem is crosshair placement, tracking, recoil, flicking, target switching, aiming-mode choice, or positioning.
How long should I practice aim?
A short, focused session can be enough. A structured 10-minute routine is often more useful than a long session of random shooting, especially when you spend the final minutes working on the weakness you identified.
Sources & Updates
Last reviewed: September 2026
EA’s current Best Settings for Apex Legends on PC guide was used to verify guidance around mouse sensitivity, ADS sensitivity, controller settings, FOV, crosshair placement, tracking, flicking, recoil, hip-fire, weapon behavior, and Firing Range practice. (EA Help)
EA’s current Aim Assist documentation was used to verify controller aim-assist behavior and EA’s current recommendation regarding enabling or disabling aim assist. (EA Help)
EA’s current PC and controller controls documentation was checked for current input terminology. (EA Help)
The training framework in this guide—Acquire → Track → Control → Convert, together with the “practice the miss” diagnostic approach—is Loot Strategist editorial analysis rather than official EA instruction.
This article deliberately avoids temporary weapon rankings, recoil tables, and Legend-specific meta advice so its core aim-training guidance remains useful as Apex Legends changes.
For related guides, see the Apex Legends Settings Guide, Apex Legends Movement Guide, Apex Legends Positioning Guide, Apex Legends Fight Guide, and Apex Legends Team Fighting Guide.
 Gaming Guides, Builds, Loot & Strategies