
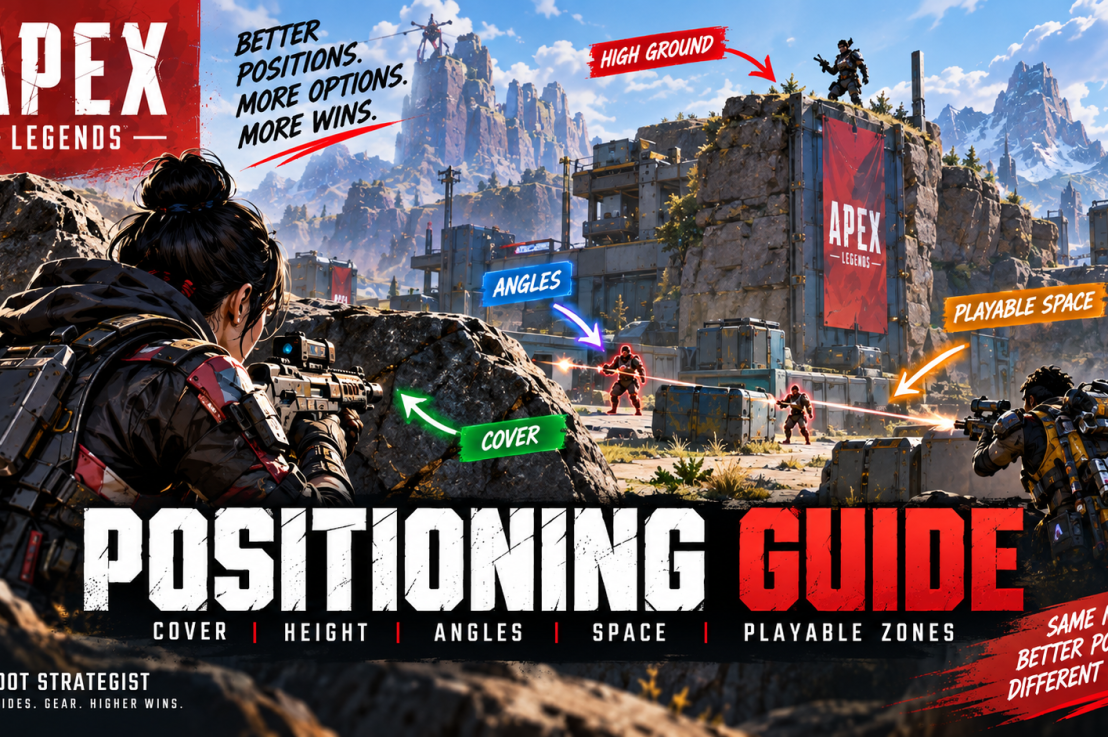
Apex Legends Positioning Guide: Cover, Height, Angles & Playable Space
Winning a fight in Apex Legends often starts before anyone fires a shot.
Two players can have similar weapons, armor, and aim, yet one can have a major advantage because they are fighting from cover, holding a better angle, controlling useful space, or keeping an escape route available.
That’s positioning.
It is more than finding the highest roof or crouching behind the nearest rock. Good positioning gives you more useful choices while forcing the enemy to make harder ones.
You can peek without exposing yourself for long. You can change angles. You can heal safely. You can support a teammate. You can retreat without crossing an open field.
A weak position takes those options away.
This Apex Legends positioning guide explains how to evaluate cover, height, angles, space, and playable zones so you can make better positioning decisions in almost any fight.
The Positioning Framework
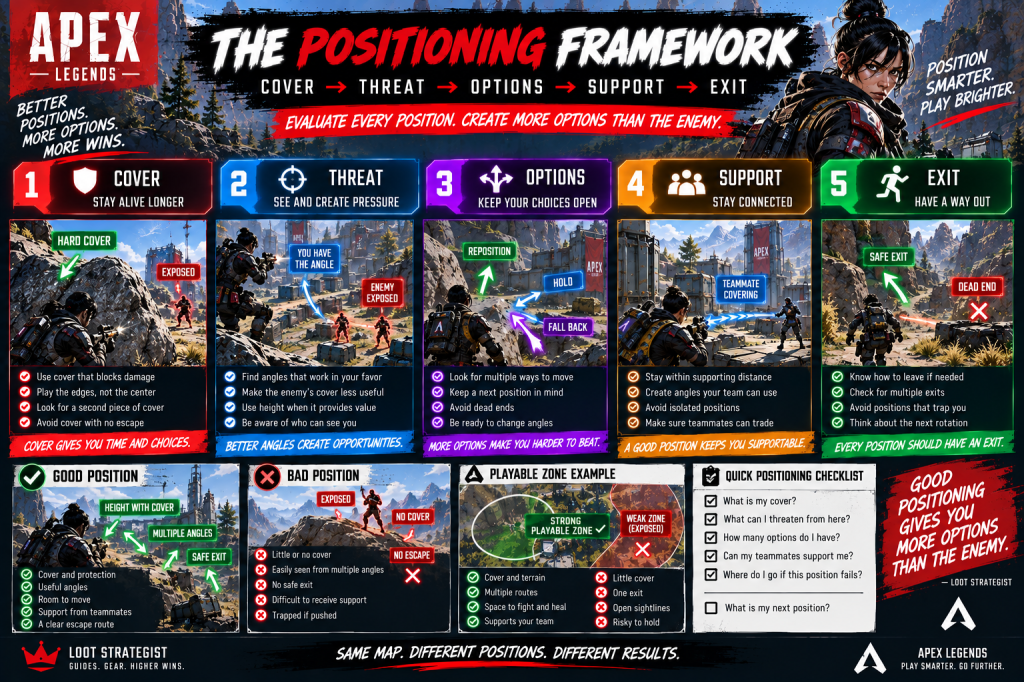
When you reach a new piece of terrain, run five questions through your head:
Cover
What protects me from incoming fire?
Threat
What can I attack from here, and who can attack me?
Options
How many useful choices do I have if the enemy moves?
Support
Can my teammates help me quickly?
Exit
Where do I go if this position stops being good?
Cover → Threat → Options → Support → Exit
A position does not have to score perfectly in every category.
A rooftop with excellent sightlines but weak cover can still be useful for a short peek.
A building with strong cover but only one exit can be excellent until the enemy controls that exit.
The point is to recognize what you’re gaining and what you’re giving up.
1. Cover Comes First
Height and angles can help you win a fight.
Cover helps you survive long enough to use them.
EA’s current beginner guidance encourages players to stay with their squad and use movement and terrain intelligently; its grenade guidance also specifically identifies forcing enemies out of cover and buying time to retreat or gain high ground as useful tactical purposes. (EA Help)
For positioning, the most useful cover generally does more than block bullets.
Good cover lets you:
- peek,
- break line of sight,
- heal,
- reload,
- change sides,
- and move toward another piece of terrain.
A huge object with no escape can be worse than a smaller piece of cover connected to a better route.
Think of cover as a platform for decisions, not merely protection.
2. Work the Edge of Your Cover
Standing directly in front of cover wastes part of its value.
Instead, use the edges.
Peek.
Take the shot.
Break line of sight.
Change the angle.
Return when you have another opportunity.
This forces the enemy to expose themselves while allowing you to limit your own exposure.
It also makes your position harder to predict.
The goal is not to hide permanently.
The goal is to control how much of the fight you have to expose yourself to.
3. One Piece of Cover Is Fine. A Chain Is Better.
Look beyond the object immediately in front of you.
Imagine:
Rock → wall → building
If the first piece becomes unsafe, you already have another option.
Now imagine:
One rock → open ground → cliff
The rock may be excellent for the first few seconds, but once the enemy takes another angle, your choices disappear.
This is why strong positioning often involves a cover chain.
You don’t need hard cover every meter.
You need enough connected terrain that one bad exchange doesn’t leave you stranded.
4. High Ground Is Only Valuable When You Can Play It
High ground gives you visibility and often better attack angles.
But elevation by itself is not a strategy.
A rooftop with no cover can leave you exposed from several directions.
A hilltop with one escape route can become a trap.
A tower can provide a perfect view while offering a terrible place to heal.
So instead of asking:
“Is this higher?”
ask:
“What does this height actually give me?”
Useful high ground usually offers some combination of:
Cover
Sightlines
Room to move
Support
A safe way down
A useful next position
High ground is an advantage when it improves your options.
It is a liability when it removes them.
5. The Difference Between Good Height and Bait Height
Before committing to elevated terrain, check five things:
Can you fight from it?
Does the terrain actually provide usable angles?
Can you survive from it?
Is there enough cover to withstand pressure?
Can your squad support you?
Are teammates close enough to trade?
Can you leave?
What happens when the enemy pushes?
Is it still playable when the Ring changes?
A position can be excellent for the next 20 seconds and terrible afterward.
That doesn’t necessarily make it bad.
It means you should treat it as temporary high ground, not a permanent home.
6. Create Angles Instead of Simply Moving Closer
One of the easiest positioning mistakes is assuming that closing the distance automatically improves your fight.
It doesn’t.
Sometimes the best move is sideways.
An enemy behind cover may be difficult to damage from the front.
Move around that cover, and the geometry changes.
Suddenly they have to decide whether to expose themselves to you or move into another angle.
This is why small lateral movements can be more valuable than simply walking forward.
A better angle can create more pressure without requiring more risk.
7. Stop Repeating the Same Peek
Once you fire from the same position, the enemy has information.
If you peek the exact same side again, you’re making their job easier.
After a meaningful exchange, consider:
A different side of the cover
A wider angle
A slightly different elevation
A nearby piece of terrain
A teammate’s angle
You don’t need a spectacular flank.
Sometimes shifting a few meters is enough to change the fight.
The objective is to keep your position from becoming predictable.
8. Use Space as a Resource
Space is not just the ground between you and the enemy.
It determines:
Where you can move.
Where the enemy can move.
How quickly teammates can help.
Where you can heal.
Which angles are available.
That makes space something you can gain, lose, and control.
Push an enemy away from a rock, and you gain the area around it.
Take the other side of a building and you control another route.
Occupy the center of a useful area and you may force the opponent toward predictable exits.
This is why positioning is really about usable space, not just personal safety.
9. A Playable Zone Is More Than Being Inside the Ring
Being inside the Ring does not automatically mean you’re well positioned.
EA’s terminology describes a “good spot” as a strong position in the Ring, including areas with substantial cover.
For practical positioning, think of a playable zone as an area where you can:
- fight,
- heal,
- reposition,
- receive support,
- and move again when the situation changes.
Compare:
Inside the Ring + exposed + one exit
with:
Inside the Ring + cover + multiple routes + room to fight
Both are technically playable.
Only one gives you much freedom.
The second is the position you should prefer.
10. A Strong Position Gives You a Next Position
A position should not be evaluated in isolation.
When you take cover, look beyond it.
Where is your next piece of protection?
When you take a building, where is the second exit?
When you climb high ground, how do you get down safely?
When you win an angle, where will the enemy move?
Think:
Position → Next Position → Exit
This prevents one of the most common positioning mistakes: taking a strong first position that leaves you with nowhere to go afterward.
11. Never Let Cover Become a Prison
Cover can create a false sense of safety.
A building with one entrance can become a trap.
A rock beside a cliff can eliminate your retreat.
A corner can protect you from one direction while exposing you to another.
Before committing, identify at least one fallback.
The best positions give you another answer when the enemy changes the question.
That might mean another doorway, another rock, another elevation change, or simply enough room to move around your current cover.
12. Position Yourself So You Can Be Supported
This is where individual positioning meets squad play.
You do not have to stand beside your teammates.
You do have to remain supportable.
Ask:
If an enemy pushes me right now, can one of my teammates help before I’m knocked?
If yes, the position is probably workable.
If no, a brilliant angle may simply be a lonely one.
EA’s current beginner guidance specifically recommends sticking close to your squad so teammates can help when you’re attacked. (EA Help)
For detailed squad coordination, see the Apex Legends Team Fighting Guide.
13. A Good Flank Is Still a Supportable Position
Flanking can create excellent angles.
It can also turn you into a free knock.
Before taking a wide angle, ask:
Can they reach me first?
Can my team trade for me?
What cover protects the route?
Where do I go if they push?
What does my flank actually accomplish?
A flank that forces the enemy to split their attention can be excellent.
A flank that takes you 40 meters away from your squad for a slightly better angle usually isn’t.
14. Make the Enemy’s Cover Worse
Positioning isn’t only defensive.
You can use your position to reduce the value of theirs.
Suppose an enemy is safely behind a rock.
You don’t need to walk directly toward the rock.
You can:
Take the side angle.
Control the retreat.
Take better elevation.
Use ordnance to force movement.
Move into space that makes their cover less useful.
EA specifically identifies grenades as a way to get enemies out of cover and buy time for a retreat or a high-ground play. (EA Help)
The objective isn’t always to shoot someone immediately.
Sometimes the better play is to make their current position stop working.
15. Reposition Between Exchanges
You do not need a dramatic movement every time you fire.
Small changes are often enough.
After an exchange, consider moving:
To the other side of your cover.
Behind a second piece of terrain.
To a slightly wider angle.
Closer to your team’s support.
Toward a better escape route.
Repeatedly appearing in exactly the same location gives your opponent useful information.
Small repositioning removes that predictability while preserving the strength of your original position.
16. Position Around Buildings
Buildings can be excellent defensive terrain because they provide cover, multiple rooms, elevation changes, and different angles.
They can also create predictable entrances.
Before holding one, identify:
Primary entrance
Secondary exit
Vertical access
Windows or exterior angles
Nearby fallback terrain
Don’t treat the building as a box.
Treat it as a network of positions.
The strongest player inside may not be the person holding the doorway.
It may be the player who controls the space the enemy needs to cross to reach the doorway.
17. Positioning in Open Terrain
Open ground is dangerous because your movement and exposure are easier to read.
When caught outside, look for the nearest useful terrain:
Rock
Wall
Building
Slope
Dip
Elevation change
Don’t stand in the open searching for the perfect fight.
Reach the best available piece of terrain first.
Then reassess.
And when moving between cover, your Apex Legends Movement Guide is the better resource for the mechanics themselves. This guide’s concern is the choice of destination, not how to perform the movement.
18. Small Geometry Can Win Big Fights
Not every positioning advantage comes from obvious high ground.
A small ridge can hide part of your body.
A shallow slope can change which angle an enemy has.
A box can block one firing line.
A doorway can restrict movement.
A corner can let you expose less of yourself while still attacking.
Players often overlook these details because they don’t look strategically important.
But combat is built from geometry.
The question is always:
How much of me can the enemy see, and how much of them can I see?
That’s the real value of small terrain advantages.
19. Heal Where You Can React
Healing is also a positioning decision.
The nearest piece of cover isn’t necessarily the safest.
Before starting a heal, consider:
Can the enemy see the cover?
Can they swing around it?
Can they throw ordnance onto it?
Can I move if they push?
Can my teammate cover the approach?
A good healing position gives you enough time to restore your resources without trapping you when the enemy changes direction.
You’re not simply looking for a place where bullets can’t currently reach you.
You’re looking for a place where you can react when they do.
20. Know When to Abandon a Good Position
Positioning is temporary.
The Ring changes.
The enemy gains an angle.
A teammate gets forced away.
A third squad arrives.
Your cover becomes compromised.
A position that was excellent five seconds ago may now be poor.
Ask:
Does this position still give me more useful options than the enemy?
If not, leave it.
Don’t defend a position just because you spent time taking it.
Your Apex Legends Rotation Guide covers the broader decision of choosing the next route and destination.
Here, the lesson is simpler:
Good positioning means knowing when a position has stopped being good.
21. Endgame Positioning: Space Gets More Valuable
Late in a match, available space becomes more limited.
That increases the value of:
Cover
Exit routes
Useful height
Information
Support
A position that is merely comfortable early in a match may be extremely valuable late because fewer safe areas remain.
But the same rule still applies:
Don’t chase a position simply because it is technically inside the Ring.
Look for the area that allows you to survive the current pressure and still make the next move.
22. Don’t Let the Center of the Ring Decide for You
Central positioning can be strong.
It can also make you visible to teams arriving from multiple directions.
A slightly offset position with strong cover and several exits may be much more useful.
This is why distance to the center isn’t enough.
Evaluate:
Cover
Threat
Options
Support
Exit
The same five-part framework works whether you’re in an early-game POI or the final playable area.
23. A Practical Positioning Test
When two locations look equally attractive, compare them directly.
Position A
Good height.
Weak cover.
One exit.
Poor teammate support.
Position B
Lower ground.
Strong cover.
Two exits.
Better angle.
Easy teammate support.
Position B may be the better choice even though it looks less impressive.
That’s the point of the framework.
You’re not choosing the location that looks strongest.
You’re choosing the one that behaves strongest when the fight changes.
Common Apex Legends Positioning Mistakes
Standing in the open because you have the better weapon
Weapons don’t replace cover.
Taking high ground just because it is high
Elevation without useful cover or an exit can become a trap.
Repeating the same peek
The enemy gets free information about your position.
Flanking farther than your team can support
Your angle may be good while your timing is terrible.
Treating the Ring as the destination
Inside the zone does not automatically mean playable.
Staying behind cover that only protects one side
You can still be exposed to the rest of the enemy squad.
Fighting from a dead end
A strong first exchange doesn’t matter if your next move is impossible.
Refusing to abandon a once-good position
Good positions have expiration dates.
Moving for a better angle without checking the route
The path to an angle may be more dangerous than the angle itself.
Standing directly beside teammates
You reduce your squad’s ability to create useful angles.
Standing too far away
You turn yourself into an isolated target.
How to Practice Better Positioning
You don’t need a special positioning drill.
Instead, review where you were standing when you lost a fight.
Ask:
What protected me?
What could see me?
Where could I retreat?
Could my teammate help?
What angle did the enemy have?
Was there a nearby position that gave me more options?
Then identify one recurring problem.
Maybe you always fight from exposed ground.
Maybe you take aggressive angles that your teammates cannot support.
Maybe you hold high ground without checking the escape route.
Maybe you stay in one position too long.
Fix one problem at a time.
That is more useful than trying to memorize dozens of positioning rules.
The Apex Legends Positioning Checklist
Before taking a position, ask:
What is my cover?
What can I threaten from here?
How many useful options do I have?
Can my squad support me?
Where do I go if this position fails?
Then look one step farther:
What is my next position?
That’s it.
You don’t need a complicated formula once the concepts become familiar.
Positioning by Situation
Holding a building
Use the building as a network of angles rather than standing on one doorway.
Holding high ground
Prioritize cover and an escape route over elevation alone.
Fighting around a rock
Work the sides and look for a second piece of cover.
Crossing open ground
Move toward the nearest connected playable terrain.
Taking a flank
Make sure your team can support the angle.
Healing
Choose cover that still lets you react to a push.
Endgame
Prioritize playable space, exits, and support rather than simply chasing the center.
Final Thoughts
Good positioning doesn’t make you impossible to kill.
It changes the terms of the fight.
You have more cover.
More useful angles.
More room to move.
More opportunities to support your squad.
More ways to disengage.
And, most importantly, more choices.
That’s why the strongest position isn’t always the highest building or the exact center of the Ring.
It’s the location that gives you useful answers when the enemy changes the situation.
Use:
Cover → Threat → Options → Support → Exit
Then keep looking one step ahead.
Where do you move if the enemy pushes?
Where do you heal?
Where does your teammate help?
Where does the enemy have to expose themselves?
Where do you go when the Ring changes?
Apex Legends gives you better odds when you stop treating positioning as a place to stand and start treating it as a resource you manage.
The enemy doesn’t need to be out-aimed if they are forced into worse choices.
And when your position consistently gives you more options than theirs, you’ve already made the fight easier before the first shot lands.
Frequently Asked Questions
What is positioning in Apex Legends?
Positioning is where you place yourself relative to enemies, teammates, cover, terrain, the Ring, and available escape routes. Good positioning gives you useful attack and defensive options while limiting the enemy’s choices.
Is high ground always better in Apex Legends?
No. High ground is valuable when it provides useful sightlines while maintaining cover, support, mobility, and an escape route. Height without those advantages can be surprisingly weak.
What is the most important part of positioning?
Cover is usually the first consideration because it determines how safely you can take damage, heal, peek, and reposition. From there, look at threat, available options, teammate support, and your exit.
How do I create better angles?
Use the edges of cover and make small lateral adjustments rather than repeatedly peeking from the same location. A modest change in angle can make the enemy’s cover much less effective.
Should I flank by myself?
Only when the angle is still supportable and the risk is justified. A flank that puts you too far from your teammates can turn a strong angle into an isolated fight.
What makes a position playable?
A playable position gives you enough cover and space to fight, heal, reposition, receive teammate support, and retreat when circumstances change. Being inside the Ring alone doesn’t make a location strategically strong.
When should I leave a good position?
Leave when it stops giving you useful options—for example, when the Ring forces you out, an enemy gains a stronger angle, your cover becomes compromised, or your retreat route disappears.
How do I improve my positioning?
After each bad fight, analyze your location instead of only your aim. Ask what protected you, what could see you, where you could retreat, and whether you had another nearby position that offered better options.
How does positioning differ from rotation?
Positioning is primarily about where you stand and how you use the terrain around you. Rotation is about moving from one area to another and choosing the route and destination. Your Apex Legends Rotation Guide covers the macro side.
How does positioning differ from movement?
Movement is how your character physically traverses the game world. Positioning is the decision about where you should be and why. Your Apex Legends Movement Guide covers movement mechanics separately.
Sources & Updates
Last reviewed: September 2026
EA’s current How to Play Apex Legends guidance was used for durable gameplay references involving staying with your squad, movement, grenades, cover, and using utility to create or escape from positions. (EA Help)
EA’s terminology documentation was checked for the concept of a good spot in the Ring and related gameplay language.
EA’s current Apex news and update documentation confirms that the game remains actively updated during Season 30: Marked, with balance and gameplay changes continuing through September 2026. This guide intentionally avoids temporary weapon rankings, Legend-tier claims, or map-specific positions that could quickly become obsolete. (EA)
The practical framework in this guide—Cover → Threat → Options → Support → Exit—is Loot Strategist editorial analysis designed to help readers evaluate positions rather than memorize fixed locations.
For related guides, see the Apex Legends Rotation Guide, Apex Legends Fight Guide, Apex Legends Team Fighting Guide, Apex Legends Movement Guide, Apex Legends Squad Composition Guide, and Apex Legends Solo Queue Guide.
 Gaming Guides, Builds, Loot & Strategies