Tag: books

WoW Midnight Prey Hunting System Guide: How to Track Quarries, Unlock Nightmare Hunts, and Farm Elite Rewards

WoW Midnight Prey Hunting System Guide: How to Track Quarries, Unlock Nightmare Hunts, and Farm Elite Rewards

While dungeons and raids dominate the traditional PvE conversation, World of Warcraft: Midnight introduces a massive shift to open-world endgame content via the Prey Hunting System. Deep within the revamped forests of Eversong and the scarred steps of the Ghostlands, players are no longer just clearing static quest nodes—they are actively tracking elite quarry targets across scaling difficulties.

If you treat a high-tier hunt like a typical open-world rare spawn, you will quickly find your target escaping into the shadows. The system enforces strict footprint tracking, environmental puzzle-solving, and brutal solo combat checks. However, if mastered, it stands as one of the fastest ways in Season 1 to stock up on high-tier currencies, catch-up gear, and incredibly lucrative player housing blueprints.

This playtested guide breaks down the hidden tracking UI, the fastest path to maximize your Regional Prey Level, and the solo strategies needed to conquer Nightmare-tier quarries.
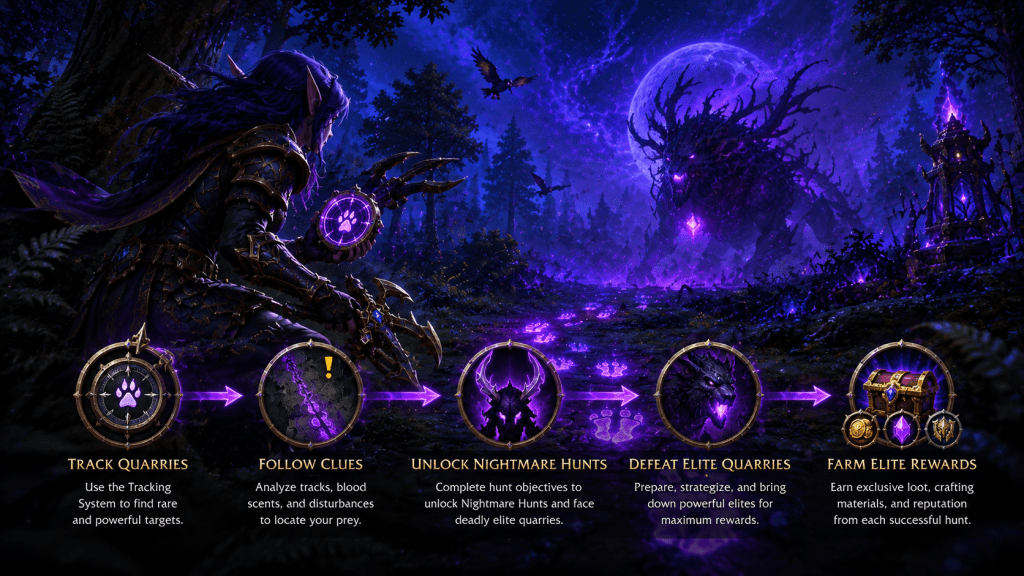
1. The Hunting Basics: How the Prey Tracking System Works

The Prey Hunting loop bypasses standard map pins. Instead, you must use localized environmental clues to discover, follow, and ambush your quarry.

Reading the Regional Tracking UI

When you enter a designated hunting zone, your minimap transitions into a specialized Scent Vector Radar. Rather than showing an exact point, it displays shifting directional arcs. To locate the quarry’s true trail, you must scour the terrain for three distinct physical interactions:

  • Disturbed Dirt: Indicates the weight and relative movement speed of the quarry.
  • Broken Foliage: Reveals if the target is flying, skyriding, or grounded.
  • Void Scents: Purple vapor clouds that show the chronological path the target took within the last three minutes.

Interacting with these points fills your Tracking Analysis Bar. Once it hits 100%, the quarry physically materializes, initiating the combat phase. If you are having trouble distinguishing hidden nodes across varying terrain elevations, you can cross-reference Wowhead’s comprehensive Prey tracking database and zone maps to overlay exact spawn grids onto your secondary monitor.

Grinding Your Regional Prey Level Fast

Your hunting efficiency is entirely gated by your Regional Prey Level (Tiers 1 through 4). To raise your rank efficiently without hitting daily diminishing returns, execute your open-world time using this specific layout:

  • Daily Minor Marks: Clear the three minor tracking bounties displayed at regional hunter camps. These require less than five minutes each and award a flat reputation baseline.
  • Weekly Major Quarries: Save your high-tier tracking consumables for the major weekly target. Defeating a major target provides a massive progression chunk toward your next tier level.
  • Avoid the Spawn Camp Trap: Standing in one spot waiting for a rare quarry to naturally path into you grants zero tracking progression. You must actively engage with physical clues to trigger the spawn.

2. Unlocking and Surviving Nightmare Hunts

Reaching Regional Prey Level 4 unlocks the true endgame layer of the system: Nightmare Hunts. This difficulty transforms standard open-world mobs into solo raid encounters.

The Escape Timers and Enrage Metrics

The moment a Nightmare quarry materializes, a strict 6-minute extraction timer begins ticking down. If the boss’s health bar is not depleted before the clock hits zero, the quarry turns immune and vanishes, wasting your tracking setup. Furthermore, at the 3-minute mark, the quarry enters a Void Rage, increasing its auto-attack damage by 50% and requiring flawless defensive mitigation.

🛑 Playtest Friction Warning: The Leash Reset Trap

During our live mechanical testing on high-tier targets, we discovered a lethal system quirk regarding boss positioning. If you drag a Nightmare quarry more than 60 yards away from its original tracking trail boundary—usually to escape a lethal environmental hazard or avoid pulling extra trash mobs—the boss will trigger an immediate Leash Reset. The quarry instantly despawns, wipes your Tracking Analysis Bar back to zero, and forces you to re-track the target entirely from scratch while locking your consumable tools on cooldown. Keep the fight firmly planted within the tracking arena.

3. High-Tier Solo Tracking Strategies & Spec Utility

Conquering Nightmare Hunts entirely solo requires specialized tools and class toolkits that can handle immense single-target damage while maintaining high mobility.

The Tracker’s Essential Survival Kit

Never trigger a high-tier hunt without filling your inventory with these mandatory engineering and alchemy tracking aids:

  • Stalker’s Pheromones: A consumable potion that extends the quarry’s escape timer by an additional 60 seconds.
  • Void-Tethered Traps: An engineered snare that halts a rampaging quarry’s movement for 6 seconds, giving you a clean window to reset your defensive cooldowns.
  • Marl-Infused Whetstones: Provides a passive 5% damage amplification modifier specifically tuned against open-world elite beasts and aberrations.

The Best Solo Spec Archetypes

Classes that possess strong passive self-healing, high target uptime, and active crowd-control utility completely trivialize the mechanical scaling of Nightmare targets:

  • Beast Master Hunter: The undisputed layout king. Your combat pets completely absorb the quarry’s heavy physical auto-attacks, allowing you to maintain perfect damage output while kiting away from ground hazards.
  • Guardian Druid: Exceptional for out-surviving the 3-minute Void Rage window. The combination of massive armor scaling and passive healing throughput ensures you can stand toe-to-toe with the hardest-hitting targets.
  • Blood Death Knight: The primary choice for ignoring control mechanics. Death Strike makes you entirely self-sufficient, while Death’s Advance prevents the quarry from knocking you out of the tracking boundary.

4. The Quarry Loot Map: Currencies & Exclusive Drops

Target-firing specific regions is essential to ensure your hunting hours align with your character’s long-term goals. Focus your weekly lockouts using this definitive loot distribution map:

Elite Quarry TargetZone RegionKey Currencies / Unique Asset DropsTargeted Player Profile
Gloomfang the UnboundGhostlands RevampAscendant Voidshards / Void-Infused Armor SetsCompetitive Gear Grinders
Sunscreecher VaelEversong WoodsEpic Sunstrider Tapestry (Housing Decor)Rare Collectors & Crafters
The Void-Stitched HorrorVoidstorm BorderReins of the Midnight Stalker (Rare Mount)Mount Hunters
All Nightmare TargetsExpansion-WideGuaranteed Champion-track item container (Weekly)Catch-Up Gearing Players

5. The Weekly Reward Optimization Loop

To extract the maximum absolute progression value from the open-world layout and ensure compliance with the official Blizzard patch notes on expansion-wide open world progression, coordinate your weekly activities using this precise sequence:

1.Complete 3 Weekly Nightmare Hunts:Step 1.

Clear your three weekly Nightmare Hunts right after the weekly reset. This fills out your initial world tracking metrics and secures your raw currency baseline early.

2.Claim the Champion-Track Container:Step 2.

Open your guaranteed weekly hunt container to check your drop slot. This prevents you from accidentally purchasing or target-farming an identical piece of armor later in the week.

3.Burn Keys in Solo Delves:Step 3.

Take the tokens and currencies earned from your hunts and transition directly into Tier 11 Bountiful Delves, building upon your established gear floor.

📊 Loot Strategist’s Market Verdict:

If you are an active crafter or gold-maker, do not spend your hunting tokens on the immediate catch-up gear containers. The gear from hunting tokens tops out at standard Champion levels, which can easily be replaced in low-level Mythic dungeons. Instead, hoard your tokens to purchase the exclusive Epic Sunstrider Tapestry and regional player housing blueprints. These housing assets hold an incredibly high value on the Auction House, allowing you to turn your outdoor tracking hours into immense liquid gold capital.

If you find your baseline item stats falling short against the strict 6-minute enrage windows of Nightmare targets, walk through our playtested WoW Midnight Endgame Gearing Guide to farm out your baseline gear tracks first. Additionally, if the steep gold costs of high-tier tracking potions and engineered traps are draining your character’s financial vault, read through our definitive WoW Midnight Gold Making & Profession Guide to keep your open-world ventures completely self-funded.

WoW Midnight Mythic+ Season 1 Strategy Guide: Dungeon Rotations, Meta Tier Lists, and Loot Mapping

WoW Midnight Mythic+ Season 1 Strategy Guide: Dungeon Rotations, Meta Tier Lists, and Loot Mapping

Pushing keystones in World of Warcraft: Midnight Season 1 is the definitive path to completely optimizing your weekly Great Vault and locking down absolute best-in-slot (BiS) Myth-track gear. However, entering the Mythic+ (M+) scene in a revamped, Void-infused Quel’Thalas requires a lot more than just raw DPS output. With tighter mechanical execution, revamped affix thresholds, and brutal trash pack scaling, running keys blindly is a fast track to bricking your keystone and alienating your group.

To ensure you stay ahead of the competitive curve and secure your weekly +10 milestones, here is our playtested, data-driven Season 1 strategy blueprint for lootstrategist.com.

1. The Season 1 Dungeon Pool: Rotation Breakdown

Season 1 features a balanced eight-dungeon layout consisting of four brand-new expansion environments and four returning fan-favorites modernized with current endgame damage scaling.

The Four New Elven Frontiers

  • The Silvermoon Catacombs: A hyper-dense, non-linear instance requiring strict pathing. Controlling line-of-sight (LoS) around the narrow elven pillars is mandatory to prevent hyper-extended Void-caster pulls.
  • Sunwell Depths: A gauntlet style instance characterized by relentless, hard-hitting trash packs. The mechanical focus here is on heavy spatial awareness and clean boss positioning.
  • Harandar Redoubt: A high-mobility dungeon featuring massive open areas. Mind your skyriding paths between platforms, as dropping out of bounds results in an immediate group wipe.
  • Voidstorm Sanctum: The pinnacle of cosmic damage profiles. Healing requirements spike heavily during the mid-dungeon environment events, demanding synchronized defensive cooldown rotations.

The Four Legacy Returners

  • The Arcway (Legion): Modernized with intense magical damage scaling. The unpredictable door-opening mechanics have been streamlined, but the mana-wraith trash packs hit much harder than you remember.
  • Grim Batol (Cataclysm): The dragon-bombing mechanic remains, but its trash-clearing efficiency has been scaled back. Focus heavily on kicking the Twilight Benders’ shadow-casting casts.
  • Siege of Boralus (Battle for Azeroth): The water-born boss encounters demand flawless spatial positioning, while the alliance/horde spotter mechanics require precise target tagging.
  • Mists of Tirna Scithe (Shadowlands): The puzzle maze layout is intact, but the mechanical variance on the trickster boss has been tightened to prevent brute-force burst phases.

2. Season 1 Mythic+ Meta Spec Tier List

The high-key leaderboard meta has solidified around specializations that offer unparalleled group utility, strong passive damage mitigation, and sustained area-of-effect (AoE) burst.

RoleS-Tier (The God Comp)A-Tier (Highly Competitive)B-Tier (Viable / Comp Dependent)
TankProtection PaladinBlood Death Knight / Guardian DruidBrewmaster Monk / Protection Warrior
HealerRestoration ShamanPreservation Evoker / Holy PriestDiscipline Priest / Mistweaver Monk
DPS (Melee)Frost Death KnightHavoc Demon Hunter / Outlaw RogueRetribution Paladin / Arms Warrior
DPS (Ranged)Augmentation Evoker / Mage (Frost)Shadow Priest / Balance DruidDestruction Warlock / Beast Master Hunter

The Rationale Behind the S-Tier Meta

  • Protection Paladin: The undisputed king of key control. The sheer volume of target-capped spell interrupts from Avenger’s Shield completely trivializes the lethal Void-mender groups in the new Midnight dungeons.
  • Restoration Shaman: Mandatory for their short-cooldown ranged interrupt (Wind Shear) and massive passive group healing profile through heavy movement phases via Spiritwalker’s Grace.
  • Augmentation Evoker & Frost Mage: The absolute bedrock of high-key damage execution. Augmentation scales the group’s passive defenses, while Frost Mage provides passive slows, group roots, and unmatched target control during high-stack trash weeks.

While every specialization is structurally capable of timing keys up to a +10 baseline, checking the real-time high-end logs on Raider.IO’s live global character rankings and group composition metrics reveals an intense community shift toward specific team structures. The community group-finder filter systems consistently prioritize options that bring targeted control to the new dungeons.

The high-key leaderboard meta has solidified around specializations that offer unparalleled group utility, strong passive damage mitigation, and sustained area-of-effect (AoE) burst. Cross-referencing our raw gameplay testing with Archon’s endgame M+ data parsing index gives us a definitive look at the initial Season 1 layout:

3. The 2026 Affix Thresholds & Mechanical Shifts

Blizzard has fundamentally restructured how affixes scale as keys escalate. Mechanics no longer introduce random, uncontrollable open-world annoyances; instead, they scale directly at core milestone levels to challenge your group’s fundamental execution.

1.1. The Baseline Scaling Era:Key Levels +2 to +3.

  • Focus: Core dungeon layout masteries. Mobs receive standard health and damage multipliers, allowing you to learn basic pull limitations and boss visual tells without immediate, lethal punishment.

2.2. The First Mechanical Pivot:Key Levels +4 to +6.

  • Focus: Challenger’s Peril activates. Wiping now results in a severe 15-second time penalty rather than a standard 5-second drain. Tyrannical or Fortified rotation cycles activate here, completely shifting your target prioritization.

3.3. The Utility Check Layer:Key Levels +7 to +9.

  • Focus: High-intensity environmental affixes activate (e.g., Void-burst anomalies). Trash packs gain extra defensive abilities or spawn tracking ground hazards, requiring crowd-control coordination and active dispel management.

4.4. The Elite Execution Threshold:Key Levels +10 and Beyond.

  • Focus: The Guiding Light / Void Infusion apex affixes unlock. Bosses gain an additional 20% health modifier, and specific elite trash mobs receive a permanent damage-boosting aura that can only be mitigated by purge mechanics or absolute single-target focus.

🛑 Playtest Friction Warning: The Voidstorm Hazard Wipe Cascade

Watch Your Ground Dispel Timings:

While testing high-tier keys in the Voidstorm Sanctum during a high-movement affix week, our group encountered a brutal mechanical loop. The second boss spawns heavy purple swirl pools that pull characters inward. If this cast happens exactly when a global moving affix triggers, the intersecting ground hazards will overwhelm standard running speeds. Do not attempt to run out of it manually. The healer must immediately drop a mass speed multiplier (like Wind Rush Totem or Stampeding Roar) or prepare a major defensive raid cooldown ahead of the overlap to prevent an instant, cascade wipe.

4. Dungeon Loot Mapping: Target-Farming Your BiS Trinkets

Do not waste your valuable keystones running instances with poor stat allocations. Use this definitive loot map to spend your dungeon focus targeting maximum statistical output:

Dungeon NameBoss EncounterTrinket / Weapon AssetPrimary Target
The Silvermoon CatacombsVoid-Overseer KaelenSignet of the Sun-StriderAll Casters / Ranged DPS
Sunwell DepthsHigh Priestess ValestraVial of Restorative LightAll Main Healers
The ArcwayIvanyrChronoshard CatalystHigh-Haste Melee DPS
Voidstorm SanctumThe ManifestationVoidcore HeartProtection Paladins / Tanks
Grim BatolErudaxUmbral GreatswordTwo-Handed Strength DPS

5. The Keystone Economy: Consumables & Group Optimization

Running competitive keys at a +10 baseline is an incredibly expensive enterprise. Between armor durability repairs, premium combat flasks, high-tier stat food, and individual potion consumption, a single night of key pushing can easily drain 50,000 gold from your inventory.

Before building your group finder listings or gathering your pre-made team at the dungeon portal, ensure your operational vault is entirely optimized.

📊 Loot Strategist’s Team Composition Verdict:

When pulling random players from the group finder (“pugging”), never select group members based purely on high raw DPS throughput numbers. A player outputting slightly less damage who possesses a reliable off-heal, a curse dispel, or a high-velocity interrupt is statistically three times more likely to save a failing key than a pure glass-cannon build. Group synergy, mechanical compliance, and crowd-control utility are your truest paths to timing keys consistently.

If you are stepping into high Mythic+ keystones for the first time this season and find your character’s baseline stats falling short, consult our playtested WoW Midnight Endgame Gearing Guide to farm out your Tier 11 solo Delve tracks first. Furthermore, if the steep costs of top-tier raiding flasks and combat enchants are putting a strain on your character’s financial reserves, read through our definitive WoW Midnight Gold Making & Profession Guide to permanently secure your crafting profits and keep your competitive endgame entirely self-funded.