Assassin’s Creed Codename Invictus: Everything We Know About Ubisoft’s Upcoming Multiplayer Game
If you spent countless hours playing hide-and-seek across the rooftops of Renaissance Italy in Assassin’s Creed Brotherhood or Revelations, you probably miss the unique tension of the franchise’s classic multiplayer. Ever since Ubisoft pivoted entirely to massive single-player open worlds, competitive stealth fans have been left wondering if a dedicated multiplayer mode would ever return.
That silence is finally set to break with Assassin’s Creed Codename Invictus. Designed as a standalone, arcade-style multiplayer experience, Invictus is shaping up to be one of the most experimental pivots in the franchise’s history.
Drawing from official Ubisoft announcements, developer movements, and industry insider reports, here is a complete, human-first breakdown of everything we know about Codename Invictus.
What is Assassin’s Creed Codename Invictus?
First confirmed during Ubisoft’s September 2022 franchise showcase alongside titles like Codename Hexe, Invictus is the working title for a standalone multiplayer entry in the series.
Rather than tacking a traditional multiplayer mode onto a massive single-player campaign—as Ubisoft did during the Unity and Black Flag eras—Invictus is being built from the ground up as a dedicated experience. Crucially, the game will live inside the broader Animus Hub (formerly known as Infinity), acting as a central launcher and ecosystem for future Assassin’s Creed content.
The Heavyweights Behind the Project: The For Honor Connection
One of the most encouraging signs for Invictus is the team at the helm. Ubisoft confirmed that development is being led by veterans at Ubisoft Montreal, specifically drawing on key talent who worked on For Honor.
Given For Honor‘s legacy as a tightly tuned, melee-focused competitive fighter, handing the reins to that team suggests Invictus won’t just be a generic shooter skin with hoods. Instead, it points toward a game heavily invested in positional combat, timing, spacing, and tactical outplay—elements that naturally align with social stealth.
Gameplay Style and Leaked Mechanics
While Ubisoft has kept official gameplay trailers under lock and key, extensive industry reporting and playtest leaks have painted a clearer picture of what to expect:
Arcade-Style, Round-Based Structure: Unlike sprawling battle royales, insider reports indicate Invictus leans toward quicker, accessible, round-based matches designed for around 16 players.
Diverse Game Modes: Leaks point to a mix of modes reminiscent of party and movement games, including traditional Team Deathmatch, free-for-all skirmishes, and speed-oriented navigation modes where players race across intricate maps to hit specific lighting points.
Crossover Potential: Because Invictus plugs directly into the Animus Hub, community speculation heavily leans toward featuring iconic characters, outfits, and maps from across the entire franchise’s history—allowing players to pit historical assassins against each other in surreal arenas.
Development Status and When to Expect It
Development on a project of this scale takes time, especially given Ubisoft’s ongoing structural adjustments across its major studios. While early insider chatter sparked rumors of a potential window, Ubisoft has maintained a tight-lipped approach, focusing heavily on getting foundational pillars like the Animus Hub right.
As Ubisoft continues to balance its single-player tentpoles—such as the atmospheric, dark-toned Assassin’s Creed Hexe
—with multiplayer experiments, Invictus represents a major test for whether the franchise can successfully recapture its competitive community.
Frequently Asked Questions (FAQ)
Is Assassin’s Creed Invictus a free-to-play game?
While Ubisoft hasn’t officially confirmed the final monetization model, its integration into the Animus Hub platform has led many analysts to suspect a live-service or accessible pricing structure.
Will Invictus feature a single-player campaign?
No. Codename Invictus is being built strictly as a dedicated multiplayer experience, separate from narrative-driven entries like Hexe or mainline historical RPGs.
Who is developing Assassin’s Creed Invictus?
Ubisoft Montreal is leading the project, with core team members who previously worked on the competitive medieval action game For Honor.
For visual reference on community discussions surrounding the project, you can check out this Assassin’s Creed Multiplayer Leaks Breakdown. This video provides a helpful overview of the community speculation and leak timelines driving interest around the game’s development.
Marvel’s Wolverine Update 1.002: How QSSR Upscaling Changes the Game on Base PS5
When Insomniac Games dropped Marvel’s Wolverine, it instantly cemented itself as one of the most visually visceral action titles on the PlayStation 5. But for players rocking a standard, non-Pro console, pushing for top-tier visual clarity often meant dealing with the usual performance compromises.
That baseline shifted overnight when Sony and Insomniac rolled out update 1.002.000. Along with standard bug fixes, the patch quietly introduces Quick Spectral Super Resolution (QSSR)—Sony’s streamlined machine-learning upscaler built specifically to bring AI-powered image enhancement to the base PS5.
Out of the gate, Logan’s debut adventure serves as the ultimate showcase for this tech. If you’re wondering what update 1.002 actually changes under the hood, here is the real talk on how QSSR affects gameplay and whether you need to tweak your settings.
What Is QSSR, and Why Should Base PS5 Owners Care?
For a long time, advanced AI upscaling felt like exclusive territory for PS5 Pro owners flexing their PSSR capabilities. Standard console owners were left wondering if they’d miss out entirely on next-gen rendering tools.
QSSR changes that equation. Born from Sony and AMD’s ongoing Project Amethyst collaboration, it uses a lightweight neural network architecture designed to squeeze maximum performance out of the base hardware constraints.
Instead of relying solely on traditional rendering techniques that can cause fast-paced action sequences to look soft or artifact-heavy during heavy combat, Marvel’s Wolverine uses QSSR to clean up dynamic scenes without melting your GPU.
The Real Talk: How Does It Look in Action?
Early technical breakdowns from analysts and community testing paint a very positive picture for base hardware:
The Visual Bump: Players and tech analysts have noted a stark boost in edge stability and fine detail clarity during frantic combat. Fine environmental details, rain effects, and Logan’s character model pop with a sharper finish that bridges some of the gap with higher-end rendering profiles.
On by Default: You don’t have to go hunting through an obscure settings maze to turn it on. Following update 1.002, QSSR is enabled automatically on base consoles.
Beyond Upscaling: Insomniac’s update also packs crucial fixes for Photo Mode, UI bugs, out-of-bounds navigation issues, and accessibility improvements.
How to Verify Your Game is Up to Date
If your console is connected to the web, Marvel’s Wolverine should have grabbed the patch automatically. If you want to double-check:
Hover over the Marvel’s Wolverine tile on your PS5 home screen.
Press the Options button on your DualSense controller and select Check for Update.
Jump into the game and check your display options to ensure everything is running on the latest version.
The Verdict: A Massive Win for Standard Consoles
Mid-cycle hardware refreshes often leave standard console owners feeling like an afterthought. By bringing a tailored version of machine-learning upscaling down to the base PS5 through heavy hitters like Marvel’s Wolverine, Sony has given the original hardware a meaningful second wind.
Have you noticed a sharper image during combat since grabbing update 1.002, or are you still holding out for a hardware upgrade? Let us know in the comments below!
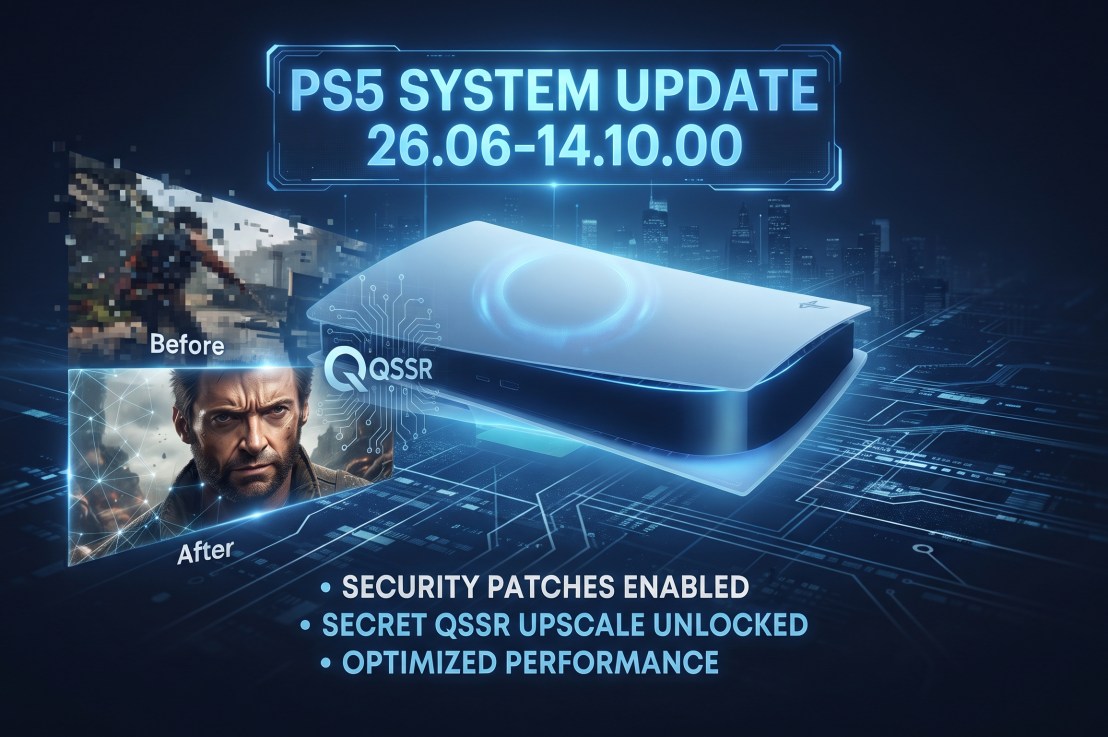
PS5 System Software Update 26.06-14.10.00: Security Fixes and the Secret QSSR Unlock
If you booted up your console and got hit with a forced download prompt, you’re looking at PS5 system software update version 26.06-14.10.00.
Sony’s official support documentation gives you the usual corporate runaround, but digging deeper reveals there’s actually more under the hood this time than just boring background maintenance. Here is the real breakdown of what this update is doing to your console.
The Official Patch Notes
Sony’s changelog for version 26.06-14.10.00 reads:
We’ve made some security fixes to the system software.
We’ve improved system software performance and stability.
What’s Actually Going On (The Real Talk)
The QSSR Upscaler Unlocked: Alongside the generic stability fixes, this firmware quietly enables support for QSSR (Sony’s new in-house AI upscaler built with AMD) on base consoles. Games like Marvel’s Wolverine are already taking advantage of it to sharpen dynamic scenes without hammering performance.
The Security / Jailbreak Angle: Whenever Sony drops a patch with vague “security fixes,” the community immediately goes on alert. Updates like this act as a counter-measure against recent exploit attempts, meaning players tracking older firmware versions for homebrew will want to stay offline.
Online Play: If you play online, you’ll eventually have to pull the trigger. PSN won’t let you hop into a lobby or party chat on an outdated version.
How to Install It
If your console is in Rest Mode, it probably already grabbed it. If not, manual installation takes thirty seconds:
Head to Settings (the gear icon top-right of your home screen).
Go to System > System Software > System Software Update and Settings.
Hit Update System Software > Update Using Internet.
Have you noticed any visual bumps in games like Wolverine since updating, or are you keeping your console offline? Let us know below.
Editorial Note:Tiers and gene recommendations reflect post-launch Title Update 5 balancing, co-op high-rank expeditions, and Fatalis/PvP meta optimization.
With over 140 companions available in Monster Hunter Stories 2: Wings of Ruin, building the ultimate team requires looking past pure nostalgia. Success in high-rank co-op dens, Special Lair runs, and competitive PvP boils down to three core factors: base stat scaling, attack tendencies (Power, Speed, Technical), and bingo board flexibility via the Rite of Channeling.
Whether you need a heavy hitter to clear the S-Rank Fatalis trial or an early-game carry, this comprehensive Monstie Tier List breaks down the absolute best companions in the current meta.
Ranmar (Velocidrome), Royal Ludroth, Kulu-Ya-Ku, Pukei-Pukei
👑 S-Tier: The Definitive Endgame Meta
S-Tier Monsties feature unmatched base stat distributions, high critical-hit ratios, and innate gene skills that dominate head-to-head (HtH) clashes.
1. Silver Rathalos (Power / Fire)
Riding Actions: Fly
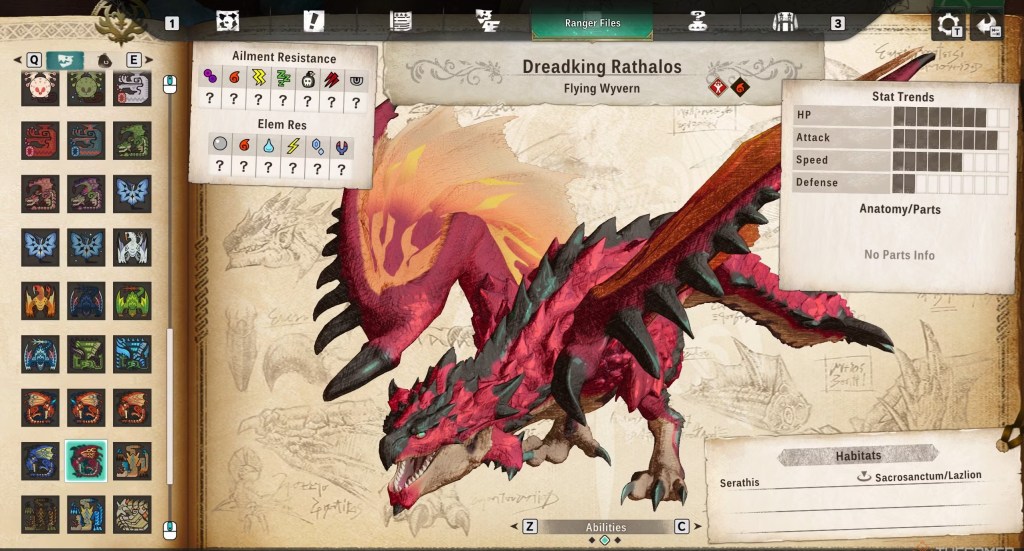
Why It’s Top Tier: Silver Rathalos sits atop the Fire damage meta. Boasting higher base elemental attack and defense stats than Teostra or Dreadking Rathalos, its signature Solar Flare gene delivers catastrophic single-target damage with a high burn chance.
Best Gene Synergy: Slot in Hellblade Gene (XL) for Flame Aura and Fire Boost Gene (XL) to maximize your Fire Bingo multipliers.
2. Bloodbath Diablos (Speed / Non-Elemental)
Riding Actions: Roar, Ground Dive
Why It’s Top Tier: The unquestioned king of raw physical burst. Bloodbath Diablos outpaces standard Speed monsties with incredible critical hit rates and its devastating Savage Roar skill, which hits all enemies while ignoring elemental resistances.
Best Gene Synergy: Build around Non-Elem Boost (XL), Might Gene (XL), and Critical Gene (XL) for maximum head-to-head damage multipliers.
3. Boltreaver Astalos (Technical / Thunder)
Riding Actions: Fly
Why It’s Top Tier: Boltreaver solves the longstanding issue of Technical monsties lacking raw speed. With immense critical hit scaling and paralysis application, it locks down bosses in high-rank co-op expeditions before they can enter enraged phases.
Best Gene Synergy: Pair with Thunderlord Gene (L) and Critical Eye to guarantee consistent crit-paralyze loops.
4. Soulseer Mizutsune (Speed / Water)
Riding Actions: Dash
Why It’s Top Tier: Water-element monsties are notoriously rare in the endgame, but Soulseer Mizutsune completely dominates this niche. Its high speed and dodge-buff mechanics make it nearly untouchable in high-rank PvP duels.
⚔️ A-Tier: High-Rank & Co-Op Powerhouses
While slightly edged out by S-Tier variants in raw stat caps, A-Tier monsties are essential for clearing high-rank dens and building specialized elemental coverage.
1. Nergigante (Power / Non-Elemental)
Why You Need It: Nergigante is the easiest S/A-tier monstie to acquire immediately upon entering the Terga region. Its self-healing passive (Calamity Slash) makes it the safest choice for soloing the Elder Lair.
2. Silverwind Nargacuga (Speed / Non-Elemental)
Why You Need It: While Bloodbath Diablos deals slightly more raw damage, Silverwind Nargacuga remains mandatory for farming. Its Stealth riding action allows you to bypass trash mobs in Co-Op Expeditions, saving hours when grinding Super Rare High-Rank Dens.
3. Velkhana & Kushala Daora (Technical / Ice)
Why You Need Them: Both Ice-type Elder Dragons dominate the Ice meta. Velkhana edges ahead in single-target skill damage, making it the primary counter for endgame Dragon-element boss trials.
🐣 Best Early-to-Mid Game Monsties (Campaign Carry)
If you are still working through the story campaign, do not waste time hyper-optimizing genes early on. Grab these easily accessible monsties:
Tigrex / Royal Tigrex (Speed – Alcala Region): Can be fought early as a Royal Monster in Harzgai Rocky Hill. Gives you immediate access to 5-star stats and the Ivy Climb riding action.
Nargacuga (Speed – Alcala Region): Unlocks the essential Stealth skill, making egg hunting significantly faster.
Zamtrios (Technical / Ice – Loloska Region): Excellent mid-game wall breaker that handles the sudden jump in dragon/fire enemy difficulty in the snow region.
🧬 Rite of Channeling: Core Rules for Endgame Builds
Prioritize Elemental Bingo Lines: Always complete bingo lines (horizontal, vertical, or diagonal) matching your monstie’s primary element to hit maximum damage caps.
Keep the Primary Tendency Pure: Avoid mixing too many off-type genes onto a natural Power or Speed monstie unless building a specific PvP surprise counter. Sticking to their natural tendency preserves their highest stat growth curve.
Always Run Head-to-Head (HtH) Master: High-Rank endgames revolve around winning Head-to-Head clashes to build Kinship gauge quickly. Ensure every endgame build includes HtH Master (XL) or Self-Improvement (XL).
💡 Planning your full gaming backlog? Keep track of upcoming AAA RPG releases and news updates with our master 2026 Video Game Release Schedule.
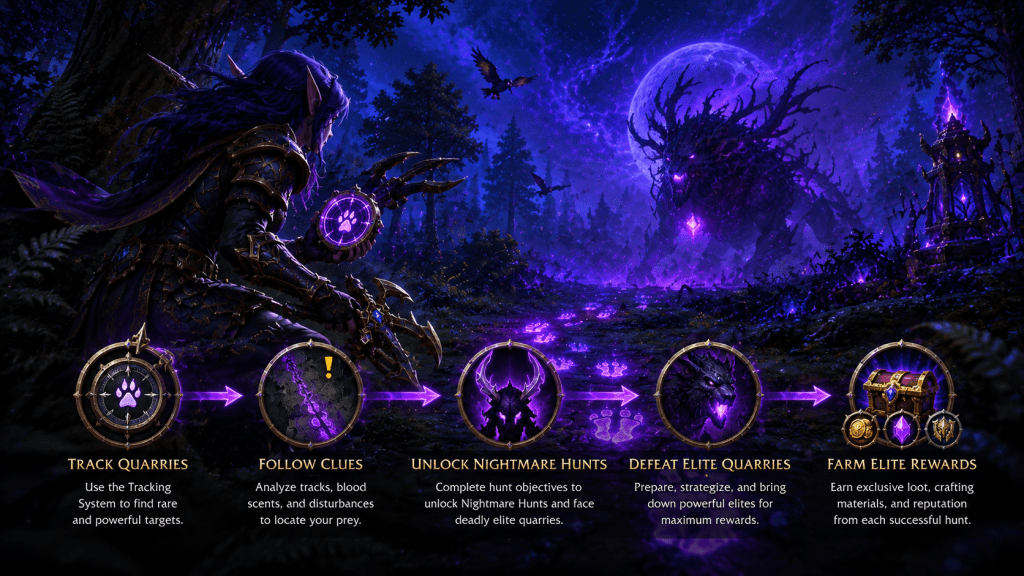
While dungeons and raids dominate the traditional PvE conversation, World of Warcraft: Midnight introduces a massive shift to open-world endgame content via the Prey Hunting System. Deep within the revamped forests of Eversong and the scarred steps of the Ghostlands, players are no longer just clearing static quest nodes—they are actively tracking elite quarry targets across scaling difficulties.
If you treat a high-tier hunt like a typical open-world rare spawn, you will quickly find your target escaping into the shadows. The system enforces strict footprint tracking, environmental puzzle-solving, and brutal solo combat checks. However, if mastered, it stands as one of the fastest ways in Season 1 to stock up on high-tier currencies, catch-up gear, and incredibly lucrative player housing blueprints.
This playtested guide breaks down the hidden tracking UI, the fastest path to maximize your Regional Prey Level, and the solo strategies needed to conquer Nightmare-tier quarries.
1. The Hunting Basics: How the Prey Tracking System Works
The Prey Hunting loop bypasses standard map pins. Instead, you must use localized environmental clues to discover, follow, and ambush your quarry.
Reading the Regional Tracking UI
When you enter a designated hunting zone, your minimap transitions into a specialized Scent Vector Radar. Rather than showing an exact point, it displays shifting directional arcs. To locate the quarry’s true trail, you must scour the terrain for three distinct physical interactions:
Disturbed Dirt: Indicates the weight and relative movement speed of the quarry.
Broken Foliage: Reveals if the target is flying, skyriding, or grounded.
Void Scents: Purple vapor clouds that show the chronological path the target took within the last three minutes.
Interacting with these points fills your Tracking Analysis Bar. Once it hits 100%, the quarry physically materializes, initiating the combat phase. If you are having trouble distinguishing hidden nodes across varying terrain elevations, you can cross-reference Wowhead’s comprehensive Prey tracking database and zone maps to overlay exact spawn grids onto your secondary monitor.
Grinding Your Regional Prey Level Fast
Your hunting efficiency is entirely gated by your Regional Prey Level (Tiers 1 through 4). To raise your rank efficiently without hitting daily diminishing returns, execute your open-world time using this specific layout:
Daily Minor Marks: Clear the three minor tracking bounties displayed at regional hunter camps. These require less than five minutes each and award a flat reputation baseline.
Weekly Major Quarries: Save your high-tier tracking consumables for the major weekly target. Defeating a major target provides a massive progression chunk toward your next tier level.
Avoid the Spawn Camp Trap: Standing in one spot waiting for a rare quarry to naturally path into you grants zero tracking progression. You must actively engage with physical clues to trigger the spawn.
2. Unlocking and Surviving Nightmare Hunts
Reaching Regional Prey Level 4 unlocks the true endgame layer of the system: Nightmare Hunts. This difficulty transforms standard open-world mobs into solo raid encounters.
The Escape Timers and Enrage Metrics
The moment a Nightmare quarry materializes, a strict 6-minute extraction timer begins ticking down. If the boss’s health bar is not depleted before the clock hits zero, the quarry turns immune and vanishes, wasting your tracking setup. Furthermore, at the 3-minute mark, the quarry enters a Void Rage, increasing its auto-attack damage by 50% and requiring flawless defensive mitigation.
🛑 Playtest Friction Warning: The Leash Reset Trap
During our live mechanical testing on high-tier targets, we discovered a lethal system quirk regarding boss positioning. If you drag a Nightmare quarry more than 60 yards away from its original tracking trail boundary—usually to escape a lethal environmental hazard or avoid pulling extra trash mobs—the boss will trigger an immediate Leash Reset. The quarry instantly despawns, wipes your Tracking Analysis Bar back to zero, and forces you to re-track the target entirely from scratch while locking your consumable tools on cooldown. Keep the fight firmly planted within the tracking arena.
3. High-Tier Solo Tracking Strategies & Spec Utility
Conquering Nightmare Hunts entirely solo requires specialized tools and class toolkits that can handle immense single-target damage while maintaining high mobility.
The Tracker’s Essential Survival Kit
Never trigger a high-tier hunt without filling your inventory with these mandatory engineering and alchemy tracking aids:
Stalker’s Pheromones: A consumable potion that extends the quarry’s escape timer by an additional 60 seconds.
Void-Tethered Traps: An engineered snare that halts a rampaging quarry’s movement for 6 seconds, giving you a clean window to reset your defensive cooldowns.
Marl-Infused Whetstones: Provides a passive 5% damage amplification modifier specifically tuned against open-world elite beasts and aberrations.
The Best Solo Spec Archetypes
Classes that possess strong passive self-healing, high target uptime, and active crowd-control utility completely trivialize the mechanical scaling of Nightmare targets:
Beast Master Hunter: The undisputed layout king. Your combat pets completely absorb the quarry’s heavy physical auto-attacks, allowing you to maintain perfect damage output while kiting away from ground hazards.
Guardian Druid: Exceptional for out-surviving the 3-minute Void Rage window. The combination of massive armor scaling and passive healing throughput ensures you can stand toe-to-toe with the hardest-hitting targets.
Blood Death Knight: The primary choice for ignoring control mechanics. Death Strike makes you entirely self-sufficient, while Death’s Advance prevents the quarry from knocking you out of the tracking boundary.
4. The Quarry Loot Map: Currencies & Exclusive Drops
Target-firing specific regions is essential to ensure your hunting hours align with your character’s long-term goals. Focus your weekly lockouts using this definitive loot distribution map:
Clear your three weekly Nightmare Hunts right after the weekly reset. This fills out your initial world tracking metrics and secures your raw currency baseline early.
2.Claim the Champion-Track Container:Step 2.
Open your guaranteed weekly hunt container to check your drop slot. This prevents you from accidentally purchasing or target-farming an identical piece of armor later in the week.
3.Burn Keys in Solo Delves:Step 3.
Take the tokens and currencies earned from your hunts and transition directly into Tier 11 Bountiful Delves, building upon your established gear floor.
📊 Loot Strategist’s Market Verdict:
If you are an active crafter or gold-maker, do not spend your hunting tokens on the immediate catch-up gear containers. The gear from hunting tokens tops out at standard Champion levels, which can easily be replaced in low-level Mythic dungeons. Instead, hoard your tokens to purchase the exclusive Epic Sunstrider Tapestry and regional player housing blueprints. These housing assets hold an incredibly high value on the Auction House, allowing you to turn your outdoor tracking hours into immense liquid gold capital.
If you find your baseline item stats falling short against the strict 6-minute enrage windows of Nightmare targets, walk through our playtested WoW Midnight Endgame Gearing Guide to farm out your baseline gear tracks first. Additionally, if the steep gold costs of high-tier tracking potions and engineered traps are draining your character’s financial vault, read through our definitive WoW Midnight Gold Making & Profession Guide to keep your open-world ventures completely self-funded.
Pushing keystones in World of Warcraft: Midnight Season 1 is the definitive path to completely optimizing your weekly Great Vault and locking down absolute best-in-slot (BiS) Myth-track gear. However, entering the Mythic+ (M+) scene in a revamped, Void-infused Quel’Thalas requires a lot more than just raw DPS output. With tighter mechanical execution, revamped affix thresholds, and brutal trash pack scaling, running keys blindly is a fast track to bricking your keystone and alienating your group.
To ensure you stay ahead of the competitive curve and secure your weekly +10 milestones, here is our playtested, data-driven Season 1 strategy blueprint for lootstrategist.com.
1. The Season 1 Dungeon Pool: Rotation Breakdown
Season 1 features a balanced eight-dungeon layout consisting of four brand-new expansion environments and four returning fan-favorites modernized with current endgame damage scaling.
The Four New Elven Frontiers
The Silvermoon Catacombs: A hyper-dense, non-linear instance requiring strict pathing. Controlling line-of-sight (LoS) around the narrow elven pillars is mandatory to prevent hyper-extended Void-caster pulls.
Sunwell Depths: A gauntlet style instance characterized by relentless, hard-hitting trash packs. The mechanical focus here is on heavy spatial awareness and clean boss positioning.
Harandar Redoubt: A high-mobility dungeon featuring massive open areas. Mind your skyriding paths between platforms, as dropping out of bounds results in an immediate group wipe.
Voidstorm Sanctum: The pinnacle of cosmic damage profiles. Healing requirements spike heavily during the mid-dungeon environment events, demanding synchronized defensive cooldown rotations.
The Four Legacy Returners
The Arcway (Legion): Modernized with intense magical damage scaling. The unpredictable door-opening mechanics have been streamlined, but the mana-wraith trash packs hit much harder than you remember.
Grim Batol (Cataclysm): The dragon-bombing mechanic remains, but its trash-clearing efficiency has been scaled back. Focus heavily on kicking the Twilight Benders’ shadow-casting casts.
Siege of Boralus (Battle for Azeroth): The water-born boss encounters demand flawless spatial positioning, while the alliance/horde spotter mechanics require precise target tagging.
Mists of Tirna Scithe (Shadowlands): The puzzle maze layout is intact, but the mechanical variance on the trickster boss has been tightened to prevent brute-force burst phases.
2. Season 1 Mythic+ Meta Spec Tier List
The high-key leaderboard meta has solidified around specializations that offer unparalleled group utility, strong passive damage mitigation, and sustained area-of-effect (AoE) burst.
Role
S-Tier (The God Comp)
A-Tier (Highly Competitive)
B-Tier (Viable / Comp Dependent)
Tank
Protection Paladin
Blood Death Knight / Guardian Druid
Brewmaster Monk / Protection Warrior
Healer
Restoration Shaman
Preservation Evoker / Holy Priest
Discipline Priest / Mistweaver Monk
DPS (Melee)
Frost Death Knight
Havoc Demon Hunter / Outlaw Rogue
Retribution Paladin / Arms Warrior
DPS (Ranged)
Augmentation Evoker / Mage (Frost)
Shadow Priest / Balance Druid
Destruction Warlock / Beast Master Hunter
The Rationale Behind the S-Tier Meta
Protection Paladin: The undisputed king of key control. The sheer volume of target-capped spell interrupts from Avenger’s Shield completely trivializes the lethal Void-mender groups in the new Midnight dungeons.
Restoration Shaman: Mandatory for their short-cooldown ranged interrupt (Wind Shear) and massive passive group healing profile through heavy movement phases via Spiritwalker’s Grace.
Augmentation Evoker & Frost Mage: The absolute bedrock of high-key damage execution. Augmentation scales the group’s passive defenses, while Frost Mage provides passive slows, group roots, and unmatched target control during high-stack trash weeks.
While every specialization is structurally capable of timing keys up to a +10 baseline, checking the real-time high-end logs on Raider.IO’s live global character rankings and group composition metrics reveals an intense community shift toward specific team structures. The community group-finder filter systems consistently prioritize options that bring targeted control to the new dungeons.
The high-key leaderboard meta has solidified around specializations that offer unparalleled group utility, strong passive damage mitigation, and sustained area-of-effect (AoE) burst. Cross-referencing our raw gameplay testing with Archon’s endgame M+ data parsing index gives us a definitive look at the initial Season 1 layout:
3. The 2026 Affix Thresholds & Mechanical Shifts
Blizzard has fundamentally restructured how affixes scale as keys escalate. Mechanics no longer introduce random, uncontrollable open-world annoyances; instead, they scale directly at core milestone levels to challenge your group’s fundamental execution.
1.1. The Baseline Scaling Era:Key Levels +2 to +3.
Focus: Core dungeon layout masteries. Mobs receive standard health and damage multipliers, allowing you to learn basic pull limitations and boss visual tells without immediate, lethal punishment.
2.2. The First Mechanical Pivot:Key Levels +4 to +6.
Focus: Challenger’s Peril activates. Wiping now results in a severe 15-second time penalty rather than a standard 5-second drain. Tyrannical or Fortified rotation cycles activate here, completely shifting your target prioritization.
3.3. The Utility Check Layer:Key Levels +7 to +9.
Focus: High-intensity environmental affixes activate (e.g., Void-burst anomalies). Trash packs gain extra defensive abilities or spawn tracking ground hazards, requiring crowd-control coordination and active dispel management.
4.4. The Elite Execution Threshold:Key Levels +10 and Beyond.
Focus: The Guiding Light / Void Infusion apex affixes unlock. Bosses gain an additional 20% health modifier, and specific elite trash mobs receive a permanent damage-boosting aura that can only be mitigated by purge mechanics or absolute single-target focus.
🛑 Playtest Friction Warning: The Voidstorm Hazard Wipe Cascade
Watch Your Ground Dispel Timings:
While testing high-tier keys in the Voidstorm Sanctum during a high-movement affix week, our group encountered a brutal mechanical loop. The second boss spawns heavy purple swirl pools that pull characters inward. If this cast happens exactly when a global moving affix triggers, the intersecting ground hazards will overwhelm standard running speeds. Do not attempt to run out of it manually. The healer must immediately drop a mass speed multiplier (like Wind Rush Totem or Stampeding Roar) or prepare a major defensive raid cooldown ahead of the overlap to prevent an instant, cascade wipe.
4. Dungeon Loot Mapping: Target-Farming Your BiS Trinkets
Do not waste your valuable keystones running instances with poor stat allocations. Use this definitive loot map to spend your dungeon focus targeting maximum statistical output:
Dungeon Name
Boss Encounter
Trinket / Weapon Asset
Primary Target
The Silvermoon Catacombs
Void-Overseer Kaelen
Signet of the Sun-Strider
All Casters / Ranged DPS
Sunwell Depths
High Priestess Valestra
Vial of Restorative Light
All Main Healers
The Arcway
Ivanyr
Chronoshard Catalyst
High-Haste Melee DPS
Voidstorm Sanctum
The Manifestation
Voidcore Heart
Protection Paladins / Tanks
Grim Batol
Erudax
Umbral Greatsword
Two-Handed Strength DPS
5. The Keystone Economy: Consumables & Group Optimization
Running competitive keys at a +10 baseline is an incredibly expensive enterprise. Between armor durability repairs, premium combat flasks, high-tier stat food, and individual potion consumption, a single night of key pushing can easily drain 50,000 gold from your inventory.
Before building your group finder listings or gathering your pre-made team at the dungeon portal, ensure your operational vault is entirely optimized.
📊 Loot Strategist’s Team Composition Verdict:
When pulling random players from the group finder (“pugging”), never select group members based purely on high raw DPS throughput numbers. A player outputting slightly less damage who possesses a reliable off-heal, a curse dispel, or a high-velocity interrupt is statistically three times more likely to save a failing key than a pure glass-cannon build. Group synergy, mechanical compliance, and crowd-control utility are your truest paths to timing keys consistently.
If you are stepping into high Mythic+ keystones for the first time this season and find your character’s baseline stats falling short, consult our playtested WoW Midnight Endgame Gearing Guide to farm out your Tier 11 solo Delve tracks first. Furthermore, if the steep costs of top-tier raiding flasks and combat enchants are putting a strain on your character’s financial reserves, read through our definitive WoW Midnight Gold Making & Profession Guide to permanently secure your crafting profits and keep your competitive endgame entirely self-funded.
So you’ve reached level 90 in World of Warcraft: Midnight. Now the real gearing game begins.
If you’re wondering what to do first, you’re not alone. Midnight gives you a lot of ways to improve your character—Delves, Prey, dungeons, Mythic+, raids, world activities, crafting, the Great Vault, and the newer Voidforge system.
The trick isn’t to do all of them.
Your best gearing route depends on what you actually play.
If you’re mostly solo, Delves and Prey give you a strong progression path. If you enjoy dungeons, move through Mythic 0 and into Mythic+. Raiders can build around raid progression while using other activities to fill gaps. And if you’re gearing an alt, catch-up systems and targeted rewards become much more important.
This guide breaks down how we’d approach Midnight Season 1 gearing, what to prioritize at each stage, and where it’s worth spending your upgrade resources.
Last updated: August 2026 Season: Midnight Season 1
The Short Version: How to Gear Up in Midnight
If you don’t want to read the entire guide, here’s the basic approach:
Fresh level 90: Replace your weakest leveling pieces and start the endgame activity you enjoy.
Mostly solo: Build around Delves and Prey, then add higher-difficulty content as your character improves.
Dungeon player: Use Heroic and Mythic 0 as a bridge into Mythic+.
Raider: Get into the raid difficulty your group can handle and use Delves, dungeons, and other activities to fill weak slots.
Every week: Complete worthwhile activities for your Great Vault rather than leaving potential upgrades on the table.
The biggest mistake is trying to optimize every slot immediately.
Early-season gear gets replaced quickly. Get strong enough to move into better content first; optimize once your upgrades start becoming harder to find.
Your First Hour at Level 90
Don’t overcomplicate this part.
Open your character panel and look for the obvious weak spots. A few low-level pieces left over from leveling can hold your character back more than a missing perfect secondary-stat combination.
At this point, prioritize large, meaningful upgrades.
You don’t need a perfect stat setup yet. You also don’t need to spend expensive upgrade currencies on every piece that happens to be upgradeable.
Start with the content that fits your character
If you prefer playing alone, start with the solo-friendly systems available to you.
If you already have a group, dungeons are an easy way to start replacing gear and getting comfortable with your level-90 rotation and mechanics.
If you’re already an experienced raider or Mythic+ player, there’s no reason to spend a week doing content far below your usual level just because a generic gearing guide says you should.
Your previous experience matters.
A veteran Mythic+ player should progress differently from someone who has just returned to WoW after two expansions away.
The Best Gearing Path Depends on How You Play
If you…
Start with
Then work toward
Mostly play solo
Delves + Prey
Higher-tier Delves and Nightmare Prey
Prefer dungeons
Heroic → Mythic 0
Mythic+
Raid regularly
Catch-up gear + raid
Higher raid difficulties
Play a mixture of everything
Delves + dungeons
Mythic+ and raids
Are gearing an alt
Catch-up systems
Your preferred endgame activity
Mainly PvP
PvP gearing
Rated PvP progression
There isn’t a single “best” activity for every player.
The best route is the one that gives you useful upgrades and that you’re actually willing to keep doing.
Solo Gearing: Delves and Prey
Midnight is particularly friendly to players who don’t want their entire gearing routine to revolve around finding a group.
Two systems are especially important: Delves and Prey.
If you’re primarily interested in solo progression, Midnight Prey guide goes into the target system, difficulties, and rewards in more detail.
Delves
Delves remain one of the easiest ways to build a solo-friendly endgame routine.
Midnight launched with eleven Delves in total, including ten new Delves and the seasonal Nemesis Delve. Blizzard also made Delves Tier 8+ part of the Season 1 endgame schedule.
For a solo player, the important question isn’t simply:
“What’s the highest Delve tier I can enter?”
It’s:
“What’s the highest tier I can clear comfortably without turning every run into a slog?”
That’s the tier I’d focus on.
A slightly lower tier that you can clear consistently is usually a better gearing routine than repeatedly struggling through content that takes significantly longer.
How we’d use Delves
Use them to replace weak gear early in your progression.
Prioritize Bountiful Delves when their rewards are useful to you.
Push higher tiers as your character becomes stronger.
Don’t waste expensive resources upgrading an item you expect to replace soon.
Keep Delves in your weekly routine if you enjoy solo progression.
Delves also become relevant to later-season systems such as Voidforge, which makes them more than just an early catch-up activity.
Prey: A Good Alternative to Group Content
Prey gives you another way to pursue endgame rewards while hunting specific targets.
The system has Normal, Hard, and Nightmare difficulties.
If you’re already comfortable with the lower difficulties, Nightmare Prey becomes particularly interesting for advanced progression. Nightmare Prey also feeds into the Season 1 Voidforge system.
Our advice is simple:
Don’t run Prey just because a guide tells you that you “have to.”
Run it when:
You enjoy the activity.
The rewards can improve your character.
You’re progressing toward the difficulty you want to play.
You want another source of endgame progression outside dungeons or raids.
That’s especially useful for players who don’t enjoy spending every evening in Mythic+.
When Should You Move Into Dungeons?
If you like group content, dungeons are a natural next step.
Heroic Dungeons
Heroic dungeons are useful for getting comfortable with your class and replacing weaker pieces before you start pushing harder content.
Don’t worry about staying here longer than necessary.
Once your character is comfortable and you’re ready for more difficult mechanics, move on.
Mythic 0
Mythic 0 gives you a useful bridge into Mythic+.
You can learn the dungeon mechanics and get used to the more demanding version of the content without the added pressure of a timed keystone.
Once you’re comfortable, start moving into Mythic+.
Mythic+: When Dungeon Progression Really Starts
Mythic+ is one of the core endgame gearing paths in Season 1.
The current rotation contains eight dungeons:
Magisters’ Terrace
Maisara Caverns
Nexus-Point Xenas
Windrunner Spire
Algeth’ar Academy
Pit of Saron
Seat of the Triumvirate
Skyreach
Blizzard’s Season 1 schedule also ties Mythic+ progression into seasonal rewards and the Great Vault.
Don’t rush into keys that are too high
This is one of the easiest mistakes to make.
If you’re constantly timing out or wiping, pushing a higher key isn’t necessarily helping your gearing speed.
Start at a level where you can complete the dungeon reliably.
Then move upward.
Your Mythic+ routine should ideally give you three things at the same time:
Gear
Rating and experience
Great Vault progress
If you’re getting all three, you’re moving in the right direction.
Raiding: The Other Major Endgame Path
Midnight Season 1’s raid progression centers on:
The Voidspire
The Dreamrift
March on Quel’Danas
The season’s raid and Mythic+ progression opened in stages, with The Voidspire and The Dreamrift available at the start of Season 1 and March on Quel’Danas following the season schedule.
If you’re a raider, don’t feel that you need to complete every other gearing system before stepping into a raid.
Raid progression itself is part of your gearing path.
Use other activities to fill the gaps
That’s where Delves, Mythic+, Prey, world activities, and crafting become useful.
If your raid team needs you to improve a particular slot, don’t necessarily wait for that exact item to drop from a boss.
Look at the other available sources and work around the gap.
That’s much more efficient than treating the raid loot table as your only source of progression.
Understanding Midnight’s Gear Progression
It’s tempting to build a gearing guide around a giant item-level table.
The problem is that those tables age quickly.
Seasonal tuning, content updates, and new reward systems can change the numbers, while the underlying progression philosophy stays largely the same.
So here’s the rule we recommend:
Think about the quality and source of the item first, then its item level.
A higher item-level item isn’t automatically the best long-term upgrade if you’re about to replace it.
Conversely, a slightly lower-level item can sometimes be worth keeping if it has an important effect, set bonus, or role in your build.
This becomes increasingly important as you move from basic gearing into optimization.
What Should You Upgrade First?
This is where a lot of players waste resources.
The right answer depends on your class and specialization, but there are a few sensible priorities.
1. Weapons
Weapons are often among the most valuable upgrades, particularly for damage dealers.
If you get a weapon that you’re likely to keep for a while, upgrading it can make much more sense than spreading the same resources across several temporary armor pieces.
2. Important Trinkets
A strong trinket can have considerably more value to your character than a small item-level increase on an ordinary armor slot.
If you’ve found one of the trinkets you’re planning to use long-term, it’s a much better upgrade candidate.
3. Tier Pieces
Once you’re building your class set, consider the value of maintaining or completing your tier bonus before blindly upgrading individual slots.
4. Major, Long-Term Upgrades
After the obvious high-impact pieces are handled, spend resources on equipment you’re likely to keep.
5. Temporary Gear
This should usually come last.
If you expect to replace an item after your next dungeon or raid night, don’t pour expensive resources into it just because the upgrade button is available.
Loot Strategist’s rule of thumb: Don’t ask, “Can I upgrade this?” Ask, “Will I still be wearing this when my next major upgrade drops?”
That’s a much better question.
The Great Vault Should Be Part of Your Weekly Plan
Don’t treat the Great Vault as something you remember to check on reset day.
Build your weekly activities around creating useful choices.
Blizzard specifically reminds players to check the Great Vault each week during Season 1.
The exact activities you choose will depend on your playstyle.
A Mythic+ player will naturally build their week around keys.
A raider will have raid progression.
A solo player can use Delves, Prey, and the other activities contributing to the relevant reward categories.
And Midnight’s later 12.0.5 content added Ritual Sites, which also contribute to the World-content Great Vault row alongside Delves and Prey.
Our advice
Don’t feel compelled to complete every possible activity simply to fill every Vault slot.
If one activity takes a huge amount of time for a reward you’re unlikely to use, your time may be better spent progressing your character elsewhere.
Matrix Catalyst: Don’t Waste Your Charges
The Matrix Catalyst is one of the most important tools for completing your class set.
But that doesn’t mean every non-tier piece should immediately be converted.
Before using a charge, ask yourself:
Is this item a meaningful upgrade?
Will converting it help complete my set bonus?
Do I already have another piece that can fill this slot?
Am I likely to replace this item soon?
Is there another item I should save the charge for?
The right answer depends heavily on your current tier progress.
If you’re one piece away from an important set bonus, the value of a Catalyst charge can be much higher than it would be for a character that’s nowhere near completing the set.
Voidforge: Targeting the Gear You Actually Want
Voidforge is one of the more interesting additions to Midnight’s endgame gearing system.
Once unlocked, it lets you use Nebulous Voidcores to obtain random eligible equipment from the loot pool associated with qualifying Season 1 activities.
Those activities include:
Season 1 raid bosses
Mythic+ dungeons
Bountiful Delves
Nightmare Prey Hunts
Blizzard’s system also removes obtained items from the relevant loot pool until eligible items have been collected for that difficulty, which makes Voidforge particularly interesting for players targeting specific missing pieces.
Why Voidforge matters
This is especially useful when your character reaches the point where one or two missing pieces are holding back your build.
Instead of simply hoping that the right item appears naturally, Voidforge gives you another way to target the available loot pool.
It’s also potentially useful for alts later in the season.
Ascendant Voidcores and High-End Gear
Voidforge also introduces Ascendant Voidcores, which can be used to further empower eligible weapons and trinkets after they meet the required upgrade conditions.
This is firmly in the “optimize your character” part of progression rather than the “I just hit level 90” part.
Don’t build your early gearing strategy around it.
By the time this system becomes a major consideration, your priorities should already have shifted from:
“How do I replace this bad item?”
to:
“Which pieces are actually worth investing in?”
Midnight’s Newer Solo-Friendly Gearing Options
If you’re reading an older Season 1 gearing guide, be careful with advice written before the 12.0.5 update.
Midnight has added more endgame activities since launch.
Void Assaults
Void Assaults provide another world-content activity and contribute to the broader progression system.
Ritual Sites
Ritual Sites are small one-to-five-player instances where you choose challenges as you progress through the tiers.
They also contribute to the World-content Great Vault row and reward Field Accolades that can be used for Champion and Hero-quality gear and other rewards.
That makes them worth mentioning in a current gearing guide—particularly for players who prefer solo or small-group content.
A Practical Weekly Gearing Routine
Here’s the routine we’d recommend rather than a rigid “do these 17 activities every reset” checklist.
First: Check your gear
Look for:
An obviously weak slot
A missing tier piece
A weapon upgrade
A strong trinket you want to keep
Gear that’s ready for a meaningful upgrade
Next: Play your main content
If you like Delves, run Delves.
If you’re a Mythic+ player, run keys.
If you’re raiding, raid.
If you prefer solo content, combine Delves, Prey, Ritual Sites, and other available world activities.
Then: Build your Great Vault
Make sure your normal weekly activities are contributing toward useful choices.
Finally: Spend resources carefully
Before upgrading something, ask:
Is this likely to survive my next few upgrades?
If yes, invest.
If no, keep the resources.
That’s the entire philosophy.
You don’t need a spreadsheet open every time you loot a pair of boots.
How to Gear an Alt
Alts are where Midnight’s broader gearing ecosystem becomes particularly useful.
Don’t approach your alt as though you’re starting the expansion from scratch.
First, get the character to a reasonable endgame baseline.
Then use the catch-up and account-wide systems available to you, followed by the activities that provide the most useful upgrades for that character.
Save expensive resources for equipment you’re likely to keep.
If your main has already taught you how the season works, don’t make your alt repeat every inefficient step.
Common Gearing Mistakes to Avoid
Upgrading everything
Just because an item can be upgraded doesn’t mean it should be.
Chasing average item level
Item level is useful, but it isn’t the entire character.
Ignoring your tier set
A small item-level increase isn’t necessarily better than progressing toward an important set bonus.
Saving every upgrade forever
The opposite mistake is also common.
If an upgrade is meaningful and you’re going to use the item for a while, use your resources.
Don’t wait forever for some hypothetical perfect drop.
Doing content you hate
If you absolutely hate Mythic+, don’t build your entire gearing plan around Mythic+ because someone called it the “fastest” method.
A sustainable routine beats a theoretically optimal routine you abandon after three days.
Following outdated guides
This is especially important in Midnight.
New content updates can add activities, change reward structures, and introduce new ways to target gear.
Always check when a gearing guide was last updated.
Frequently Asked Questions
What should I do first after reaching level 90?
Replace your weakest leveling gear, then start the endgame content that fits your preferred playstyle. Delves and Prey are natural options for solo players, while dungeons and Mythic+ are better suited to players who enjoy group content.
Are Delves still worth doing if I play Mythic+?
Yes. Delves can provide another source of progression and remain relevant to systems such as Voidforge. They can also be useful for filling gaps between dungeon runs.
When should I start spending upgrade resources?
Start spending when the item is a meaningful upgrade and you’re reasonably confident you’ll keep it for a while. Don’t spend heavily on gear you’re likely to replace immediately.
Should I use the Matrix Catalyst immediately?
Not necessarily. If using a charge completes an important tier bonus, it can be extremely valuable. Otherwise, consider whether you’re likely to receive a better item soon.
What’s the fastest way to gear an alt?
Get your alt to a reasonable baseline, use available catch-up and Warband resources, then focus on the endgame activity you already understand and enjoy. There’s little reason to repeat every inefficient gearing step you went through on your main.
Final Recommendation
Don’t make gearing harder than it needs to be.
At the beginning of the season, your job is simply to replace bad gear and get strong enough to enter better content.
Once you’re established, start being selective.
Use Delves and Prey if that’s how you like to play. Run Mythic+ if you enjoy pushing keys. Raid if raiding is your thing. Use the Great Vault every week. Work toward your tier set. And when you reach the point where upgrades become scarce, use systems such as Voidforge and targeted gearing to chase the pieces that actually matter.
Most importantly, don’t confuse higher item level with better progression.
A good gearing week isn’t the one where every number on your character sheet goes up.
It’s the week where you made your character noticeably stronger, spent your resources wisely, and are now ready to tackle content that was previously out of reach.
That’s the gearing loop worth building around.
Sources & Updates
Last updated: August 2026 Current season: Midnight Season 1
This guide is maintained as Midnight’s gearing systems change. We use Blizzard’s official documentation to verify major changes to rewards, progression systems, and new Season 1 activities.
Official Sources
Midnight Season 1: Blizzard’s official Season 1 overview, including raid, Mythic+, Delve, and seasonal progression information.
12.0.5 Content Update: Blizzard’s official patch notes covering Void Assaults, Ritual Sites, Voidforge, Nebulous Voidcores, and Ascendant Voidcores.
Voidforge: Blizzard’s official explanation of how Nebulous Voidcores and Ascendant Voidcores work with Midnight Season 1 gear.
12.0.5 World Content: Blizzard’s overview of Ritual Sites, Field Accolades, and their relationship with the World-content Great Vault.
Why we include these sources: Midnight is a live-service game, and gearing systems can change during the season. We update this guide when Blizzard changes the underlying reward or progression systems rather than relying on launch-day information.
With the gates to a rebuilt Quel’Thalas fully open in the Midnight expansion, millions of players are returning to Azeroth to push through the new level 80 to 90 bracket. Whether you are a fresh recruit stepping onto the shores of the elven homeland for the first time or a returning veteran dusting off characters from The War Within, hitting the new level 90 cap efficiently is your ticket to the competitive Season 1 endgame.
Leaving behind outdated zones to enter high-level competitive loops like the Voidspire raid or Dreamrift events requires a structured leveling strategy. To save you hours of aimless backtracking, here is the definitive, playtested 80–90 leveling and catch-up route optimized for modern SEO and community credibility.
1. The Onboarding Catch-Up: Level 80 Baseline
If you are a returning player, you don’t need to spend weeks grinding through old patch content just to start the expansion. Blizzard has streamlined the onboarding process significantly.
The Enhanced Level 80 Character Boost: Every standard edition of the expansion comes packaged with a catch-up boost. Utilizing this instantly equips your character with a full set of baseline Champion-tier gear, a fully unlocked skyriding mount library, and puts you right at the introductory campaign questline in your capital city.
The Warband XP Accelerator: Before mapping your route, remember that leveling is a team effort. For every character you successfully hit level 90 with, your entire account receives a permanent 5% Warband XP bonus (capping out at a massive 25% extra experience). Always level your fastest, high-mobility DPS class first to unlock this accelerator for your slower alts.
2. The Golden 80–90 Leveling Route
To hit level 90 fast, do not get sidetracked by yellow side-quests during your first character’s run. Stick strictly to the linear Campaign Quests (marked with a distinct bordered campaign shield icon). The main story campaign provides the highest baseline chunk of raw experience and automatically unlocks critical endgame phasing.
Optimized Zone Progression Workflow
1.1. The Reclaimed Eversong Woods:Level 80–83.
Focus: Establish your faction’s forward operating base.
Strategy: The mob density here is tightly packed. Rely heavily on grouping up open-world pulls and burning them down with AoE burst. Complete the main storyline up to the establishing of the Silvermoon outskirts hub.
2.2. The Sunwell Outskirts & Ghostlands Revamp:Level 83–86.
Focus: Navigating high-density Void scar areas.
Strategy: This zone introduces verticality. Prioritize your Skyriding flight pathways to bypass ground-level trash packs. The campaign quests here award large chunks of gear upgrades that replace any pre-expansion raiding pieces.
3.3. The Zul’Aman Perimeter & Void Frontiers:Level 86–90.
Focus: Elite world event skirmishes and final campaign chapters.
Strategy: The raw XP requirement per level spikes heavily at level 87. To cross the finish line quickly, weave random dungeon queues into your active questing loop to bridge the final level gaps.
🛑 Playtest Friction Warning: The Campaign Gating Bottleneck
Heads Up on Level 88 Gating:
During our initial testing run through the final chapters of the Zul’Aman perimeter campaign, we hit a hard structural wall. The main story questline temporarily halts at Chapter 4 if your character is not at least Level 88. If you have only run campaign quests up to this point, you will likely find yourself stranded at Level 87 and roughly 40% experience. Do not panic and start hunting down random open-world side-quests. Instead, immediately open your group finder and run consecutive random dungeon instances to bridge that single level gap in under an hour.
3. Delves vs. Dungeon Spamming: Which is Faster?
The traditional way to level up fast has always been spamming random dungeons with a dedicated five-player group. However, the revamped solo progression mechanics introduce a viable competitor.
Efficiency Comparison Matrix
Activity
Solo Friendliness
XP Per Hour Rating
Best Used For
Campaign Questing
Perfect
Excellent (Tier 1)
Your absolute first character run; mandatory for unlocking global endgame features.
Random Dungeon Spam
Low (Requires groups)
Great (Tier 2)
Pre-made groups with tank/healer specializations to force instant queue pops.
Solo Delves
Ideal for Solo Players
Moderate (Tier 3)
Leveling up secondary alts while simultaneously farming companion level tiers.
If you are a solo player or a fragile DPS spec dealing with 20-minute dungeon queue times, Solo Delves are your secret weapon. Running Delves alongside combat companions like Valeera Sanguinar gives you high-velocity solo XP without the stress of group mechanics or toxic dungeon-finder queues.
🛑 Playtest Friction Warning: The Shared Tap Rested Bug
Watch Your Open-World Mob Tags:
While open-world leveling in the new zones, the game utilizes a shared-tag system allowing up to 5 players of the same faction to hit a monster and receive full quest credit. However, our testing revealed a persistent UI bug: if an opposing faction player tags a rare-elite mob first and you drop a heavy AoE attack on it, your character can become locked in a permanent “combat state.” This bugs out your character’s natural out-of-combat health regeneration and stops you from mounting up. If this happens, your fastest solution is to find a safe nook, execute a quick /reload in your chat bar, or force a quick close of the client to reset your world state.
4. Preparing for the Level 90 Endgame Loop
The second you see the golden flash of Level 90 hit your screen, your primary objective completely shifts from gaining experience to building item level.
Visit the Local Quartermaster: Head directly to the central square in Silvermoon to purchase your baseline Level 90 starter armor sets from the reputation faction vendors using standard gold.
Unlock Your Account Features: Your first max-level character instantly opens up account-wide access to World Quests, weekly Neighborhood Endeavors, and advanced custom features.
Secure Your Housing Base: Don’t let your hard-earned gold sit stagnant. Now that you are at cap, take 15 minutes to secure your Warband’s land asset. See our definitive [WoW Midnight Player Housing Guide] to unlock your home base for just 1,000 gold and start displaying your leveling trophies.
If you are completely new to the expansion’s ecosystem or want to optimize your character’s build before diving into heroic dungeons, make sure to read our central hub resource: the [World of Warcraft Complete Beginner Guide 2026 For Returning & New Players]. It acts as your strategic roadmap to master Azeroth’s brand-new competitive era.
Before you invest heavily in buying expensive recipes from the Auction House, make sure your character is fully leveled and caught up with basic expansion mechanics using our step-by-step WoW Midnight Fast Leveling Guide.
To see what options and activities await you the second your character hits maximum level, check out this walkthrough on Everything to do at Max Level in WoW Midnight. This video is an excellent companion resource because it visually maps out the exact Silvermoon quartermasters, advanced Delves, and gear upgrades you need to look for right after finishing your 80–90 speed run.
📊 Loot Strategist’s Efficiency Verdict: If you are leveling purely to establish your gold-making roster, do not level a healer or tank spec first. Start with a hyper-mobile, high-burst DPS class (like a Mage or Demon Hunter). Use them to power through the campaign, unlock the first 5% account-wide Warband XP tier, and establish your open-world flying paths. This cuts the leveling time of your slower, crafting-heavy alts by nearly two hours.
Stepping back into Azeroth after a long hiatus—or entering its vast world for the very first time—can feel incredibly overwhelming. With the launch of the Midnight expansion, Blizzard has fundamentally restructured the leveling experience, redesigned class archetypes, and introduced highly requested features like Player Housing.
To save you from the typical trial-and-error, our team of veteran MMO theorycrafters spent dozens of hours testing the live build of Midnight. This guide provides our hands-on, step-by-step roadmap to help you set up your game, level efficiently from 1 to 90, and dive straight into the endgame.
1. Retail vs. Classic: Which Version is Right for You?
Before launching the battle.net client, you must decide which version of the game to play. In 2026, the player base is split between modern Retail and various Classic progression servers.
Feature
WoW Retail (Midnight)
WoW Classic
Level Cap
Level 90
Varies by era (60, 70, or 80)
Combat Pacing
Fast, highly mobile, complex rotations
Slow, strategic, resource-heavy
Solo Viability
High (Delves, Story Mode Raids)
Moderate to Low (Group dependent)
Onboarding
Streamlined tutorial (Exile’s Reach)
Open-world, trial-by-fire
Newest Systems
Player Housing, Warbands
Era-specific nostalgic loops
Our Recommendation: If you want fluid combat, modern quality-of-life features, and a thriving community with minimal “gatekeeping,” play Retail (Midnight). It is by far the most welcoming version for newcomers and returning players alike.
2. Pre-Game Checklist: Essential Settings to Enable
One of the biggest mistakes we see returning players make is diving in with default UI settings. WoW’s interface is highly modular, and making a few quick adjustments in your game menu will immediately improve your gameplay loop.
1.Pick a High-Population Server:Realm Selection.
Navigate to the realm selection screen and sort by population. We strongly advise choosing a High or Full population server in your local timezone. This guarantees a stable, active economy and plenty of active guilds to help you learn.
2.Enable Auto Loot:Controls Menu.
Press ESC to open your Options menu, search for Auto Loot, and check the box. In our testing, this simple change saves hours of leveling time by automatically gathering gold and quest items the second you right-click a fallen enemy.
3.Activate Extra Action Bars:UI Customization.
In the game menu, click Edit Mode. Here, you can drag and resize any element on your screen. Be sure to check the boxes to enable Action Bars 2, 3, and 4. You will need this extra screen real estate to hold your mounting, healing, and damage spells as you scale toward level 90.
If you do not want to be spammed by automated guild recruitment bots the moment you log in, go to the Social tab in options and check Block Guild Invites until you are ready to seek out a curated group of players.
3. The 1–90 Leveling Roadmap
The modern leveling process is incredibly fast. During our testing, a fresh character took roughly 11 to 14 hours of casual play to reach the level 90 cap. Here is the path we recommend taking:
Phase 1: Levels 1–10 (Exile’s Reach)
Every new character should start on Exile’s Reach, a beautifully designed tutorial island that teaches you your class’s fundamental mechanics, resource management, and basic dungeon structures.
Phase 2: Levels 10–70 (Chromie Time)
Once you arrive in your faction’s capital city (Stormwind or Orgrimmar), we recommend visiting the NPC Chromie (located near the embassies). She allows you to select any previous expansion to scale with your character.
Our Pick: Choose the Dragonflight expansion campaign. It is incredibly fluid, teaches you how to master Skyriding (advanced active flight) at level 10, and features highly clustered quest hubs that minimize travel downtime.
The Dalaran Hearthstone Trick: To make global travel easier, start the brief introductory quest line for the Legion expansion. This awards you a secondary Hearthstone that instantly teleports you to the city of Dalaran. From Dalaran, you can access direct portals to both Orgrimmar and Stormwind, giving you a quick travel escape hatch with a low cooldown.
Phase 3: Levels 70–90 (The Midnight Campaign)
Upon reaching level 70, you will automatically receive the introductory quest to head to the redesigned kingdom of Quel’Thalas. Focus purely on the main campaign quests (marked with a distinct bordered exclamation point) to unlock all the major new features of the expansion.
4. Modern Game-Changers: Warbands & Player Housing
If you haven’t logged into WoW in several years, Midnight features two incredibly massive systemic overhauls that make the game feel entirely fresh.
Warbands: Alt-Friendly Integration
In the past, playing an alternate character (“alt”) meant repeating massive reputation grinds, re-earning achievements, and starting from scratch. Now, your entire roster of characters is united under a single Warband.
They share a unified bank tab, making gold and material sharing instantaneous.
Reputations and achievement tracks are completely account-wide.
High-tier gear can drop as “Warbound until Equipped”, allowing you to mail epic drops from your main character directly to a leveling alt.
Player Housing: Build Your Sanctuary
After more than two decades, true Player Housing has arrived. We tested the system extensively at launch, and here is how it works:
The Unlock: Upon arriving in the expansion’s main hub, you will receive the quest “A House For You.” The quest line takes roughly 15 minutes to complete.
The Location: You can claim a personal plot in dedicated instanced neighborhoods: Founder’s Point for the Alliance or Razorwind Shores for the Horde.
The Cost: Claiming your starter plot costs a flat 1,000 gold, with absolutely zero weekly or monthly upkeep taxes.
Customization: Furniture and decorations can be crafted via professions, purchased from faction vendors, or collected as rare drops from raid bosses and dungeons.
5. Navigating the Midnight Endgame
Once you hit level 90, the core loop of World of Warcraft shifts from leveling to character progression and gearing.
Hero Talents
At level 71, you unlock Hero Talents—a highly distinct talent tree built between your class and specialization. In our testing, these don’t just add passive damage; they fundamentally alter your class fantasy, offering visually striking spells and altered mechanical interactions.
The star of the expansion is the new Devourer Demon Hunter, which shifts the traditionally melee class into a highly mobile, mid-range caster that utilizes void energies to decimate foes from 25 yards away.
Delves: Perfect for Solo Players
If you do not have the time or desire to commit to a strict 20-person guild schedule, Delves are your primary gearing path. These are 10-to-20-minute, role-neutral scenarios that you can complete solo (alongside a customizable NPC companion) or in small groups of up to five friends. Clearing high-tier Delves rewards gear that is fully equivalent to Heroic-level raid drops.
Key Resources for Further Reading
Keep up with real-time class balancing and builds via the community-driven Wowhead Talent Calculator.
Track your character’s progression metrics and find reputable group guides on Raider.io.
Min-maxing a Level 80 character for Master Mode Operations or high-tier PvP requires looking beyond basic gear drops. While completing weekly missions on planets like Ruhnuk or Kessan’s Landing and running the R-4 Anomaly will yield baseline gear, achieving true stat optimization relies heavily on the Crew Skills ecosystem.
Whether your goal is to self-sustain through reusable consumables or corner the market on the Galactic Trade Network (GTN), optimizing your companion tasks is essential. This guide breaks down the current crafting meta and the economic realities of funding high-end production.
The Best Crew Skills in SWTOR for Endgame Production
In the current endgame ecosystem, crafting is heavily centered around two elements: reusable combat utility and Augment optimization. A character can select one primary Crafting skill paired with two complementary Gathering or Mission skills.
1. Biochem (The Raider’s Necessity)
Biochem remains a critical choice for active endgame raiders. Reaching Biochem level 700 grants access to Medpacs, Stims, and Adrenals.
The Min-Max Benefit: These items provide significant stat boosts (such as Mastery, Critical, or Absorb) and are never consumed upon use.
Economic Impact: While the initial investment to craft these items is high, saving millions of credits on consumable expenses during progression raiding makes Biochem highly cost-effective over time.
2. Synthweaving & Armormech (The Stat Boosters)
These armor-crafting disciplines are crucial for producing Augments and Augment Kits (MK-11). Augments provide the final layer of customizable stats needed to reach strict tertiary stat thresholds, such as the 1.4-second or 1.3-second Alacrity GCD (Global Cooldown) tiers.
Synthweaving: Focuses on Critical, Alacrity, and Redoubt Augments.
Armormech: Focuses on Accuracy, Shield, and Absorb Augments.
3. Cybertech & Artifice (The Utility & Market Drivers)
Cybertech: Essential for crafting tactical components, spaceships upgrades, and specialized grenades used to control crowds in PvP brackets.
Artifice: Primarily drives the cosmetic and modification economy, producing high-demand color crystals, dye modules, and Relics.
Crafting Discipline Matrix
Discipline
Primary Gathering Skill
Primary Mission Skill
Key Endgame Output
Target Audience
Biochem
Bioanalysis
Diplomacy
Reusable Medpacs & Stims
Progression Raiders / Active PvPers
Synthweaving
Archaeology
Underworld Trading
Alacrity & Critical Augments
DPS & Healer Min-Maxing
Armormech
Scavenging
Underworld Trading
Accuracy & Shield Augments
Tanks & Stat-Capping Players
Artifice
Archaeology
Treasure Hunting
Dye Modules & Relics
Market Traders / Fashion Customization
The True Cost of Endgame Crafting
Transitioning from a casual crafter to a Master Crafter requires significant capital. The profitability and efficiency of the crafting loop are governed by Companion Influence Level.
The Companion Influence Bottleneck
To maximize production yields, crafting tasks should only be assigned to companions at Influence Level 50.
Level 50 Companion Benefits:
└── +75% Crafting Speed Efficiency
└── +25% Critical Crafting Chance
A critical success during crafting yields double the items for gathering/mission skills, or adds an augmented slot/extra item for crafting skills. Maxing out a companion’s influence requires thousands of premium companion gifts or a Commander’s Compendium (which costs 3 Dark Projects and 4.25 million credits, or 250 Cartel Market Coins). Scaling an entire crew roster of alts to this level requires an investment of tens of millions of credits before production even begins.
High-Tier Material Acquisition
Crafting superior items requires rare materials that cannot be obtained through standard gathering nodes:
OEM-37 and ODM-38 Matrices: These essential components are required for top-tier item modifications and Augments. They are acquired by trading Tech Fragments gained from completing Veteran and Master Mode Flashpoints, Daily Areas, and Operations.
The Extraction Choice: Crafters must choose between spending hours grinding activities to accumulate Tech Fragments or purchasing raw components directly from other players on the hyper-inflated GTN.
GTN Funding & Material Strategies
For players who prefer to avoid the complexities of crafting management, the most direct path to wealth is focusing entirely on raw material liquidity.
The Triple-Gathering Yield Strategy
Dropping crafting disciplines entirely to pick up Scavenging, Archaeology, and Slicing allows players to accumulate wealth with low financial risk.
Slicing: Lockboxes found throughout high-level daily zones provide direct credit yields, while Slicing missions offer purple-tier tech parts required by Cybertech professionals.
Node Farming: Selling raw Grade 11 materials directly on the GTN capitalizes on Master Crafters who prefer purchasing resources in bulk over gathering them manually.
Managing Crafting Alts (The Legacy Loop)
Because Crew Skill unlocks and Companion Influence levels are character-specific, efficient players distribute production across a Legacy Alt Network. By designating one character as a dedicated Biochemist, another as a Synthweaver, and utilizing low-level characters strictly for resource gathering, players can optimize their crafting process while keeping their main characters geared and ready for endgame content.