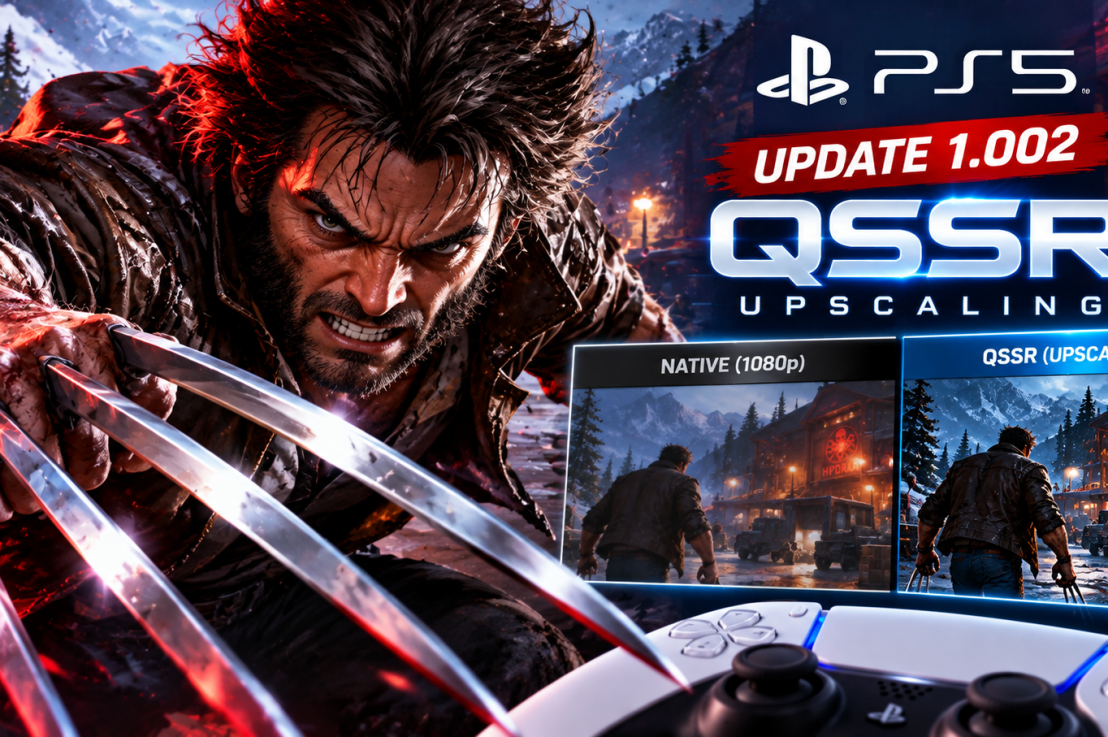
Marvel’s Wolverine Update 1.002: How QSSR Upscaling Changes the Game on Base PS5
When Insomniac Games dropped Marvel’s Wolverine, it instantly cemented itself as one of the most visually visceral action titles on the PlayStation 5. But for players rocking a standard, non-Pro console, pushing for top-tier visual clarity often meant dealing with the usual performance compromises.
That baseline shifted overnight when Sony and Insomniac rolled out update 1.002.000. Along with standard bug fixes, the patch quietly introduces Quick Spectral Super Resolution (QSSR)—Sony’s streamlined machine-learning upscaler built specifically to bring AI-powered image enhancement to the base PS5.
Out of the gate, Logan’s debut adventure serves as the ultimate showcase for this tech. If you’re wondering what update 1.002 actually changes under the hood, here is the real talk on how QSSR affects gameplay and whether you need to tweak your settings.
What Is QSSR, and Why Should Base PS5 Owners Care?
For a long time, advanced AI upscaling felt like exclusive territory for PS5 Pro owners flexing their PSSR capabilities. Standard console owners were left wondering if they’d miss out entirely on next-gen rendering tools.
QSSR changes that equation. Born from Sony and AMD’s ongoing Project Amethyst collaboration, it uses a lightweight neural network architecture designed to squeeze maximum performance out of the base hardware constraints.
Instead of relying solely on traditional rendering techniques that can cause fast-paced action sequences to look soft or artifact-heavy during heavy combat, Marvel’s Wolverine uses QSSR to clean up dynamic scenes without melting your GPU.
The Real Talk: How Does It Look in Action?
Early technical breakdowns from analysts and community testing paint a very positive picture for base hardware:
The Visual Bump: Players and tech analysts have noted a stark boost in edge stability and fine detail clarity during frantic combat. Fine environmental details, rain effects, and Logan’s character model pop with a sharper finish that bridges some of the gap with higher-end rendering profiles.
On by Default: You don’t have to go hunting through an obscure settings maze to turn it on. Following update 1.002, QSSR is enabled automatically on base consoles.
Beyond Upscaling: Insomniac’s update also packs crucial fixes for Photo Mode, UI bugs, out-of-bounds navigation issues, and accessibility improvements.
How to Verify Your Game is Up to Date
If your console is connected to the web, Marvel’s Wolverine should have grabbed the patch automatically. If you want to double-check:
Hover over the Marvel’s Wolverine tile on your PS5 home screen.
Press the Options button on your DualSense controller and select Check for Update.
Jump into the game and check your display options to ensure everything is running on the latest version.
The Verdict: A Massive Win for Standard Consoles
Mid-cycle hardware refreshes often leave standard console owners feeling like an afterthought. By bringing a tailored version of machine-learning upscaling down to the base PS5 through heavy hitters like Marvel’s Wolverine, Sony has given the original hardware a meaningful second wind.
Have you noticed a sharper image during combat since grabbing update 1.002, or are you still holding out for a hardware upgrade? Let us know in the comments below!
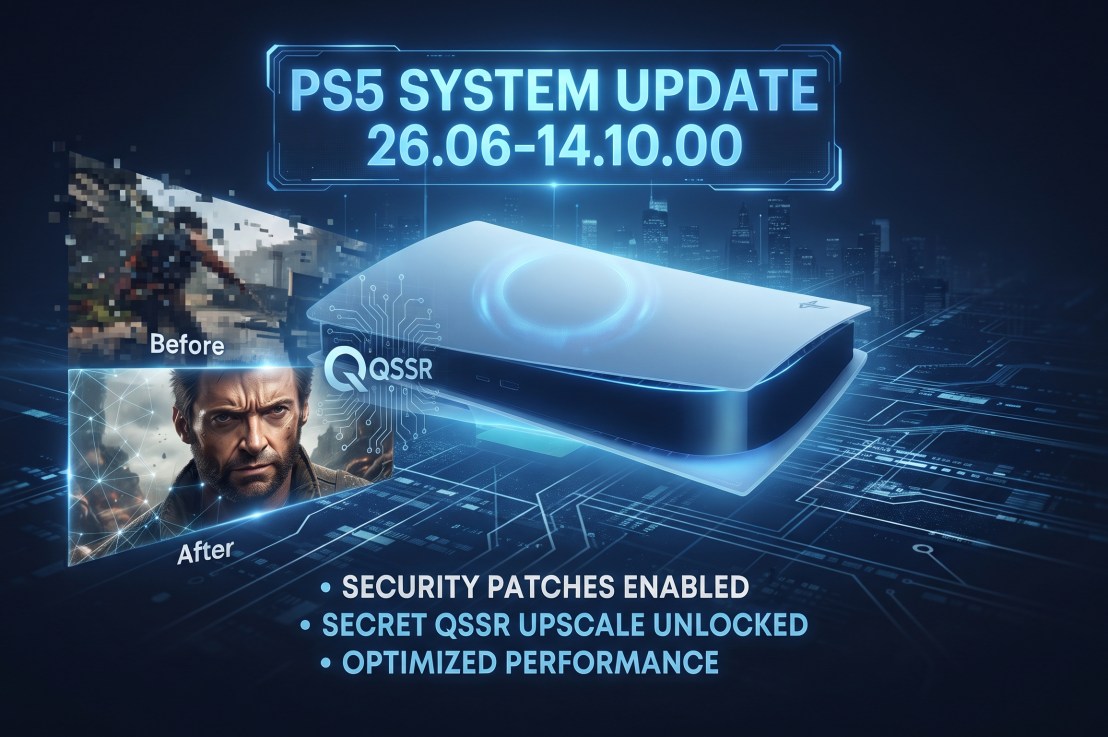
PS5 System Software Update 26.06-14.10.00: Security Fixes and the Secret QSSR Unlock
If you booted up your console and got hit with a forced download prompt, you’re looking at PS5 system software update version 26.06-14.10.00.
Sony’s official support documentation gives you the usual corporate runaround, but digging deeper reveals there’s actually more under the hood this time than just boring background maintenance. Here is the real breakdown of what this update is doing to your console.
The Official Patch Notes
Sony’s changelog for version 26.06-14.10.00 reads:
We’ve made some security fixes to the system software.
We’ve improved system software performance and stability.
What’s Actually Going On (The Real Talk)
The QSSR Upscaler Unlocked: Alongside the generic stability fixes, this firmware quietly enables support for QSSR (Sony’s new in-house AI upscaler built with AMD) on base consoles. Games like Marvel’s Wolverine are already taking advantage of it to sharpen dynamic scenes without hammering performance.
The Security / Jailbreak Angle: Whenever Sony drops a patch with vague “security fixes,” the community immediately goes on alert. Updates like this act as a counter-measure against recent exploit attempts, meaning players tracking older firmware versions for homebrew will want to stay offline.
Online Play: If you play online, you’ll eventually have to pull the trigger. PSN won’t let you hop into a lobby or party chat on an outdated version.
How to Install It
If your console is in Rest Mode, it probably already grabbed it. If not, manual installation takes thirty seconds:
Head to Settings (the gear icon top-right of your home screen).
Go to System > System Software > System Software Update and Settings.
Hit Update System Software > Update Using Internet.
Have you noticed any visual bumps in games like Wolverine since updating, or are you keeping your console offline? Let us know below.
As a Wind Hunt hypercarry, Feixiao operates on a unique resource loop: she completely bypasses standard Energy mechanics, utilizing Flying Aureus stacks generated by total team attack frequency. Because her multi-hit Ultimate (Terrasplitter) ignores elemental Weakness types to deplete Toughness directly, optimizing her build requires maxing out CRIT Rate, Speed, and DEF Ignore stacking.
Core Kit & Trace Priority
Feixiao gains 1 Flying Aureus stack for every 2 attacks performed by any ally (including follow-ups, counters, and summons). She holds up to 12 stacks, with each Ultimate cast consuming 6 stacks.
Because her Ultimate consists of up to 6 rapid strike hits, CRIT Rate consistency is paramount. A non-critical hit on any of her Ultimate sequence strikes severely hurts total damage output.
Ability Upgrade Order
Ultimate (Terrasplitter): Primary damage engine. Leveling increases per-hit scaling on both Boltsunder and Waraxe strike choices.
Talent (Thunderclap): Dictates the damage multiplier of her guaranteed out-of-turn Follow-Up Attack (FUA) and her innate CRIT DMG self-buff.
Skill (Waraxe): Deals Wind damage and immediately triggers a Talent Follow-Up Attack.
Basic Attack: Low priority; rarely used in clean Skill Point (SP) rotations.
Light Cone Rankings & Performance
Feixiao benefits heavily from Light Cones offering raw CRIT Rate, Follow-Up Attack bonuses, and DEF Ignore.
Light Cone
Rarity / Superimposition
Key Bonus
Performance vs. Signature
I Venture Forth to Hunt
5★ (S1 Signature)
+15% CRIT Rate; Ultimate DMG ignores 54% DEF after FUA
100% (Best in Slot)
Baptism of Pure Thought
5★ (S1 Dr. Ratio Sig)
+20% CRIT DMG; +36% DMG & 24% DEF ignore on Ult
~92%
Cruising in the Stellar Sea
5★ (S5 Herta Shop F2P)
+16% CRIT Rate (+32% vs <50% HP targets); +40% ATK on kill
~85% (Best F2P)
Swordplay
4★ (S5)
+16% DMG per hit on same target (stacks up to 5 times = 80% DMG)
~88% (Single Target)
Only Silence Remains
4★ (S5)
+24% ATK; +24% CRIT Rate when $\le 2$ enemies present
~82%
Final Victor
4★ (S5 F2P Craftable)
+12% CRIT Rate; grants stacking CRIT DMG on landing CRITs
~80%
Gamer Tip on Swordplay: Feixiao’s Ultimate strikes count as individual hits against the same target, allowing S5 Swordplay to reach its full 80% damage bonus on the very first Ultimate cast.
Best Relic & Planar Ornament Sets
Relic Sets
1. 4pc The Wind-Soaring Valorous (Best-in-Slot)
- 2pc: Increases ATK by 12%.
- 4pc: Increases CRIT Rate by 6%. After launching a Follow-Up Attack, increases Ultimate DMG by 36% for 1 turn.
Why it works: Perfect synergy. Feixiao’s Skill automatically triggers her Talent’s Follow-Up Attack before her turn finishes, ensuring 100% uptime on the 36% Ultimate DMG buff.
2. 4pc Pioneer Diver of Dead Waters (Debuff Comps)
- 2pc: Increases DMG dealt to debuffed enemies by 12%.
- 4pc: Increases CRIT Rate by 4%. Deals 8%/12% increased CRIT DMG to enemies with 2/3 debuffs.
Why it works: Viable only if running heavy debuff engines like Topaz (E1/S1), Moze, or Aventurine (S1).
Planar Ornaments
2pc Duran, Dynasty of Running Wolves (Best-in-Slot): Ally follow-ups generate stacks. At 5 stacks, grants 25% FUA DMG and 25% CRIT DMG. The indisputable standard for FUA-heavy team comps.
2pc Izumo Gensei and Takama Divine Realm: Grants 12% ATK and an extra 12% CRIT Rate as long as another Hunt character (Topaz, March 7th Hunt, Moze) is in the party.
2pc Inert Salsotto: Grants 8% CRIT Rate and 15% Ultimate/FUA DMG when CRIT Rate reaches 50%+.
Main Stats & Substat Benchmarks
Energy Regeneration Rate (ERR) ropes are completely useless on Feixiao because she lacks an Energy bar. Always run an ATK% Rope.
Relic Slot
Target Main Stat
Body
CRIT Rate% (Mandatory unless running heavy external CRIT buffers)
Feet
SPD (134+ Breakpoint) or ATK% (If paired with Hyperspeed Robin/March)
Planar Sphere
Wind DMG% or ATK% (Within 1-2% difference; choose better substats)
- CRIT Rate: 90% – 100% (Aim for 80%+ on character stat sheet)
- CRIT DMG: 130% – 160%+
- Speed: 134+ (Standard 2-turn Cycle 0 threshold) or 143+
- ATK: 2,600 – 3,000+
- Energy Regeneration Rate: 0% (Do NOT equip ERR Ropes)
Sub-DPS Comparison: Topaz vs. March 7th (Hunt) vs. Moze
Feixiao’s ultimate frequency depends heavily on her secondary Hunt sub-DPS. Choosing between Topaz & Numby, March 7th (Hunt), and Moze shapes your team’s Skill Point (SP) economy, stack generation speed, and total damage ceiling.
Feature / Metric
Topaz & Numby (5★)
March 7th – Hunt (4★)
Moze (4★)
Acquisition Cost
Limited 5★ Gacha
Free (Event / Permanent)
4★ Gacha
Stack Generation Rate
Highest (S-Tier)
Very High (A+-Tier)
High / Single-Target Burst (A-Tier)
SP Economy
SP-Positive / SP-Neutral
Ultra SP-Positive (+1 SP/3 turns)
Very SP-Positive
Primary Team Buff
+50% FUA DMG Vulnerability
+10.8% SPD & +60% CRIT DMG
+25% FUA DMG Taken & +40% CRIT DMG (E2)
Wave / Add Scaling
Excellent (Auto-targets Proof of Debt)
Excellent (Retains Master status)
Poor (Requires re-casting Skill when target dies)
Best Overall For
Premium F3A Gold Standard
F2P / High-Speed Rotations
Pure Single-Target Boss Burst
1. Topaz & Numby: The Premium Gold Standard
Stack Loop Synergy: Numby advances by 50% whenever any ally lands a Follow-Up Attack. Because Feixiao launches a guaranteed FUA on Skill, and Aventurine/Robin attack out-of-turn, Numby enters an infinite turn-advance loop that generates Flying Aureus stacks faster than any other setup.
Buffing Value: Applies a permanent 50% FUA DMG Vulnerability to targeted enemies via Proof of Debt. At E1 or S1, Topaz adds an extra +50% CRIT DMG or +24% CRIT DMG / +12% CRIT Rate debuff, respectively.
Verdict: Topaz is Feixiao’s undisputed best-in-slot partner for top-tier Memory of Chaos, Pure Fiction, and Apocalyptic Shadow clears.
2. March 7th (Hunt): The SP-God F2P Champion
Stack Loop Synergy: Designate Feixiao as March’s Master (Shihan). Whenever Feixiao attacks or uses her Talent FUA, March gains 1–2 charge points. At 7 charges, March immediately triggers an enhanced multi-hit Basic Attack, which instantly procs Feixiao’s Talent FUA back in response.
Buffing Value: Grants Feixiao +10.8% SPD passively, allowing Feixiao to drop SPD boots for ATK% boots while maintaining 134+ SPD thresholds. She also boosts Feixiao’s CRIT DMG by up to 60%.
Verdict: March 7th costs zero Stellar Jades, uses almost zero Skill Points, and performs within 5–8% of an E0S0 Topaz. She is the best budget alternative in the game.
3. Moze: The Single-Target Assassin
Stack Loop Synergy: Moze uses his Skill to mark a primary boss as Prey and enters the Departed state. Every time allies attack the Prey, Moze deals an additional coordinated hit. After 7 coordinated attacks, Moze launches a powerful FUA.
Buffing Value: Increases FUA DMG taken by the Prey by 25%, and grants teamwide +40% CRIT DMG against the target at Eidolon 2 (E2).
Limitation: When the Prey enemy dies, Moze exits Departed state and loses his buffs until his turn comes around to re-apply his Skill on a new target. This causes noticeable downtime in multi-wave or add-heavy encounters.
Verdict: Exceptional single-target boss burster (ideal for Apocalyptic Shadow), but slightly clunkier than March 7th in multi-wave Memory of Chaos stages.
Synergy: Numby and Aventurine’s counters trigger continuous out-of-turn hits, feeding Feixiao’s stack bar at maximum speed. Robin’s teamwide Action Advance and flat bonus physical DMG per hit elevate teamwide DPS output to peak levels.
2. High-Speed F2P Core (March 7th Hunt Variant)
Feixiao (DPS) | March 7th - Hunt (Sub-DPS) | Moze or Robin (Buffer) | Gallagher / Lingsha (Sustain)
Synergy: Designate Feixiao as March 7th’s Shihan. March gains charge points every time Feixiao attacks or FUAs, triggering rapid enhanced basic attacks that loop back to generate Flying Aureus charges for Feixiao.
Practical Combat Tips
Stack Management: Feixiao can hold up to 12 Flying Aureus stacks. Do not sit on 12 stacks—cast her Ultimate as soon as 6 stacks accumulate during boss vulnerability phases to avoid overflowing stack waste.
Target Switching During Ultimate: You can manually target strikes during Terrasplitter. If a minion reaches 0 HP mid-Ultimate sequence, switch remaining hits directly to the main boss target to preserve total damage value.
Skill Usage: Always use Feixiao’s Skill over Basic Attack unless out of Skill Points. Her Skill guarantees an immediate Follow-Up attack, counting as 2 hits toward her own stack-building loop.
When optimizing Feixiao, choosing between Robin and Sparkle comes down to understanding how Feixiao generates her Flying Aureus stacks. Because Feixiao relies on total team attack frequency rather than energy, Robin is Feixiao’s undisputed Best-in-Slot Harmony support, outperforming Sparkle by approximately 18% to 25% in total team damage output.
Here is a detailed breakdown of how Robin and Sparkle compare across stack generation, action advance mechanics, damage amplification, and Skill Point (SP) economy.
Deals flat Physical Additional DMG on every ally attack
None
SP Economy
SP-Positive during Concerto
Ultra SP-Positive (+4 SP per Ultimate)
1. Stack Generation Rates: The Flying Aureus Engine
Feixiao gains 1 Flying Aureus stack for every 2 ally attacks. Because sub-DPS units (Topaz, March 7th Hunt, Moze) and sustains (Aventurine, Lingsha) attack frequently, team attack density dictates Feixiao’s Ultimate frequency.
Robin’s Stack Generation (S-Tier):When Robin casts her Ultimate (Pinion’s Aria), all three teammates immediately get a 100% Action Advance. In a standard FUA team (Feixiao + Topaz + Aventurine + Robin):
Aventurine acts $\rightarrow$ builds Blind Bet stacks for a bounce FUA.
This single Robin Ultimate sequence results in 6 to 8 team attacks in rapid succession, instantly generating 3 to 4 Flying Aureus stacks within a single cycle. Furthermore, every ally hit during Robin’s Concerto state triggers Robin’s personal Physical Additional DMG.
Sparkle’s Stack Generation (B-Tier):Sparkle’s Skill advances only Feixiao by 50%. While this allows a 0-SPD Feixiao to act as frequently as a 160-SPD unit, it leaves the sub-DPS and sustain moving at their normal speeds. A turn where Sparkle advances Feixiao yields exactly 2 attacks (Feixiao’s Skill + her Talent FUA), granting 1 Flying Aureus stack. Sparkle provides zero attack acceleration for the rest of the team.
2. Action Advance Mechanics: Burst vs. Single-Target
Robin (Teamwide 100% Action Advance):Robin’s Ultimate resets the entire turn queue. During Concerto, Robin cannot act, making her completely SP-positive while active. Because Feixiao’s team attacks constantly (via counters, follow-ups, and basic attacks), Robin regenerates Ultimate Energy at an accelerated pace, allowing her to maintain high uptime on her teamwide advance.
Sparkle (Single-Target 50% Action Advance):Sparkle operates as a continuous engine. By building Sparkle to 160+ SPD (Hyperspeed), she pulls a 0-SPD Feixiao (wearing ATK% boots) forward constantly. This maximizes Feixiao’s individual turn frequency, but misses out on the burst-stack generation created when the entire party acts simultaneously.
3. Damage Amplification: Dual-DPS vs. Single Hypercarry
Feixiao’s highest-performing compositions are inherently Dual-DPS setups (pairing Feixiao with Topaz, March 7th Hunt, or Moze).
Why Robin Dominates Dual-DPS Comps:Robin’s buffs—teamwide ATK%, teamwide DMG%, teamwide CRIT DMG%, and her passive +25% CRIT DMG for Follow-Up Attacks—apply to every character on the field. Both Feixiao and her sub-DPS partner receive 100% of Robin’s buff value. Additionally, Robin’s flat additional physical damage triggers on every single hit from Numby, March’s enhanced basic attacks, and Aventurine’s coin bounces.
Where Sparkle Falls Short:Sparkle’s primary buff—her massive single-target CRIT DMG boost—only applies to the specific target of her Skill (Feixiao). Her sub-DPS partner receives no CRIT DMG boost and only minimal teamwide DMG% from Sparkle’s talent. This leaves 30%–40% of the team’s total damage potential unbuffed.
4. Skill Point (SP) Economy
Sparkle: Unmatched SP generation (+4 SP per Ultimate, +7 max SP cap). If running an extremely SP-hungry sub-DPS or sustain setup, Sparkle ensures you never run out of points. However, Feixiao teams are naturally SP-light (March 7th and Topaz are SP-positive, Aventurine/Gallagher rarely use Skills), making Sparkle’s excess SP somewhat redundant.
Robin: Highly SP-positive once Concerto is active, but requires careful SP management during her opening setup turn. Paired with SP-positive partners like March 7th (Hunt), Topaz, or Gallagher, Robin has zero issues maintaining clean Skill rotations.
Final Verdict
Pull / Run Robin if: You want Feixiao’s absolute highest damage ceiling, fastest stack generation, and seamless synergy with Topaz, March 7th (Hunt), Moze, and Aventurine.
Run Sparkle if: Robin is locked to another team in Memory of Chaos / Apocalyptic Shadow, or if you are running a hypercarry setup without a secondary Hunt sub-DPS.
To maximize Robin’s synergy with Feixiao, your primary objective is achieving 100% Concerto Ultimate uptime. While Feixiao’s high-frequency Follow-Up Attack (FUA) engine continuously funnels flat energy to Robin, meeting exact Energy Regeneration Rate (ERR) thresholds and equipping the correct ATK-scaling relics ensures Robin never experiences awkward downtime turns.
Energy Regeneration Rate (ERR) Thresholds & Mechanics
Robin’s Ultimate (Vox Harmonique, Opus Cosmique) costs 160 Energy—the highest cost in Honkai: Star Rail.
However, Robin’s Talent (Tonal Resonance) regenerates 2 flat Energy every time an ally attacks. In a Feixiao team (Feixiao + Topaz/March 7th + Aventurine/Lingsha), the party lands roughly 30 to 45 individual attacks per cycle. This translates to 60–90 free Energy regenerated purely from team attack frequency.
Base Energy Cost: 160
Feixiao Team Flat Energy Generation: ~60–90 Energy per Concerto rotation
Skill Energy Generation: 35 Energy (with A6 Trace "Sequential Passage")
ERR Threshold Benchmarks
Build Setup
Total ERR%
How to Achieve
Concerto Rotation Comfort
Baseline (Non-Sig LC)
124.4%
5★ ERR Rope (19.4%) + 2pc Planar Set (5%)
High (Requires 1 Skill cast + high FUA team frequency)
The ATK% Rope Trap: Do not equip an ATK% Rope on Robin, even in a Feixiao team. Sacrificing 19.4% ERR for an ATK% Rope leaves Robin short by 15–25 Energy when Concerto ends, forcing her to take 2 full manual turns (using SP) to re-cast her Ultimate.
Light Cone Rankings for Supporting Feixiao
When supporting Feixiao, Robin’s Light Cone must balance Energy Regeneration, Base ATK (which dictates the ATK transferred to Feixiao), and Team Damage Buffs.
Light Cone
Rarity / Superimposition
Key Effects
Performance & Synergy
Flowing Nightglow
5★ (S1 Signature)
+15% ERR; +48% Self ATK; +24% Team DMG
100% (Best in Slot) — Solves all energy requirements while maximizing her ATK buff.
But the Battle Isn’t Over
5★ (S1 Standard / Bronya Sig)
+10% ERR; +1 SP on Ult; High Base ATK (635)
~88% — Excellent ERR stick with high base ATK for higher stat conversion.
Poised to Bloom
4★ (S5 Gacha)
+32% CRIT DMG for same-path allies; +32% Self ATK
~86% — Outstanding for double-Hunt setups (Feixiao + Topaz/March/Moze).
For Tomorrow’s Journey
4★ (S5 Event F2P)
+32% Self ATK; +30% DMG after Ult; High Base ATK (476)
~84% (Best F2P Stat Stick) — Huge flat ATK conversion, but requires strict 124.4% ERR relics.
Meshing Cogs / Memories
3★ (S5) / 4★ (S5)
+8 Energy on attack/hit
~75% — Fixes energy if missing ERR relics, but low base ATK weakens Feixiao’s ATK buff.
Best Relics & Planar Ornaments
Robin does not benefit from 4-piece set effects because she remains in the Concerto state (unable to take actions) for the majority of combat. Instead, stack 2pc / 2pc ATK sets to maximize the raw ATK transferred to Feixiao and increase Robin’s personal Physical Additional DMG procs (120% ATK per hit).
Relic Sets
2pc Musketeer of Wild Wheat (+12% ATK)
+
2pc Prisoner in Deep Confinement / 2pc Wind-Soaring Valorous (+12% ATK)
Why this works: Grants a passive +24% ATK out-of-battle, boosting Feixiao’s raw damage output during Concerto without requiring active triggers.
Planar Ornaments
2pc Lushaka, the Sunken Seas (Best-in-Slot for Feixiao):Grants +5% ERR. If Robin is not placed in Slot 1 of the team, it passively increases the ATK of the Slot 1 character (Feixiao) by 12%. This set provides both the required energy threshold and direct hypercarry amplification.
2pc Sprightly Vonwacq (Alternative):Grants +5% ERR and advances Robin’s action by 40% at the start of battle. This guarantees Robin acts before Feixiao and Topaz on Cycle 0, allowing her to cast her Skill and accumulate Energy before the rest of the team starts attacking.
2pc Fleet of the Ageless / Broken Keel:Provides teamwide +8% ATK or +10% CRIT DMG, but lacks the 5% ERR bonus. Only run these if you already hold her Signature Light Cone (Flowing Nightglow).
Target Stat Benchmarks
Robin’s additional damage during Concerto has a fixed 100% CRIT Rate and 150% CRIT DMG. Therefore, CRIT Rate and CRIT DMG sub-stats on Robin are completely useless.
Relic Slot
Target Main Stat
Notes
Body
ATK%
Primary scaling stat for team buff & personal procs.
Feet
ATK% (or SPD to 120)
High speed is useless during Concerto. Aim for 120 SPD via sub-stats/Vonwacq.
Planar Sphere
ATK%
Outperforms Physical DMG% by providing higher teamwide ATK transfer.
Link Rope
Energy Regeneration Rate (19.4%)
Mandatory across all team comps.
Optimal End-Game Stats
ATK: 4,000+ (Out-of-battle)
Energy Regeneration Rate: 124.4% minimum (139.4% with Signature)
Honkai: Star Rail Super Break Mechanics & Damage Formula Guide
Unlike traditional CRIT-based hypercarries that multiply Base ATK by Skill Ratios and Damage % bonuses, Super Break operates on a fundamentally separate damage formula in Honkai: Star Rail. Introduced via the Harmony Trailblazer and expanded through specialized Break DPS units like Firefly, Boothill, and Rappa, Super Break transforms Toughness depletion into sustained, high-frequency damage while target enemies are in a Weakness Broken state.
Understanding the underlying math reveals why conventional stats like CRIT Rate, CRIT DMG, and Elemental DMG% offer zero value to Super Break builds, and why Character Level, Toughness Reduction, Break Effect, and DEF Ignore dictate the ceiling of this archetype.
The Master Super Break Damage Formula
When an attack lands on a Weakness-Broken enemy while a Super Break enabler (such as Harmony Trailblazer’s Backup Dancer aura or Firefly’s Module $\beta$ trace) is active, outgoing damage is calculated using the following master equation:
Super Break relies entirely on character ascension level rather than ATK or DEF stats. Base Break DMG is a fixed constant scaled directly to the attacker’s level:
Level 70:$\approx 2,657$
Level 80:$\mathbf{3,767.55}$
Theorycrafting Priority: Ascending your Super Break DPS and enablers from Level 70 to Level 80 provides a raw $\sim 41.8\%$ damage increase across all Super Break instances. Level 80 is non-negotiable for this archetype.
Toughness Reduction represents the base Toughness damage an ability inflicts on an enemy’s Toughness bar (e.g., standard Basic Attack = $30$, Skill = $60$, single-target ultimate = $90–120$).
Crucially, Weakness Break Efficiency acts as a direct multiplier to this value before it enters the Super Break equation:
Ruan Mei’s Skill (+50% Break Efficiency): Turns a $60$ Toughness Skill into $90$ Toughness damage. In the formula, this increases the Toughness term from $6.0$ to $9.0$—a flat $50\%$ multiplicative damage boost.
Firefly Complete Combustion / Boothill Pocket Trickshot: Native ability enhancements stack additively with Ruan Mei’s efficiency buff, heavily inflating their per-hit Super Break output.
Every $10\%$ additional Break Effect sub-stat roll adds a clean $+0.10$ to your base multiplier.
4. Super Break Ratio (Source Trace Multiplier)
The Super Break Ratio is dictated by the specific ability or trace triggering the Super Break instance:
Harmony Trailblazer (Backup Dancer):$120\% – 160\%$ against a single target (scales down slightly when hitting multiple targets depending on active enemy count).
Firefly (Module $\beta$): Converts Break Effect over $200\% / 360\%$ into an innate $35\% / 50\%$ Super Break ratio.
Rappa (Trace): Converts enhanced basic attacks into independent Super Break triggers.
Multiple Super Break instances (e.g., Harmony Trailblazer’s Backup Dancer buff paired with Firefly’s innate trace) trigger independently on the same hit, calculating separate damage numbers that stack together.
Because DEF Ignore stacks additively up to $100\%$, combining sources yields exponential returns:
4pc Iron Cavalry Against the Scourge:$15\%$ DEF Ignore at $250\%$ BE (plus $10\%$ on standard Break at $150\%$ BE).
Firefly E1 / Signature Light Cone / Ruan Mei E1: Stacking these pushes teamwide DEF Ignore close to the $100\%$ cap, where damage output increases exponentially per percentage point.
Weakness-broken enemies have their innate elemental resistance reduced to $0\%$ for their weakness types. Adding elemental RES PEN (such as Ruan Mei’s Ultimate granting $25\%$ All-Type RES PEN) boosts Super Break damage directly from $1.00\times$ to $1.25\times$.
Debuffs that increase “Damage Taken” (Gallagher’s Besotted state, Lingsha’s Ultimate debuff, or Firefly’s Skill mark) belong to this category and act as independent multipliers.
Super Break vs. Standard Damage: What Works & What Doesn’t
Stat / Buff Type
Affects Standard DMG?
Affects Super Break DMG?
Notes
Character Level
Yes (Minor)
YES (Critical)
Level 80 sets base scalar ($3,767.55$).
Break Effect%
No
YES
Primary scaling stat.
Weakness Break Efficiency
No
YES
Multiplies Toughness Reduction term directly.
DEF Shred / DEF Ignore
Yes
YES
Stacks additively up to 100% cap.
RES PEN / Vulnerability
Yes
YES
Fully effective.
ATK% / Flat ATK
Yes
NO*
*(Unless converted to BE via character traces like Firefly).
CRIT Rate / CRIT DMG
Yes
NO
Super Break cannot inflict Critical Hits.
Elemental DMG% / All DMG%
Yes
NO
Relic spheres with Elemental DMG% do nothing.
Skill / Ult DMG% Bonuses
Yes
NO
Traditional ability multipliers are completely ignored.
Relic Optimization & Stat Benchmarks
Primary Relic Sets
Best-in-Slot 4pc:Iron Cavalry Against the Scourge
2pc: +16% Break Effect.
4pc: Ignores 10% DEF when dealing Break DMG at 150%+ BE; ignores an additional 15% DEF when dealing Super Break DMG at 250%+ BE (25% total DEF ignore on Super Break).
Support 4pc:Watchmaker, Master of Dream Machinations
4pc: Increases all allies’ Break Effect by 30% for 2 turns when the wearer uses their Ultimate.
- Main Stats: Body: Healing Boost | Feet: SPD | Sphere: HP%/DEF% | Rope: Energy Regeneration Rate
Common Theorycrafting Traps
Equipping Elemental DMG% Spheres: Super Break ignores all Elemental DMG% bonuses on your stat sheet. Always run ATK% Spheres on conversion-based Break DPS (like Firefly) or HP%/DEF% Spheres for survival on supports.
Neglecting Speed for Pure Break Effect: Attacking 3 times in a broken window at $250\%$ Break Effect deals far more cumulative Super Break damage than attacking once at $350\%$ Break Effect.
Over-investing in ATK without Conversion: Unless a unit’s kit explicitly converts ATK into Break Effect (e.g., Firefly’s Module $\alpha$ converting ATK over 1800 into BE), raw ATK sub-stats provide zero benefit to Super Break output.
In Honkai: Star Rail, Speed (SPD) isn’t just about moving first—it’s about manipulating Action Value (AV) to take extra turns inside Memory of Chaos, Pure Fiction, and Apocalyptic Shadow cycle limits.
Building 134 SPD on a DPS doesn’t arbitrarily boost damage; it physically grants a second action during Cycle 0 before the timer ticks down. Hitting specific speed thresholds ensures your supports cycle Skill Points reliably, your hypercarries capitalize on vulnerability windows, and your team clears within turn limits.
The Math Behind Speed: Action Value Explained
Turn order in Honkai: Star Rail is determined by Action Value (AV). When a cycle begins or a character finishes an action, their position on the action queue is calculated using a simple formula:
$$\text{Action Value (AV)} = \frac{10000}{\text{SPD}}$$
Every cycle in timed endgame modes has a set AV limit:
Cycle 0 (First Cycle):150 AV
Cycle 1 and onwards:100 AV per cycle
When your character’s cumulative AV fits within a cycle’s total limit, they act during that cycle. If their cumulative AV exceeds the limit by even 0.1, their turn spills over into the next cycle.
Standard baseline for almost every DPS and support
142.9 (143)
69.93
2 turns in Cycle 0, 3 turns in first 2 cycles
Sub-DPS, fast harmony supports, Break units
160.0
62.50
2 turns in Cycle 0, 4 turns in first 2 cycles
Hyperspeed supports (Sparkle, Bronya, Tingyun)
171.5
58.31
3 turns in Cycle 0 (with Vonwacq / Lushaka)
Advanced 0-cycle MoC setup
200.0
50.00
3 turns in Cycle 0 (2 turns every cycle)
Extreme theorycrafting / 0-cycle speed stacking
Breakdown of Key Speed Thresholds
1. The Baseline: 120 SPD
Cumulative AV:$83.33$
Why it matters: 120 SPD is the activation floor for legacy Planar Ornaments like Space Sealing Station, Fleet of the Ageless, and Broken Keel.
Verdict: Easily reached with basic sub-stats or SPD boots. Treat 120 as the absolute bare minimum for sustain units if you aren’t actively speed-tuning them higher.
2. The Gold Standard: 134 SPD (133.4 Actual)
Cumulative AV for 2 turns:$74.63 \times 2 = 149.25\text{ AV}$
Why it matters: Because Cycle 0 provides 150 AV, a unit with at least 133.4 SPD completes two full turns before Cycle 0 ends ($149.25 \le 150$).
Verdict: The non-negotiable benchmark for standard hypercarries (Feixiao, Acheron with SPD setups, Ruan Mei, Pela). Missing 134 SPD by even a fraction of a decimal pushes your second attack into Cycle 1, instantly slowing down your clear speed.
3. The Smooth Integrator: 143 SPD (142.9 Actual)
Cumulative AV for 3 turns:$69.93 \times 3 = 209.79\text{ AV}$
Why it matters: Over the first two cycles (Cycle 0 + Cycle 1 = 250 AV total), a unit with 143 SPD takes 3 full turns ($209.79 \le 250$). It also grants 5 turns across the first 3 cycles (350 AV limit).
Verdict: Ideal for sub-DPS units, debuffers, and Break units (Boothill, Firefly without signature thresholds) who benefit from frequent action cadence without forcing full speed-main-stat sacrifices across all relic slots.
4. Hyperspeed: 160 SPD (160.0 Actual)
Cumulative AV for 4 turns:$62.50 \times 4 = 250.00\text{ AV}$
Why it matters: At 160 SPD, your unit takes 2 turns in Cycle 0 and 2 turns in Cycle 1—a flat 4 turns in the first two cycles.
Verdict: The gold standard for Skill Point generators and Action Advance supports (Sparkle, Bronya, Tingyun, Huohuo). A 160 SPD Sparkle allows a 0-SPD hypercarry (wearing ATK% boots) to act 4 times in the first two cycles while generating net-positive SP.
Advanced Speed Tuning Strategies
Strategy A: Hyperspeed Support + Base SPD DPS
Setup: Support at 160+ SPD, DPS at Base SPD (ATK%/HP% Boots).
How it works: Action Advance supports like Sparkle or Bronya drag your zero-investment DPS forward. The DPS effectively inherits the support’s speed tier while keeping heavy offensive main stats on their boots.
Best For: Heavy scaling hypercarries (Acheron, Jing Yuan, DHIL).
Sprightly Vonwacq / Lushaka (40% First Turn Advance): Reduces your first turn AV requirement by $0.40 \times \left(\frac{10000}{\text{SPD}}\right)$. This allows units with ~120 SPD to act first in Cycle 0, or units with ~160 SPD to act before high-speed boss mobs trigger opening phase attacks.
Dance! Dance! Dance! (S5 = 24% Team Action Advance): Reduces remaining AV across all allies upon Ultimate cast. Pairing an S5 Dance! Dance! Dance! on Harmony units effectively lowers teamwide speed requirements by 10–15 points to hit equivalent cycle breakpoints.
Common Traps & Hidden Decimals
In-Game Rounding Lies: The character stat sheet rounds SPD to the nearest whole integer. A character displaying 134 SPD might actually have 133.3 SPD under the hood due to hidden decimal sub-stats, causing them to fail the Cycle 0 double-turn check ($150.03\text{ AV} > 150\text{ AV}$). Verify exact decimals via third-party showcase tools or in-combat turn order queues.
Speed Over-Investment: Pushing a DPS from 134 to 140 SPD without reaching the 143 threshold yields zero additional turns in Cycles 0 or 1. Those 6 speed rolls would have provided far higher damage output if allocated into CRIT Rate, CRIT DMG, or Break Effect.
Buff Desync: Speed buffs applied mid-battle (e.g., Asta’s Ultimate, Huohuo’s E1, or relic set triggers) recalculate remaining AV, not total AV. To maximize speed buffs, trigger them at the very top of the action queue right after your unit finishes their turn.
Standout Mythics: Sonic’s Power Sneakers, Tetris Rift, Mega Man’s Mega Buster, and Midas’ Masterpiece.
Current Event:Fortnitemares 2026 integration (featuring Five Nights at Freddy’s and Black Clover crossovers).
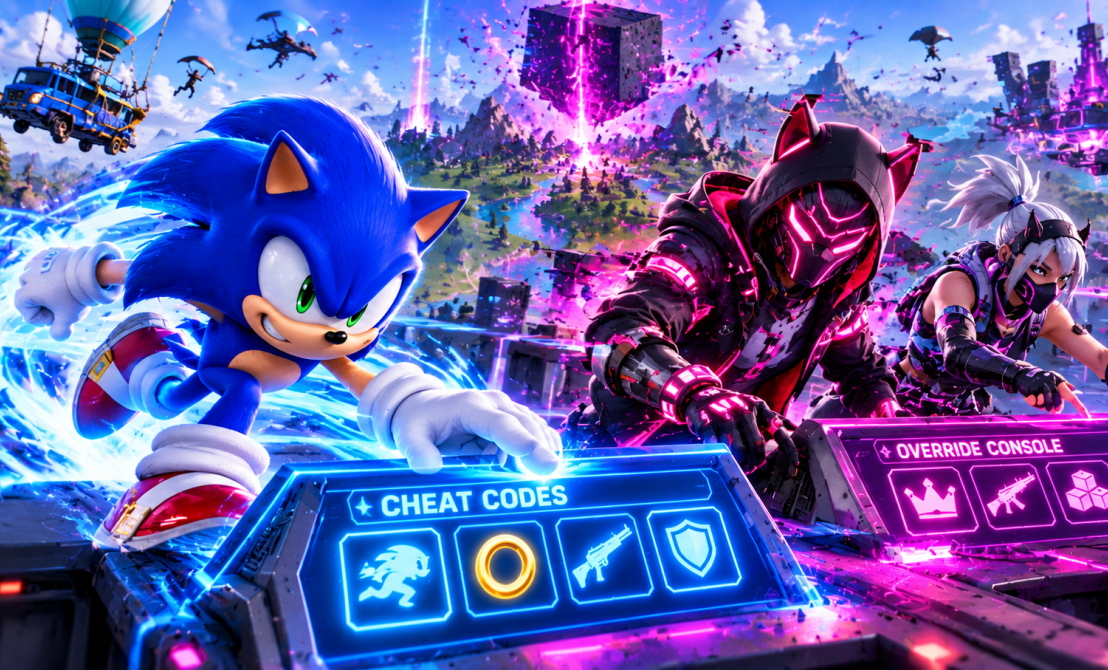
The Override System: Server-Wide Hacks & Console Locations
Chapter 7 Season 4 disrupts standard Battle Royale pacing with the introduction of Override Consoles. Spawned in contested POIs across the island, these interactive stations allow players to temporarily rewrite server physics, loot tables, and movement mechanics for all remaining squads.
Global Overrides: Interacting with a primary console lets you apply server-wide mutators (such as low gravity, instant weapon reloading, or doubled movement speeds). When activated, the controller’s player name is displayed at the console base and on the global feed.
Rare Squad Overrides: These consoles grant localized buffs exclusively to the squad that claims them first (e.g., health regeneration on eliminations or infinite stamina). However, claiming a Squad Override broadcasts your exact position on the Tac-Map, making your team an instant target for third-party pushes.
New & Vaulted Weapons Loadout
The Override loot pool blends futuristic tech, classic fan-favorites, and gaming legend Mythics.
Weapon / Item
Classification
In-Game Utility & Strategy
Sonic’s Power Sneakers
Mobility Mythic
Grants high-speed sprinting, wall-running, and double-jump capability through momentum building.
Tetris Rift
Utility Throwable
Spawns falling Tetronimo blocks that destroy built structures instantly and drop localized floor loot.
Mega Buster
Energy Arm Cannon
Chargeable ranged blast dealing high structure damage and temporary EMP disabling to vehicles.
Midas’ Masterpiece
Legendary Pistol
High-precision sidearm delivering single-shot headshot eliminations at close-to-medium range.
Kingdom Key
Melee Mythic
Sweeping melee combos paired with a forward dash strike that reflects incoming small-caliber projectiles.
Rebecca’s Guns
Dual Pistols
High fire-rate dual pistols with heavy recoil, optimal for hip-fire close-quarters box fights.
Sprite Garden & Cheat Code Interactions
Carried over and expanded from Season 3: Runners, Sprites play a crucial role in end-game loadouts through the new Sprite Garden hub and on-map Sprite Cheat Codes.
1. Sprite Cheat Codes
Interactable terminal points hidden across major POIs allow players to input physical button combinations discovered in the environment. Successfully entering a cheat code spawns high-tier weapons, health restoration, or immediate Sprite companions without spending Gold Bars.
2. Loot Hacks via Sprite Dust
By visiting the Sprite Garden from the main menu or in-match sanctuaries, players can convert collected Sprite Dust into permanent Loot Hacks. These hacks customize chest drops during Battle Royale matches, guaranteeing specific weapon categories or bonus utility items (like Slurp Juice or Shockwave Grenades) from standard chests.
Chapter 7 Season 4 Battle Pass & Crossover Lineup
The Season 4 Battle Pass introduces gaming icons alongside original Fortnite lore characters.
Sonic the Hedgehog: Features dynamic running animations, the Tails Sidekick back bling, and classic Green Hill Zone sound triggers.
Grace Crowne (Infiltrator Style): Available as a launch-week bonus outfit, featuring sleek techwear edit styles.
Mali (Peril Peak Style): Unlocked through Battle Pass progression and gifting milestones.
Item Shop & Season Collabs: The Override rotation includes crossovers from Five Nights at Freddy’s, KINGDOM HEARTS, Black Clover, Cyberpunk: Edgerunners, Persona 5 Royal, Pac-Man, Crash Bandicoot, and Spyro the Dragon.
Competitive & Ranked Strategy for Season 4
Deny Console Pings Early: If an enemy squad captures a Squad Override, do not push blindly. Wait for them to engage another team first, as their permanent Tac-Map marker makes them prime targets for crossfire.
Combine Power Sneakers with Box Fighting: Use Sonic’s Power Sneakers to build horizontal momentum, wall-run past enemy ramps, and initiate high-angle wall takes before opponents can box up.
Optimize Sprite Dust Early: Prioritize unlocking the Shotgun Loot Hack in your Sprite Garden to guarantee higher floor-tier weapon drops right off the spawn drop.
Frequently Asked Questions
When does Fortnite Chapter 7 Season 4 end?
Season 4: Override launched on August 20, 2026, and is scheduled to wrap up in early November 2026, paving the way for the Chapter 7 finale event.
Where do Job Boards spawn in Season 4?
Job Boards (and SHADOW Briefings) remain located at all major named POIs and gas stations across the map, offering bounties and supply drop requests for completing seasonal quests.
When Epic Games introduced cel-shaded cosmetics in Chapter 2, anime skins felt like a risky experiment. Early models suffered from unnatural facial lighting, awkward head-to-body proportions, and glowing outlines that turned players into easy targets in night matches.
Fast-forward through Unreal Engine 5 updates and major collaborations—spanning Dragon Ball, Naruto, Jujutsu Kaisen, Attack on Titan, Bleach, and Black Clover—and anime skins have become some of the most sought-after cosmetics in Fortnite.
Evaluating anime skins requires looking beyond brand nostalgia. We evaluated every major crossover skin based on cel-shading fidelity in UE5, ADS (Aim-Down-Sights) sightline obstruction, built-in transformation emotes, and competitive hit-profile perception.
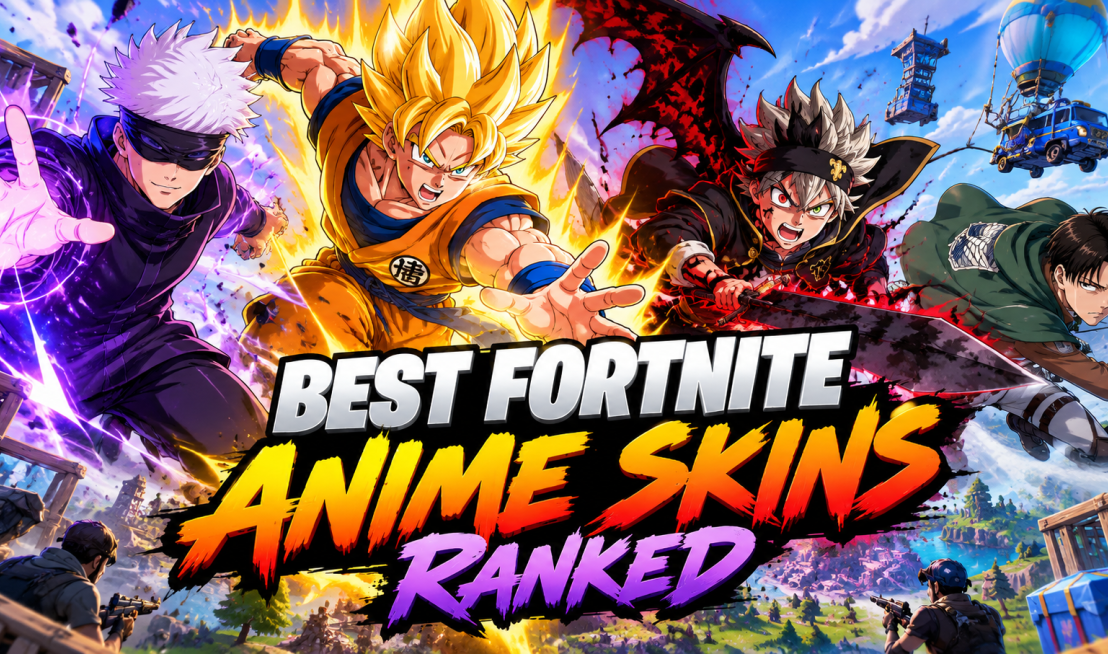
Quick Ranking: Top Fortnite Anime Skins at a Glance
Rank
Skin Name
Franchise
Standout Feature
Best For
#1
Satoru Gojo
Jujutsu Kaisen
Unblindfolded style & zero ADS obstruction
Competitive “Sweats” & Ranked
#2
Son Goku
Dragon Ball Super
4-in-1 Built-in Transformation Emote
Iconic Value & Transformations
#3
Asta
Black Clover
Mid-match Devil Transformation emote
Best UE5 Cel-Shading & FX
#4
Captain Levi
Attack on Titan
Slim silhouette & Scout Regiment cloak
Stealth & Low-Profile Play
#5
Ichigo Kurosaki
Bleach
Fully-Hollowfied built-in transformation
Best Sword/Pickaxe Synergy
#6
Itachi Uchiha
Naruto Shippuden
ANBU & Akatsuki edit styles
Legacy Classic & Crowd Favorite
#7
All Might
My Hero Academia
Small Toshinori to Hero Form transformation
Nostalgia & Meme Value
#8
Saitama
One-Punch Man
Clean bald profile & Cape back bling
Meme Play & Clean Visibility
Detailed Reviews & Rankings
1. Satoru Gojo (Jujutsu Kaisen)
V-Buck Cost: 1,500 V-Bucks
Best Edit Style: Unblindfolded (Six Eyes Active)
Why It’s #1:
Gojo isn’t just a fan-favorite character; he’s widely considered by the competitive community to be the cleanest anime skin ever released in Fortnite. Unlike older anime models with oversized hair meshes that block your view while aiming down sights, Gojo’s head profile is sleek and proportional.
His cell-shading is tuned perfectly for UE5 lighting, avoiding the aggressive line-art shadow glitches seen on earlier models. The option to toggle between his blindfolded Jujutsu High look and his unblindfolded Six Eyes style gives players two distinct aesthetics for a standard 1,500 V-Buck price tag.
ADS Visibility: 10/10 (Zero screen blocking)
Cel-Shading Quality: 10/10
2. Son Goku (Dragon Ball Super)
V-Buck Cost: 2,000 V-Bucks
Best Feature: Built-in “Charging Up” Transformation Emote
Why It’s #2:
While Goku’s default Super Saiyan hair can feel slightly bulky in close-quarters box fights, his mechanical execution sets the benchmark for anime crossovers. He features four playable forms in a single outfit: Base Form, Super Saiyan, Super Saiyan Blue, and Ultra Instinct.
Using his built-in emote during a match triggers a dynamic aura charge that transitions through his Saiyan forms sequentially. When paired with the Flying Nimbus glider and Power Pole pickaxe, Goku offers the most feature-complete crossover package in the game’s history.
Best Feature: Devil Transformation Emote & Dual-Blade Integration
Why It’s #3:
Representing the modern generation of Fortnite cel-shading, Asta showcases how far Epic Games’ character rendering has come. His textures use soft gradient shading that blends seamlessly with Fortnite’s realistic environmental lighting.
His built-in Devil Transformation emote shifts him into his Black Form mid-game, sprouting his anti-magic wing and horn without needing a trip back to the Locker menu. Combined with his Demon-Slayer Sword pickaxe animation, Asta provides incredible visual feedback during high-elimination matches.
ADS Visibility: 8.5/10
Cel-Shading Quality: 9.5/10
4. Captain Levi (Attack on Titan)
V-Buck Cost: 1,500 V-Bucks
Best Edit Style: Scout Regiment Cloak (Off)
Why It’s #4:
If your primary goal in Battle Royale is winning box fights and staying low-profile, Captain Levi is the undisputed king of anime skins. His character model lacks giant hair spikes, floating capes, or glowing glowing auras that give away your position through fog or bushes.
His Scout Regiment jacket features clean, matte cel-shading that looks grounded in the world. For competitive players who typically avoid anime skins due to bright colors, Levi offers the perfect balance of anime fandom and sweat-tier utility.
ADS Visibility: 10/10
Cel-Shading Quality: 9/10
5. Ichigo Kurosaki (Bleach)
V-Buck Cost: 1,800 V-Bucks
Best Feature: Fully-Hollowfied Built-In Emote & Zangetsu Pickaxe
Why It’s #5:
Bleach arrived in Fortnite with high expectations, and Ichigo delivered. His base Soul Reaper outfit looks sharp, but the real highlight is his Fully-Hollowfied built-in transformation emote.
Unlike skins where back blings look awkwardly floating behind the character’s shoulders, Ichigo’s Zangetsu acts as a seamlessly mounted back-bling that smoothly unsheaths into his primary pickaxe. The animation work on his Bankai coat physics during sprinting and sliding is among the best in the game.
ADS Visibility: 8/10
Cel-Shading Quality: 9/10
6. Itachi Uchiha (Naruto Shippuden)
V-Buck Cost: 1,500 V-Bucks
Best Edit Style: ANBU Black Ops Uniform
Why It’s #6:
The original Naruto Wave 1 and Wave 2 drops paved the way for anime in Fortnite, and Itachi remains the standout skin from the entire hidden leaf roster.
While Naruto and Sasuke suffer from slightly dated facial rigging, Itachi’s ANBU Mask style and classic Akatsuki cloak hold up exceptionally well. The Akatsuki cloud patterns are crisp, and his ANBU edit style provides a slim, dark silhouette that competitive players favor for night-cycle storm rotations.
ADS Visibility: 9/10
Cel-Shading Quality: 8/10
7. All Might (My Hero Academia)
V-Buck Cost: 2,000 V-Bucks
Best Feature: Toshinori Yagi to Hero Form Transformation
Why It’s #7:
All Might is pure theatrical joy. He is one of the largest anime character models in the game, meaning he isn’t built for stealth or competitive arena play. However, his Symbol of Peace transformation emote—switching from his frail Toshinori Yagi form to his booming, muscular hero form—is one of the most iconic built-in emotes ever designed.
If you play casual squad games or festive modes, flexing All Might’s sheer size and shading intensity is unmatched.
ADS Visibility: 5/10 (Large shoulder silhouette blocks right-hand camera angles)
Cel-Shading Quality: 8.5/10
8. Saitama (One-Punch Man)
V-Buck Cost: 1,500 V-Bucks
Best Feature: Completely Bald Head Profile (Zero Hair Obstruction)
Why It’s #8:
Saitama brings pure comedic power to the Battle Royale island. Because he has zero hair mesh, his head offers the absolute cleanest third-person camera sightlines of any anime skin in existence.
His bright yellow jumpsuit stands out in grassy biome terrain, but his clean silhouette, cape physics, and hilarious emote synergy make him an instant favorite for casual players and streamers alike.
ADS Visibility: 10/10
Cel-Shading Quality: 8.5/10
Buyer’s Guide: How to Pick the Right Anime Skin
Before dropping 1,500 to 2,000 V-Bucks on an anime collab, keep these three factors in mind:
1. Do Anime Skins Have Larger Hitboxes?
No. All character skins in Fortnite share the exact same underlying hit register capsule. A bullet aimed at All Might’s shoulder or Goku’s hair tips will not deal damage unless it strikes the standard character hitbox model. However, larger visual models like All Might or Super Saiyan 3 Goku block your own line of sight when aiming down sights (ADS), making enemies harder to track up close.
2. In-Game Lighting & Cel-Shading Settings
If you find cel-shaded anime skins look overly bright or washed out on your monitor, check your graphics settings:
PC Players: Set Post-Processing to Medium or Low and disable Motion Blur. This reduces the halo glow around cel-shaded character borders.
Console Players: Toggling Colorblind Mode (Deuteranope 2-4) can help smooth out harsh cel-shading outlines in dark or stormy areas of the map.
3. V-Buck Valuation: Individual Skins vs. Bundles
Epic Games typically prices individual anime skins at 1,500–2,000 V-Bucks, while character bundles (including 2–3 skins plus pickaxes and gliders) range between 2,800–4,000 V-Bucks. If you plan to pick up more than one character from a wave (such as the Bleach or Black Clover drops), purchasing the complete bundle always saves between 1,500 and 2,200 V-Bucks compared to à la carte buys.
Frequently Asked Questions
Which Fortnite anime skin is the most rare?
Battle Pass exclusive anime skins like Eren Jaeger (Chapter 4 Season 2) and Lexa (Chapter 2 Season 5) are currently the rarest, as Battle Pass cosmetics historically do not return to the Item Shop. For Item Shop collabs, older waves like the original Naruto Team 7 set often experience long vault stints exceeding 400+ days between rotations.
Can built-in transformation emotes be used in combat?
Yes. Built-in emotes (such as Goku’s Saiyan charge or Asta’s Devil Transformation) can be used at any point during a match. However, be mindful that the transformation audio and visual effects can briefly reveal your position to nearby opponents.
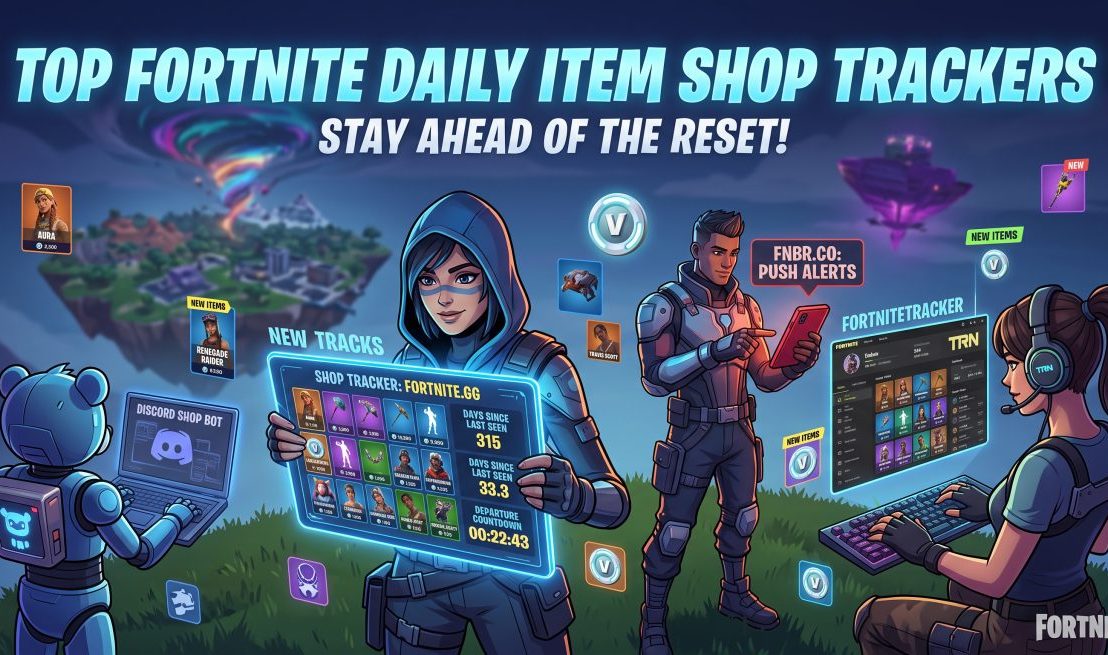
Top Fortnite Daily Item Shop Trackers: Ranked & Reviewed
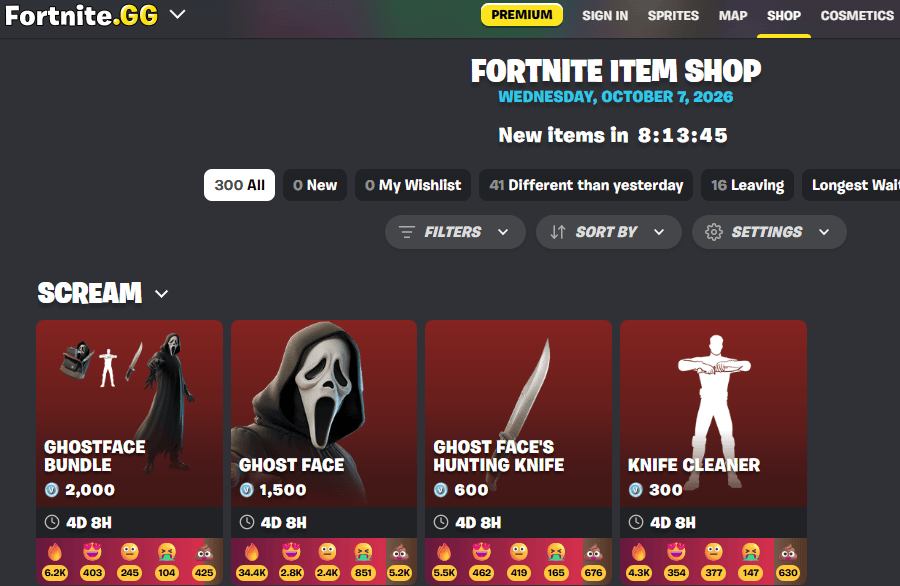
When the Fortnite Item Shop resets every day at 8:00 PM ET / 5:00 PM PT, browsing through the in-game menu isn’t always convenient. With the shop expanding across Battle Royale outfits, LEGO styles, Fortnite Festival Jam Tracks, Rocket Racing vehicle bodies, and dynamic bundle discounts, navigating the in-game UI can feel bloated and slow.
Item shop trackers solve this problem by providing instant access to daily rotations, “days since last seen” historical data, item rarity stats, and custom wishlist push notifications—all from a browser, mobile app, or Discord server.
Quick Comparison: Best Fortnite Shop Trackers
Tracker
Best For
Standout Feature
Platform
Fortnite.gg
Best Overall
Interactive 3D cosmetic views, wishlist alerts, & locker tracking
Web
FNBR.co
Best Mobile Experience
Native iOS/Android apps with instant reset push notifications
Web, iOS, Android
FortniteTracker (TRN)
Best All-In-One
Combines shop listings with player stats and leaderboards
Web
Discord Shop Bots
Best for Communities
Automatically posts shop resets directly to server channels
Discord
ItemShop.gg
Best Speed & Simplicity
Ultra-clean, lightweight grid with exact departure countdowns
Fortnite.gg is the most feature-rich cosmetic resource available for Fortnite players. It offers an intuitive visual interface that displays the entire active shop on a single, clean page without performance lag.
Key Strengths:
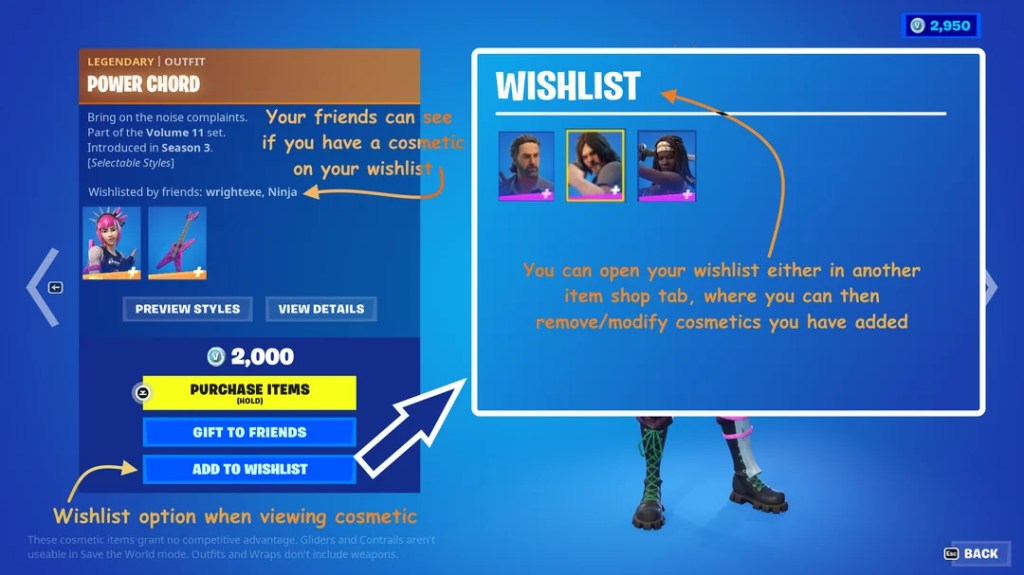
Wishlist Notifications: Set up custom alerts to receive browser or email notifications the moment a desired skin, emote, or pickaxe hits the shop.
Deep Historical Data: Displays precise statistics for every cosmetic, including total shop occurrences, release dates, and “days since last seen” timers to track rare items like the Leviathan Axe or Travis Scott.
Locker & V-Buck Valuation: Allows users to build a digital inventory of owned items to calculate total locker value and track dynamic bundle savings.
Drawback: The sheer volume of data (maps, leaks, battle pass trackers) can feel overwhelming if you strictly want a simple image of today’s shop.
2. FNBR.co — The Mobile & Notification Champion
fnbr.co item shop website interface screenshot
FNBR.co has been tracking cosmetics since Fortnite’s earliest seasons and remains one of the fastest platforms on the market. It excels in delivering quick shop updates through dedicated mobile apps for iOS and Android.
Key Strengths:
Instant Push Notifications: Delivers notification alerts directly to mobile devices seconds after Epic Games updates the shop API.
Unreleased & Leaked Cosmetics: Keeps a dedicated tab for upcoming cosmetics found in patch files by dataminers before they officially release.
Reminders without Accounts: Enables quick item reminders on mobile without requiring extensive account setup.
Drawback: The web interface is functional, but less visually modernized compared to newer competitors.
3. FortniteTracker (Tracker Network) — The All-In-One Hub
For players who track competitive statistics alongside cosmetic rotations, FortniteTracker by the Tracker Network (TRN) integrates both workflows onto one domain.
Key Strengths:
Combined Workflow: View battle royale stats, ranked leaderboards, tournament histories, and the daily shop on a single platform.
Price & Bundle Transparency: Clearly breaks down individual item costs versus complete bundle prices, highlighting exact V-Buck savings.
Proven Reliability: Supported by high-uptime server infrastructure, ensuring site stability during massive event nights and new season launches.
Drawback: Heavier ad footprint compared to standalone community-run shop trackers.
4. Discord Shop Bots (Daily Shop & FNBR Bot) — Best for Gaming Guilds
For gaming communities, esports teams, or casual friend groups, checking a website isn’t always necessary. Discord bots fetch official Epic Games shop assets and post them directly into server channels the moment the reset occurs.
Key Strengths:
Zero Friction: Delivers full visual shop graphics straight to active chat channels without opening external browsers.
Automated Daily Ping: Assigns roles (e.g., @Shop-Alerts) to ping group members only when the shop resets.
Customizable Commands: Allows server members to run commands like /shop or search specific skin histories directly in chat.
Drawback: Limited to static image previews; lacks interactive 3D model viewing or personal locker management.
If you want to view today’s shop instantly on low-bandwidth connections or older mobile hardware, ItemShop.gg prioritizes page loading speed above all else.
Key Strengths:
Instant Load Times: Strips out excessive scripts to deliver shop image grids almost instantly upon page load.
Clear Departure Timers: Organizes items by category tags (New Today, Leaving Tonight, Collaborations) with visible countdown clocks for each section.
Direct Jam Track Audio Previews: Allows users to preview Fortnite Festival music tracks directly within the browser UI.
Drawback: Lacks deep analytical tools, inventory saving, or advanced stat tracking.
Essential Features Every Good Tracker Needs
When choosing a primary shop tracker, prioritize these core features to avoid missing key cosmetic drops:
Automated API Integration: Ensure the tracker pulls directly from Epic Games’ public endpoints. Manual updates lead to delays and incorrect V-Buck pricing.
“Days Since Last Seen” Metrics: Distinguishes 30-day rotation cosmetics (like Aura or Sirens) from vault items that haven’t appeared in over 500+ days.
Dynamic Bundle Discount Calculation: Calculates reduced prices automatically if you already own partial items in a bundle (e.g., owning a back bling before buying the full character outfit).
Multi-Mode Support: Separates cosmetics across modes (Battle Royale Outfits, Jam Tracks, LEGO Kits, and Vehicle Skins) so you can filter out irrelevant items.
Security & Account Safety Notice
Legitimate Fortnite item shop trackers never require your Epic Games account password, two-factor authentication codes, or credit card details.
Safe Usage: Public shop trackers only require reading open API data provided by Epic Games. Setting up wishlist alerts should only require a basic site account or browser cookie—never your primary gaming credentials.
Red Flags: Avoid any site or bot claiming to sell shop skins directly at a discount or asking you to sign into Epic Games to “claim” free V-Bucks. Cosmetic purchases must always be executed directly through the official Fortnite client or the Epic Games Store.
The Apocalyptic Shadow: Dominance of Oblivion rotation rewards high Toughness depletion, clean Skill Point (SP) management, and precise team positioning. With Kafka, Ichor Memosprite: Judge of Oblivion, and Hoolay taking the field, clearing for a full 3600+ score on each node requires matching the right stage buffs to your core DPS engine.
Stage Buffs & Node Selection
Pick your node modifier based on your primary damage mechanism. Forcing a buff that doesn’t align with your DPS will cost you turns during vulnerability phases.
Node
Modifier
Mechanics
Best Suited For
Node 1
Magic Time
Boosts Elation DMG scaling with team unit count
Follow-up / Elation comps
Node 1
Collapse of Sight
Increases Break DMG taken; breaking weaknesses grants teamwide SPD
Firefly / Boothill Super Break
Node 1
Moment of Opportunity
+50% Follow-Up & Ultimate DMG (+100% against broken targets)
Feixiao / Acheron Hypercarry
Node 2
Comic Relief
Dealing Elation DMG applies a 2-turn Vulnerability debuff
Consuming Skill Points stacks CRIT DMG (+6% per SP, up to 10 stacks)
SP-heavy dual DPS lineups
Node 1: Kafka Boss Fight
Key Mechanics & Weaknesses
Weaknesses: Physical, Wind, Fire, Imaginary
Primary Threat: Kafka’s Dominate (Mind Control) can redirect your primary DPS to attack allies and wreck your action turn order.
Tactical Tip: Kafka’s damage mitigation drops drastically once her Toughness bar is depleted. Time your high-Toughness Ultimate hits right before her turn to lock her out of action.
Recommended Compositions
1. Premium Follow-Up (Feixiao Engine)
Feixiao (DPS) | Robin (Support) | Topaz / March 7th (Hunt) | Aventurine (Sustain)
Best Buff: Moment of Opportunity
Execution: Aim for 134+ SPD across all supports. Save Robin’s Ultimate for immediately after breaking Kafka’s Toughness bar—this lets Feixiao squeeze in two full Ultimate skill stacks during the vulnerability window.
Cleanse Priority: Aventurine’s Effect RES passive protects the party from Dominate; if using Fu Xuan or Huohuo instead, queue up Huohuo’s Skill before Kafka’s main phase attack to auto-cleanse the mind control.
Execution: Focus directly on Kafka to melt her Toughness bar. Ruan Mei’s Weakness Break Efficiency passive plus Harmony Trailblazer’s Super Break triggers allow this team to ignore Kafka’s phase transitions almost entirely. Target at least 250% Break Effect on Firefly in battle.
Node 2: Ichor Memosprite: Judge of Oblivion
Key Mechanics & Weaknesses
Weaknesses: Fire, Lightning, Imaginary, Physical
Primary Threat: Spawns secondary adds that build boss shields and absorb targeted attacks.
Tactical Tip: Do not dump single-target damage into the boss while adds are active. Wipe the side mobs first to lower the main boss’s damage resistance stack.
Recommended Compositions
1. Acheron Debuff Cleave
Acheron (Slot 1 DPS) | Jiaoqiu (Debuffer) | Pela / Sparkle | Aventurine / Fu Xuan
Best Buff: Exploit Opening or Land of Fertility
Execution: Place Acheron in Slot 1 if running Land of Fertility. Ensure Jiaoqiu or Pela holds Before the Tutorial Mission Starts or Resolution Shines As Pearls of Sweat for maximum debuff uptime.
SP Management: Keep Pela and your sustain unit SP-positive so Sparkle or Jiaoqiu can use Skills continuously to generate Acheron Ultimate charges before add spawns.
Execution: Himeko’s passive follow-up attack triggers every time an add’s weakness is broken, creating a continuous loop of Break damage across the board. Equip Gallagher with an Energy Regeneration Rate (ERR) rope to ensure consistent Ultimate availability for quick Fire Toughness depletion.
Node 3: Hoolay (Starward Mode)
Key Mechanics & Weaknesses
Weaknesses: Quantum, Physical, Fire, Wind
Primary Threat: Hoolay’s Moon Rage grants him extreme SPD and continuous action advances. If left unchecked, he can burst down squishy supports before you can set up buffs.
Tactical Tip: Bring units with high single-target Toughness damage or counter mechanics to disrupt Hoolay’s turn cadence.
Execution: Place Boothill in Slot 1 to maximize Heroic Vanguard. Use Bronya’s Skill to pull Boothill immediately after his turns, stacking his Pocket Trickshot charges in turn 1. Once fully stacked, Boothill can chunk 40–50% of Hoolay’s health bar per break trigger.
Benchmark: Aim for 145+ SPD on Boothill (to trigger Talia: Kingdom of Banditry) and 160 SPD hyperspeed on Bronya.
2. Counter / Sustained Burst Setup
Yunli / Clara (DPS) | Robin | Tingyun | Huohuo
Best Buff: Moment of Opportunity
Execution: Hoolay’s rapid multi-hit attacks feed Yunli and Clara infinite energy and counter triggers. Use Tingyun to battery Yunli’s Ultimate, ensuring you hold the Parry stance right before Hoolay unleashes his multi-slash combination.
Primary DPS Builds & Stat Benchmarks
To hit maximum score thresholds in Apocalyptic Shadow, ensure your primary DPS units meet these relic, Light Cone, and stat requirements before stepping into Node 1–3:
1. Feixiao (Wind / The Hunt)
Best Light Cones:I Venture Forth to Hunt (Signature) > Baptism of Pure Thought > Cruising in the Stellar Sea (S5 F2P) > Swordplay (S5)
Relics & Ornaments: 4pc The Wind-Soaring Valorous + 2pc Duran, Dynasty of Running Wolves (or Izumo Gensei)
Main Stats: Body: CRIT Rate% | Feet: SPD (or ATK%) | Sphere: Wind DMG% / ATK% | Rope: ATK%
Stat Thresholds:
CRIT Rate: 90%+ (Crucial—missing a crit on her multi-hit Ultimate kills cycle speed)
CRIT DMG: 130%+
SPD: 134+ (or run ATK boots with Hyperspeed Robin/March 7th)
ATK: 2,600+
2. Firefly (Fire / The Destruction)
Best Light Cones:Whereabouts Should Dreams Rest (Signature) > On the Fall of an Aeon (S5 F2P) > Indelible Promise (S5)
Relics & Ornaments: 4pc Iron Cavalry Against the Scourge + 2pc Forge of the Kalpagni Lantern
Main Stats: Body: ATK% | Feet: SPD | Sphere: ATK% | Rope: Break Effect%
Stat Thresholds:
Break Effect: 360%+ in-battle (Unlocks full 25% DEF ignore on 4pc Iron Cavalry)
Out-of-Battle SPD: 150+ (140+ if paired with Ruan Mei) to achieve 210 SPD in Complete Combustion state
CRIT Stats: Ignore completely
3. Acheron (Lightning / The Nihility)
Best Light Cones:Along the Passing Shore (Signature) > Good Night and Sleep Well (S5) > Boundless Choreo (S5)
Relics & Ornaments: 4pc Pioneer Diver of Dead Waters + 2pc Izumo Gensei and Takama Divine Realm
Main Stats: Body: CRIT Rate% or CRIT DMG% | Feet: ATK% (or SPD 134) | Sphere: Lightning DMG% / ATK% | Rope: ATK%
Status:LIVE NOW in the Fortnite Item Shop (released October 3, 2026 during Chapter 7 Season 4: Override / Fortnitemares).
Main Characters: Asta, Noelle Silva, and Yuno Grinberryall.
Confirmed Bundle Price:3,800 V-Bucks for the main Black Clover Bundle (discounted from 5,900 V-Bucks à la carte).
Standout Feature: Asta features a mid-match Devil Transformation emote that shifts him into his Black Form without going back to your Locker.
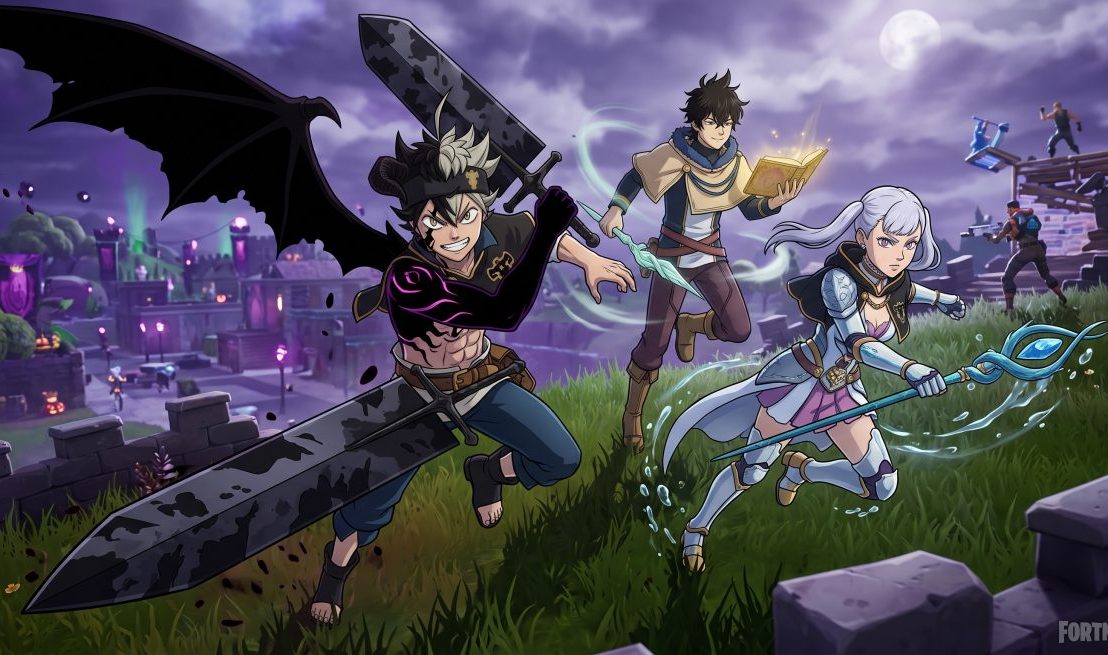
The Magic Knights of the Clover Kingdom have officially landed on the Battle Royale island. Dropping right alongside Fortnitemares 2026 and tied to the Black Clover anime Season 2 premiere, the Asta, Noelle, and Yuno outfits are currently available in the official Fortnite Item Shop.
If you’re deciding whether to spend your hard-earned V-Bucks or save them for the next Fortnitemares drop, here is a complete breakdown of what’s in the shop, confirmed pricing, and how these skins perform in-game.
Black Clover Item Shop Breakdown & Confirmed Prices
Buying items individually adds up quickly, but Epic Games offers a full Black Clover Bundle for 3,800 V-Bucks, saving you 2,100 V-Bucks compared to buying every cosmetic piece-by-piece.
Cosmetic Item
Type
Individual Price
Asta (Includes Devil Transformation Emote)
Outfit
2,000 V-Bucks
Noelle Silva (Includes Valkyrie Armor Edit Style)
Outfit
1,800 V-Bucks
Yuno (Includes Alternate Edit Style)
Outfit
1,600 V-Bucks
Asta’s Demon-Slayer Sword
Pickaxe
800 V-Bucks
Sea Serpent’s Wand
Pickaxe
800 V-Bucks
Spirit of Boreas
Pickaxe
500 V-Bucks
Anti-Magic
Weapon & Vehicle Wrap
500 V-Bucks
Grimoires (Asta, Noelle, Yuno)
Back Blings
300 V-Bucks each
Asta’s Devil Wings
Back Bling / Glider
300 V-Bucks
FULL BLACK CLOVER BUNDLE
Complete Set
3,800 V-Bucks(35%+ Discount)
(Note: A separate cross-game Nissan GT-R NISMO Black Clover bundle is also available in the Shop for 2,800 V-Bucks, usable across Battle Royale, LEGO Fortnite, and Rocket Racing).
Skin Details & In-Game Hands-On Impressions
1. Asta
The Good: Asta is the highlight of the set. His built-in Devil Transformation Emote triggers his anti-magic wing and horned black markings mid-match. In third-person gameplay, the transformation animation is smooth and feels awesome during combat reset moments.
The Caveat: His Demon-Slayer Sword pickaxe uses a heavy two-handed swinging animation. If you prefer slim, low-latency pickaxes for competitive box fights, it might feel slightly bulky, though casual anime fans will love the impact feel.
2. Noelle Silva
The Good: Cell-shading on anime skins can sometimes feel hit-or-miss in Fortnite‘s Unreal Engine 5 lighting, but Noelle’s Valkyrie Armor edit style looks sharp. The water-effect textures on her armor retain clean lines without glowing so brightly that you become a walking target in dark corners of the map.
3. Yuno
The Good: Yuno’s clean aesthetic makes him the sleekest skin of the trio. If you don’t care for heavy armor or bulky transformations, his outfit offers clean sightlines and zero screen obstruction when ADS (Aiming Down Sights).
Community Verdict: Is the Bundle Worth Buying?
The community response on Reddit and X (Twitter) has been overwhelmingly positive regarding the cell-shading fidelity—especially when compared to earlier, flatter anime crossovers like the original Naruto or My Hero Academia waves.
If you main anime skins: Grab the 3,800 V-Bucks bundle. Getting all three characters, their grimoires, pickaxes, and the Anti-Magic wrap at a 2,100 V-Buck discount is solid value if you plan to use more than one character.
If you’re on a budget: Buy Asta individually (2,000 V-Bucks). Because he comes with the built-in transformation emote, his five-leaf grimoire, and unique effects, he offers the most gameplay variety per V-Buck spent.
Frequently Asked Questions
How long will the Black Clover skins stay in the Item Shop?
Epic Games hasn’t listed an official departure date yet. Typically, major anime collab bundles stay in the store for 7 to 14 days before rotating out, so expect them to remain available through mid-October.
Can I get these skins for free?
No. These cosmetics are strictly available via the Item Shop using V-Bucks. Watch out for third-party “free skin generator” websites—they are scams. Always review Epic Games’ official V-Bucks security guidelinesbefore making purchases.